Organization hierarchy
Contents
- 1 Overview
- 2 Configuration—Essentials
- 3 Configuration—Advanced
- 4 See Also
Overview
Organizations are hierarchically organized; each organization has a link to a single parent organization. An organization hierarchy will have an internal hierarchy (often referred to as branches, for internal staff and affiliates) and an external hierarchy (for external contacts and organizations). The root organization, which is the organization at the root of that specific SmartSimple copy, will appear on both the internal and external hierarchies.
- All contacts, regardless of whether they are able to log into the system (users), are associated with a single, specific level in either the internal or the external hierarchy.
- An unlimited number of levels can be created in both the internal or external hierarchies.
Inter-organization Collaboration
SmartSimple is designed to support multiple organizations and their communities to collaborate together for a common goal. The system is used in markets that require high levels of inter-organization collaborations such as the following:
| Vertical Market | Collaboration |
| Grants Management and Philanthropy | Collaboration by grant makers, grant seekers, and external reviewers |
| Research Management | Collaboration by individual researchers, research institutes, universities, and funding agencies/partners |
| Medical Claims Management | Collaboration by insurance companies, service providers, and medical specialists |
The organization hierarchy is a helpful method to categorize, list, and display the individual actors involved in inter-organization collaboration.
Inter-organization collaboration is supported by SmartSimple in two different ways:
- Organizations share a single copy of SmartSimple.
- Organizations share information from individual, organization-specific copies of SmartSimple.
For more information on these techniques, see the articles on security, role-based access, portals, data exchange and object synchronization features.
But first, let's learn about the most fundamental part of any SmartSimple copy: the organization hierarchy.
Configuration—Essentials
- Note: You will have varying levels of access to modify or add to the organization hierarchy depending on your Role within a copy of SmartSimple. While the System Administrator will be able to add, delete, and edit organizations, and the respective owners of an organization may modify their own organization, a typical user role such as an Employee or External Applicant might only be able to view the organization hierarchy.
Example of an Organization Hierarchy
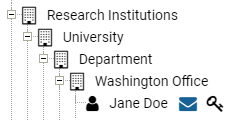
Organizations may represent a variety of entities from physical locations to organizational units. For example, you might have an Office Location organization underneath a Department organization underneath a University organization underneath an umbrella Research Institutions organization. From this example, you can see how flexible organization types can be, as well as the hierarchical structure in organizing them.
In the above image, you can see the organization hierarchy structured as described. The user, Jane Doe, is at the bottom of the hierarchy as her job role falls within the larger organizations, with the Washington Office being the most specific level under which she falls.
Organizations and contacts are the most basic objects in SmartSimple. Organizations may store information about internal office branches as well as external clients or vendors. There are billing implications based on whether an organization is internal or external in the hierarchy - please contact your Account Manager for more information.
No matter which organization you are referring to, every organization is stored in the same format with certain permanent attributes that will be tracked for every organization, regardless of type. These standard attributes are referred to as Standard Fields: examples of standard fields might include the organization's name, address, and parent organization (whether it is a subsidiary of another organization) - this information is available to all organizations.
Organization Terminology
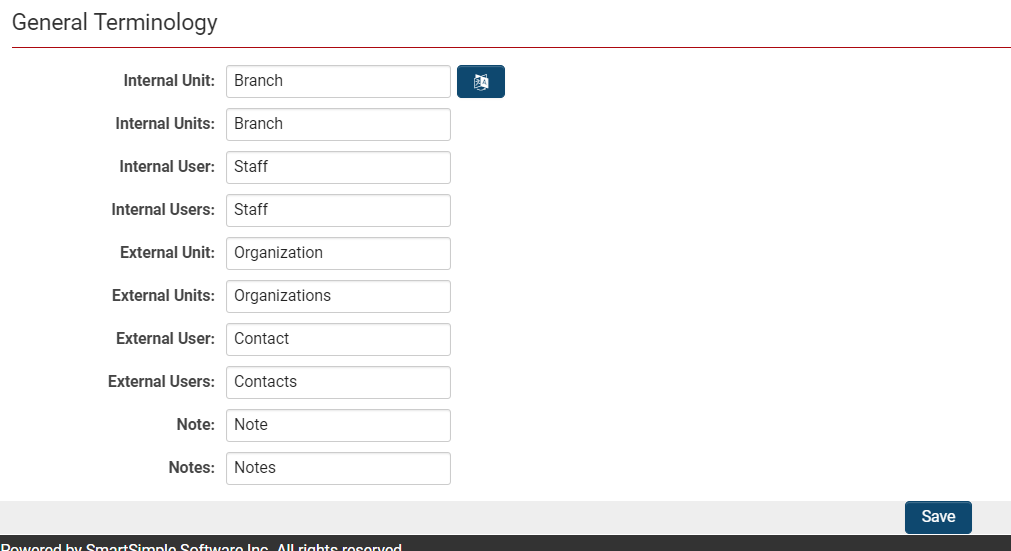
The nomenclature used to describe the internal and external organizational units and people will differ depending on your instance. For example, Internal users can be designated as employees, while External users might be applicants. The nomenclature settings are controlled by following these steps:
1. Click the 9-square menu icon on the top right of your page.
2. Under the heading Configuration, select Global Settings.
3. Go the second tab labelled Branding.
4. Scroll down to the bottom of the Branding section labelled General Terminology.
Here, you can set the terminology that you will see when you access your organization hierarchy and more. You can set the singular and plural terms that will be used for internal vs external Units (companies/organizations using the system) and Users (individuals that use the system).
Translation options for your organization terminology are also available: see Enable Translation Service.
How to Access the Organization Hierarchy
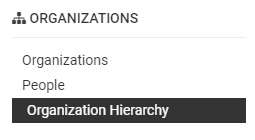
To access the organization hierarchy, click the 9-square menu icon on the top right of your page.
Under the Organizations category, select Organization Hierarchy.
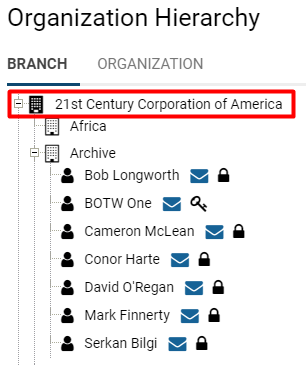
The organization hierarchy associated with the SmartSimple instance will appear.
The first tab of your organization hierarchy lists internal contacts, while the second tab lists external contacts. In the below example, the internal hierarchy is titled Branch and the external hierarchy is titled Organization. The organization terminology is variable depending on the SmartSimple instance; however, the root organization will always appear first on both the internal and external lists.
How To Create A New Internal Branch In The Organization Hierarchy
With every instance of SmartSimple, the root organization will already be listed underneath the internal and external hierarchies of the organization hierarchy. To add to the organization hierarchy, the same technique is always used when creating a new internal organization:
1. Click the 9-square menu icon on the top right of your page..
2. Under the Organizations heading, select Organization Hierarchy.
3. Click the organization that you wish to be the parent organization of the organization you are creating. This organization will be "one level up" from your new organization. If there are no other organizations yet on your hierarchy, the root organization would be the parent organization.
4. Click the New button, then select Organization.
* Note: The nomenclature for your SmartSimple instance may be different. For example, Organization may instead be labelled Institution.
5. The Quick Entry for Duplicate Check window is displayed.
Enter a new Organization Name. If the inputted information for your new organization matches one that exists in the SmartSimple system already, you will be prompted to either use the existing record, create a new record, merge the records, or delete the extra records.
6. Click the Submit button.
7. If there are no duplicates, you will be prompted to select the category or categories that your new organization falls under. Click Next when you are done.
-
- Tip: The System Object category is suggested for holding entities so as to exclude it from searches and reporting. For example, it is helpful to group the System Administrators in your system together into one organization on the hierarchy, as they have high-levels of accessibility and functionality within the system. This "organization" of System Administrators would be best categorized under System Object.
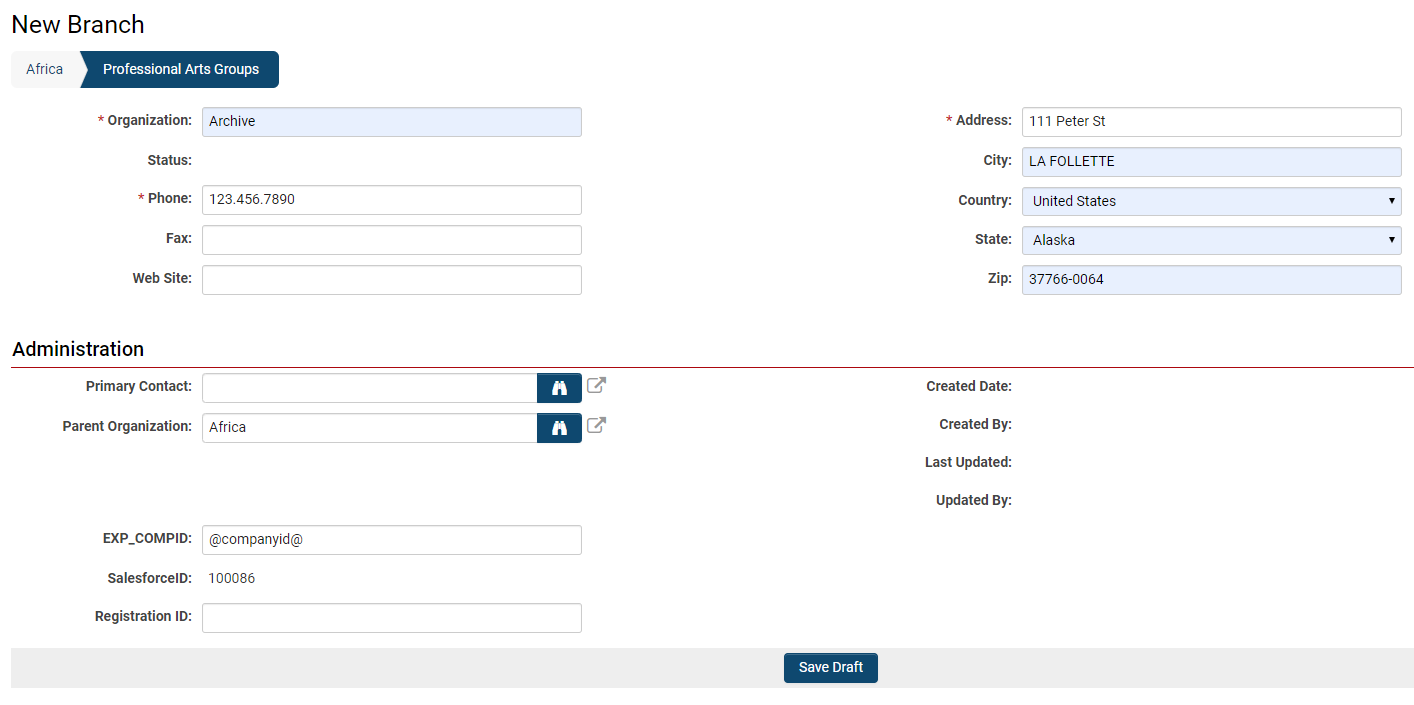
8. You will be prompted to fill in further information (Standard Fields) for your new organization. Any field with an asterisk (*) is a mandatory field; if no information is inputted into those mandatory fields, you will not be able to proceed.
9. Select the Save button to add your new company.
You may return to your organization hierarchy in order to confirm that your new organization has been added appropriately - that it is correctly placed either on the internal or external hierarchy, and that it correctly falls under its parent organization.
- Tip: External organizations can be created as structural placeholders, rather than functional organizations. For example, an external organization called Individual Applicants would allow individual users to register if they are working independently, or are not directly affiliated with an organization.
Standard Organization Fields
As mentioned previously, each organization will have relevant information no matter where that specific organization falls in the hierarchy. This information falls under Standard Fields.
The standard fields used to describe an organization are as follows:
| Standard Organization Field | Description |
| Name | Name of account |
| Address | Street address for this account |
| Address 2 | If required, second line of address (ex: apartment or suite number) |
| City | City address |
| State/Province | State or province address |
| Country | Country portion of address. You select the country from within the combo box; the default country will be the same as the user's country |
| Zip/Postal Code | Zip or postal code portion of address |
| Phone | Account's primary phone number |
| Fax | Account's primary fax number |
| Website | If applicable, organization's website URL |
| NAIC Codes | The North American Industry Classification System (NAICS) - this field only shows up if enabled |
| Parent Organization | If this account is in an organization hierarchy, then use the name of the higher-level account |
| Created Date | The date that the account information was created |
| Created By | The owner/creator of the account |
| Last Updated By | The name of the person that last updated the account information |
| Last Modified Date | The date and time that the account information was last modified |
Organization Menu Items
A user with higher levels of access to an organization (such as an owner or a System Administrator) will see the following additional items on the organization's profile page. Giving someone ownership of an organization will enable these menu items. The main menu is accessible at the top of the profile, right below the header.
Clicking each button on the main menu will open a drop-down of associated functions. Each of these functions is explained in the table below.
- Note: The nomenclature for these functions may vary in your copy of SmartSimple, as organization terminology is configurable.
| Menu Item | Options |
| New |
Staff — add a new contact to this organization Branch — add a new organization as a subsidiary of the current organization Activity — add an activity such as a phone call, event, or meeting with this organization, without reference to the specific contact who creates the activity Import Branch — launch the Import Wizard to begin the process of importing multiple subsidiary organization to this current organization Import Staff — launch the Import Wizard to begin the process of importing multiple users to this current organization Import Activities — launch the Import Wizard to begin the process of importing multiple activities for this current organization |
| View/Edit |
Clicking on this button will change the accessibility to this current organization's details from a View mode into an Edit mode, or vice versa. Edit mode will then allow those with access to modify the organization's details such as their Standard Fields; the View mode only allows a read-only viewing of the details. |
| Options |
History - Reader Log — The reader log opens up a modal window displaying all the recent users who have accessed this organization's profile. It will provide the name of the user, their start and end time on the profile, as well as whether they were accessing the profile from View or Edit mode. Properties - Categories — This allows an owner or System Administrator to modify the category that the organization falls under. Pressing Save will enforce these category changes. Settings - Password Policy — This opens up a modal window that allows an owner or System Administrator to modify the rules and restrictions for their users' passwords. For example, some password settings include the length of characters, the complexity of passwords (alphanumerical combinations, capitalization enforced etc), a set time for password expiration, and more. You are also able to
Settings - Regional Settings — This allows you to alter regional settings including the following:
To enforce the change in regional settings, toggle on the Enforce Settings button next to each setting and press Save when you are done. Tools - Duplicate Check — The duplicate check allows you to see if there are any duplicates already in the system for this organization. Tools - Pinboard — This feature is deprecated, but please see Using the Pin Board if your SmartSimple copy still uses this function. |
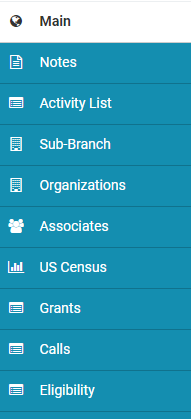
On the left side of the organization profile, you will see an additional menu that will allow you to display other details related to the organization.
-
- Note: The tabs on this menu will vary depending on the organization. In this example, the tabs such as US Census, Calls, and Eligibility will display the records of applications that have been configured specifically for the organization's needs. The other tabs will remain constant no matter what the organization is.
| Menu Item | Description |
| Main | This will display the main profile details of the organization, including its main address and contact information. |
| Notes | This will allow you to annotate records with comments, instructions, and other notes. Notes are available both in View and Edit mode. They are timestamped and associated with the user who created them. They can be edited, expanded, or hidden. |
| Activity List | This will display all activity records for the current organization. |
| Sub-Branch | This will display a list of all sub-branches (subsidiary organizations) for the current organization. This means that the current organization is the parent company of all the sub-branch organizations, and will appear one level above them in the organization hierarchy. |
| Organizations | As this is the side menu of a root organization, this tab appears to display all the External organizations related to the current organization. |
| Contacts | This will display all the contacts that fall under the current organization. |
| Associates | This will display all the associated contacts to this current organization. You can learn how to associate users with an organization. |
Organization Ownership
If you intend to assign specific internal staff to manage an organization, you will need to assign the appropriate owner to each organization.
Each sub-account (division, branch, business unit, etc) in the same organization can have a different owner.
- Note: The owner standard field may appear labelled Primary Contact.
If you need to assign multiple internal staff to work with an organization, you can use the associations feature to associate multiple internal contacts with a single account.
How to Associate Users
Associations must be enabled through Global Settings before you can associate multiple internal contacts with a single organization account.
1. Click the 9-square menu icon on the top right of your screen.
2. Under the Configuration heading, select Global Settings.
3. Under the Associations tab, toggle on Enable Associations - Enable Associations feature between companies and users.
After Associations have been enabled, return to the main menu and under the Organizations heading, select Organization Hierarchy.
1. Select the organization that you want to associate a contact with.
The organization's details will be displayed.
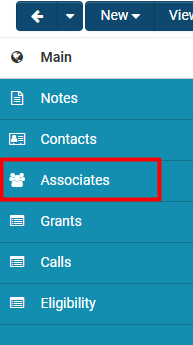
2. The side menu will have a tab called Associates. Select that tab.
3. If any contacts are already associated with that organization, they will be listed on this page. To add a new contact as an association, ensure that you are in Edit mode. The top menu will say Edit (between New and Options) if you are correctly in Edit mode.
4. In the Lookup bar, select the contact that you would like to associate. You can press the Binoculars icon to open up a list of all available users.
5. Next, select the Role of the associated contact.
In this example, the associated contact, Adrienne, is a Donor for this organization. When the associated contact is added, their information - such as email and address - will be displayed. They will also have their main organization listed under the Organization heading. Adrienne's main organization is External Reviewers.
Repeat this process if you would like to add more associated contacts.
Configuration—Advanced
Moving Users to Another Organization
In order to move users to another organization so that they fall at a different level in the organization hierarchy (or to simply have them in the resources of another equal-level company), you must enable the Parent Organization Standard Field and update the field to the new organization.
1. Click on the 9-square menu icon on the top right of your page.
2. Under the heading Configuration, select Global Settings.
3. Under the User tab, select the hyperlink Standard Fields.
4. Make sure that the Parent Organization standard field is enabled.
After enabling the Parent Organization standard field, when you are in Edit Mode on a user's profile, you can update their parent organization to move them to another organization.
Moving Organizations on the Hierarchy
To move organizations under a different Parent Organization, the same process is repeated as the above section, but using the Organization tab > Standard Fields under Global Settings.
System Summary
The system provides a number of ways of accessing information on the configuration details for an [wiki/Instance instance] of [wiki/SmartSimple SmartSimple]. For more information, see our System Summary page.
Organization and User Security Matrix
Using the SmartSimple security matrix, you are able to permission features to ensure that your system has the security you need. You can also permission roles to access certain functionalities, or deny them use of parts of the system. To learn how to configure and use the security matrix as a System Administrator, see our Company and User Security Matrix page.
- You are also able to enable the security matrix for individual s - see UTA Settings - Security for more information.
Organization Based Security
Organization security is based on the user's organization in the overall hierarchy.
- You permission an organization to access a resource, and everyone in that organization will be able to access that resource.
- When you add new people to that organization, they will also automatically gain access to the resource.
Advantages:
- When you create a user in an organization, you will not have to take the extra step to set any specific permission for the user to access a resource. The user will instead have "inherited" access by being associated with that organization.
Note:
- Organization security does not allow you to give individual users from different organization access to the resource.
- You must associate each organization with the resource; giving multiple organizations access must mean repeating the process.
- If you "move" the user to another organization, they will automatically lose access to resources associated with their previous organization.
