Workflow Task Type: Acknowledgement
From SmartWiki
Revision as of 14:09, 23 September 2013 by Arthur Lathrop (talk | contribs)
Acknowledgement Workflow Task Types send messages to SmartSimple contacts.
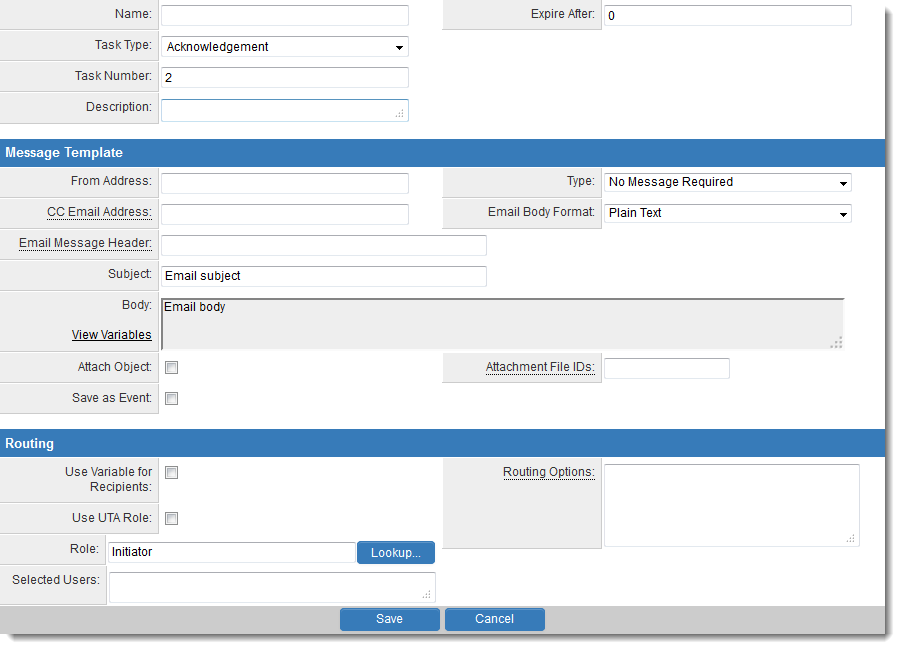
Task Settings
Acknowledgement Tasks have the following settings:
- Name - Narrative name for the task.
- Task Number - A system generated number that determines the presentation order of the task in the workflow. This number can be changed to display the step in a different location.
- Description - Detailed description of the task (optional).
- Expire After - Intended duration of the workflow.
Message Template
- Message Type - Type of message – e-mail, instant message, both, or none required with this task. E-mail and instant messages can be created using variables that will create custom messages specific to instances of the workflow. Options are No Message Required (default), Quick Message, Email Only and Quick Message and Email.
- From Address - Email address sent from. This field accepts variables, so you can either hard-code a value (i.e. donotreply@mycompany.com) or use variable syntax (i.e., on a Level 1 Workflow, @owner.email@)
- CC Email Address - CC recipients address. (Separate multiple addresses with commas)
- Email Body Format - Options are Plain Text or HTML.
- Email Message Header - The email header can be modified using the following syntax:
- X-Priority={1,2,3,4,5}
- Priority={normal,urgent,non-urgent}
- Importance={high,normal,low}
- Sensitivity={personal,private,company,confidential}
e.g. Priority=urgent;Importance=high
- Message Subject - Narrative subject line of the message.
- Message Body - Narrative body of the message.
- Attach Object - Attaches the details of the object to the message. In the case of a SmartSimple object, such as a company, person, or application, the textual details of the object will be added. If the object is a file, then the file will be attached to an e-mail message, but not an instant message.
- Attachment File IDs - Attach additional default files when triggered from a Smart Folder. See the Determining the File ID article for instructions.
- Role - Specific role required to complete this task. The list of users associated with this role will be displayed to the initiator, before this task is commenced.
- Selected Users - If required, specific users can be selected to complete this task. This technique restricts the number of users that the initiator can select.
Routing
- Routing Options - Specifies the types of options available to process this workflow step. In many instances, the default options can be used, such as Approved, Rejected or Revise. But additional and alternate sets of options can be created to reflect more complex business processes.
- Use UTA Role - Check this box if you would like to use this role with a UTA triggered workflow.
Configuration Walk-Through
The following articles walk through the steps needed to configure this Workflow Task Type
- Adding a Workflow Task in an Acknowledgment Workflow
- Setting the Message Type in an Acknowledgment Workflow
- Setting the Step Role in an Acknowledgment Workflow
- Selecting Recipients in an Acknowledgment Workflow
- Completing an Acknowledgment Workflow
- Attaching an Acknowledgment Workflow to an Object