Difference between revisions of "User Role"
| Line 1: | Line 1: | ||
| + | {{Banner-UnderConstruction}} | ||
| + | |||
__TOC__ | __TOC__ | ||
| Line 32: | Line 34: | ||
=Configuration - Essentials= | =Configuration - Essentials= | ||
| − | |||
==Accessing Roles== | ==Accessing Roles== | ||
| − | |||
To access the list of roles available in your copy of SmartSimple, follow these steps: | To access the list of roles available in your copy of SmartSimple, follow these steps: | ||
| Line 40: | Line 40: | ||
:: {{Icon-Menu}} | :: {{Icon-Menu}} | ||
| − | |||
2. Under the heading '''Configuration, '''select [[Roles and Security Settings|Roles and Security]]. | 2. Under the heading '''Configuration, '''select [[Roles and Security Settings|Roles and Security]]. | ||
| Line 48: | Line 47: | ||
==Creating a Role== | ==Creating a Role== | ||
| − | |||
There are only two fields that need to be defined in order to create a role: the name of the role and a narrative description. | There are only two fields that need to be defined in order to create a role: the name of the role and a narrative description. | ||
:: [[File:New role.png|600px|border]] | :: [[File:New role.png|600px|border]] | ||
| − | |||
==Editing or Creating a Role== | ==Editing or Creating a Role== | ||
To edit a Role, take the following steps: | To edit a Role, take the following steps: | ||
Revision as of 15:34, 21 June 2019
Contents
Overview
User Roles are a key feature of SmartSimple: they are defined in the system by System Administrators to categorize users and to provide the basis for setting Role Based Security permissions. The majority of your configuration needs will be using role-based security settings.
The Key Control Element - Roles
Roles have the ability to control the following features within your SmartSimple system:
- The Administration Interface menu - the menu items displayed in the administrative interface are controlled by the user role. Some users will see different menu items than other users, depending on their allocated role.
- Portal Interface - you can create a specific portal view for people in a specific role, overriding the display of the administrative interface.
- Role Based Custom Fields - you can gather different information for different roles through role-specific custom fields.
- Manager Permissions - manager permissions in all applications and key features are associated with specific roles. These Manager permissions will give them higher levels of access and functionality to that feature than other user roles.
- Role Permissions - permission a role to be able to set other roles. For example, a sales role may be able to change a Suspect role to a Prospect role, but not a Customer or Employee role.
- Associations - When you use the Associations feature to associate a contact with an organization to which they are not a contact, you use a role to show the relationship between the organization and the person.
- Within s, roles are used to define a context-specific role for a person - for example, a customer may be playing the role of Project Leader, but only for a specific project.
- Workflows Overview - you are able to reference the role in a collaborative workflow step; for instance, you can specify that everyone with the Executive Role would need to approve a document before the system can forward its distribution.
Notes on Roles
Prior to adding many users to SmartSimple, it is important to define roles:
- You can define any number of roles.
- You can associate a single user with any number of roles.
- Only a System Administrator can define roles.
- Once a role is created, the administrator associates users with those roles.
Always make sure that the role is defined prior to Importing Users or adding users via Auto Loader. Both methods provide features that will prompt you to select one or more roles for the users that you are uploading.
The Everyone Role
A single, important, built-in role is the Everyone role. Every contact will be a member of the Everyone role regardless of the other roles that are created and assigned to them. You are able to set a menu for the Everyone role, but unlike the other roles, you cannot create a portal for everyone, or provide access to reports to the Everyone role.
Configuration - Essentials
Accessing Roles
To access the list of roles available in your copy of SmartSimple, follow these steps:
1. Click on the 9-square menu icon on the top right of your page.

2. Under the heading Configuration, select Roles and Security.
4. Click on the hyperlink for User Roles.
5. A list of roles available to the system will be displayed; if you want to edit a role, click the pencil icon next to the name of the role. To create a new role, click the New button (+ icon).
Creating a Role
There are only two fields that need to be defined in order to create a role: the name of the role and a narrative description.

Editing or Creating a Role
To edit a Role, take the following steps:
- Click on Roles and Security (located on the Configuration Menu on the left-hand navigation bar)
- Click on the hyperlink for User Roles
- Click the Edit button next to the role you wish to edit, or click on the New button to create a new Role.
For detailed instructions on creating a role, see the Creating User Roles page.
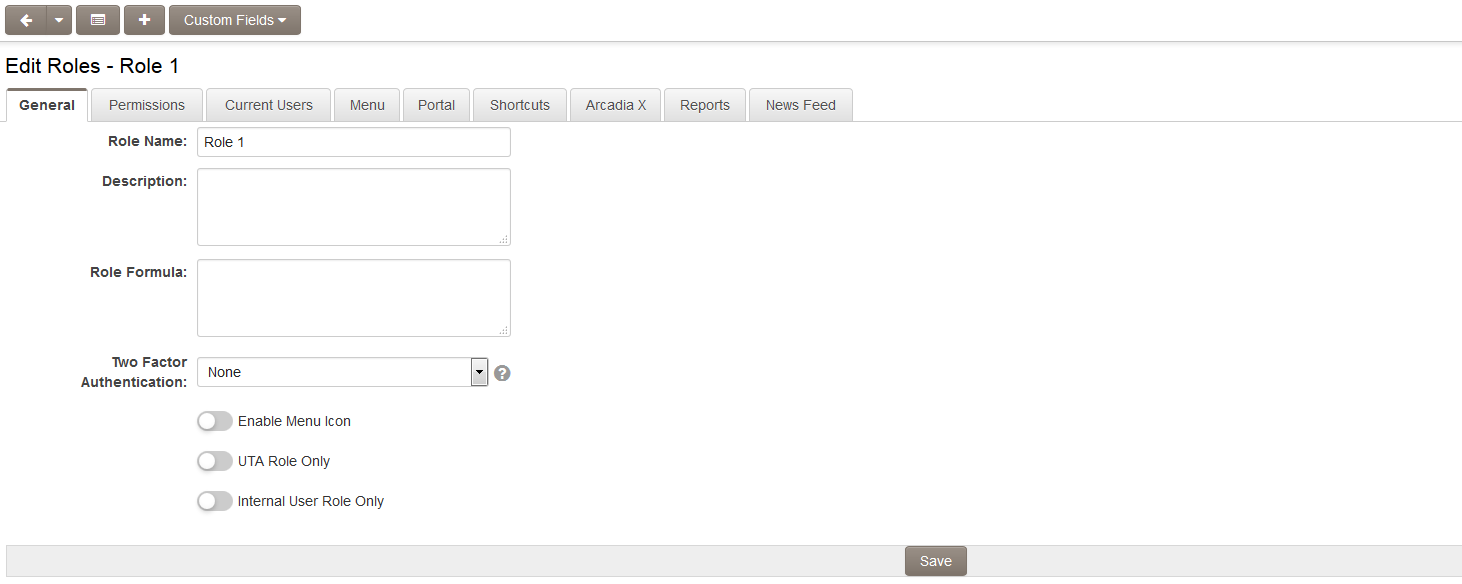
Role Settings
![]()
The following buttons are displayed at the top of each Edit Roles page:
- Back - navigates the user back to the list of all User Roles
- New - opens a new Edit Roles page for the creation of a new User Role
- Menu - sets menu permissions for User Role. See Menus and Roles for further information.
- Portal - see Creating a Role Based Portal for detailed instructions.
- Custom Fields - see Role Based Custom Fields for detailed instructions.
- Reports - presents a list of reports in the system for which access can be granted to the selected Role. See Assigning Multiple Reports to a Role for further information.
The following settings are available on the General tab of the Edit Roles page:
- Role Name - The unique name of the Role.
- Caption - The name of the role as it appears throughout the system. If you prefer to change the name of a role, changing the caption will accommodate this.
- Description - Narrative description of the role.
- Role Formula - Sets a calculation that is performed whenever a contact record possessing this role is saved. See Role Formula for instructions.
- Two Factor Authentication - enable Two Factor Authentication if required.
- Enable Menu Icon - Displays a Menu Icon on the right of the screen for this Role.
- UTA Role Only - Role that is only relevant relative to records in a Universal Tracking Application™. See UTA Roles for more information. If selected, the role will not be able to be assigned to a contact's profile, but will be able to be selected as a role when a contact is assigned to a UTA record.
- Internal User Role Only - if set then this role can only be added to Internal users,
- When a user is added to a role, the role will be visible on the role list of that user's profile.
-
