Status
Overview
Statuses represent a core concept within the SmartSimple Cloud platform. Each status represents the state of the related object. Statuses can be defined with the Universal Tracking application for all types of objects that you create; Level 1 objects and Level 2 and Level 3 activities. You can also use statuses with both contacts and organizations. This article concentrates on the use of Statuses for the Universal Tracking Application but the same logic applies to contact and organization statuses.
Why?
Statuses can be assigned to all records in SmartSimple Cloud, including users and organizations. By assigning statuses to entities in your system, you are able to track your relationships with anyone and everyone that you interact with, both internally and externally.
A good use-case for the benefits of statuses is if you have an organization's Status as Registered, but not yet Verified. Once their status is switched into Verified, you are able to enter that information to change their status in your SmartSImple instance, and both the status and record will be updated simultaneously. You can create as many status options as you need; they can be modified and updated in your Global Settings, UTA Settings, as well as from any individual organization or applicant record.
Contents
Configuration - Essentials
Creating UTA Statuses
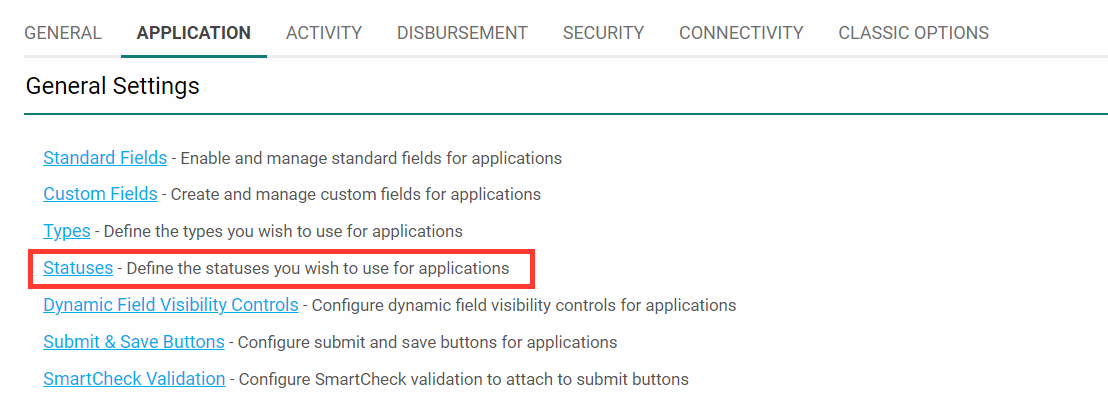
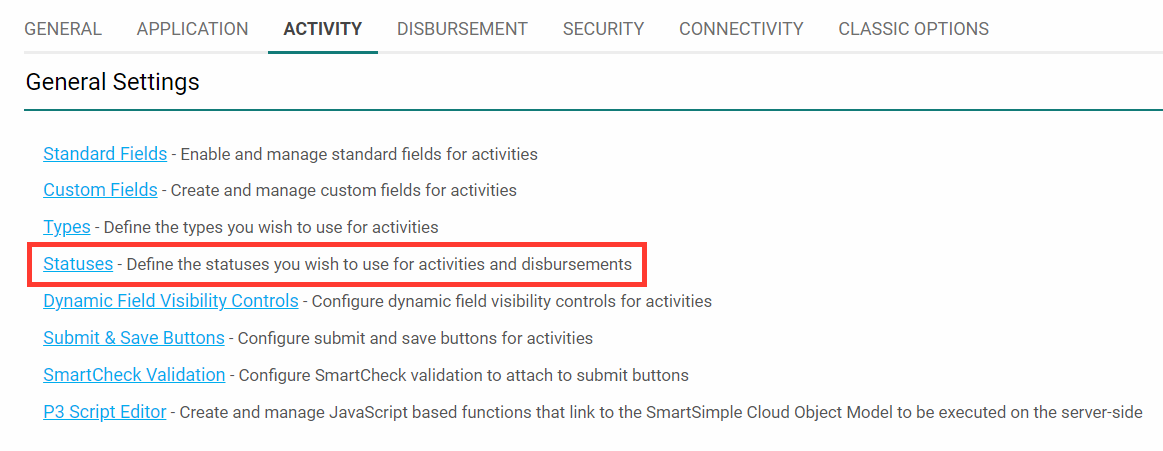
To edit with statuses within a UTA, you need Administrator Access for that UTA. If you have this permission, go to the Configuration Settings on the UTA, signified by the gear icon. Next, choose the Level 1, Level 2, or Level 3 tab, and then click on the Statuses link.
The Status settings for Level 1, Level 2 and Level 3 are similar, with a few differences outlined below.
- For Level 1 statuses, click the Statuses link in the Level 1 settings tab, located second from the left in the UTA Settings.
- For Level 2 statuses, click the Statuses link in the Level 2 settings tab, located third from the left in the UTA Settings (if enabled).
- For Level 3 statuses click the Statuses link in the Level 3 settings tab, located fourth from the left in the UTA Settings (if enabled).
- Details of each status are displayed when you click into a specific status.
Organization/Contact Statuses
- Organization statuses are accessible from Global Settings > Organizations > Statuses.
- Contact statuses are accessible from Global Settings > Users > Statuses.
Status Settings
Each status has the following settings:
General Tab
- Status ID - Internal unique system ID that can be used to reference the status.
- Name - Name for the Status.
- Caption - Default display name for the status.
- Display Order - The order that statuses are displayed in the Status settings and dropdown.
- Description - Any comments or notes you wish to include. Note: Description only manifests on the configuration page.
- Status Group Name - Used to mask multiple individual statuses within a single overall status. This is only available in UTA Statuses.
- Tooltip - a description to be displayed when the user moves their mouse over the caption (when displayed used the Status Indicator). This is only available on level one statuses.
- Color Code - The color code used to indicate each status. This color will be used in the list view and the details view. Click the color palette button to display a colour picker.
- Lock On Status - This setting is used to lock the record so that it cannot be changed until it is unlocked.
- Is Default Status - Determines the default status to be selected when a new record is created.
- Is Default Copy Status (UTA Statuses only) - When the Copy button is used to create a copy of a UTA record, the new record will have the status that has this setting enabled. If no status is set as Is Copy Status, copied UTA records will have the same status as the original record.
- Exclude from Status Indicator - Checking this will exclude this status from the Status Indicator Level 1 Standard field.
Permissions and Availability Tab
Role Permissions
- Allow to Set Roles - The specific roles that can set the status. If you do not set a role, then any user can set any status.
- Override Lock Roles - The specific roles to which the Lock On Status setting does not apply. If you enable Lock on Status and do not set an Override Lock Role, then the item cannot be unlocked.
- Note: Any Role with the UTA Manager Permission will be able to override the Lock on Status setting, even if not specified here.
Availability
- Available Status - Only available on User and Organization statuses. Statuses added here are available to be selected from this status.
- Enabled on Record Types - Only available in UTA Statuses. This status will be available to record types added here. If you do not set a type, then the status will be available on all record types of this level entity.
Annotation System Role Permissions
Only available in UTA Statuses. Roles added here will have different levels of access to Annotation Mode in this status.
- View Annotation Roles - defines the roles that can view annotations that have been added to the object at this status (annotation is only available for UTA objects).
- View and Create Annotation Roles - defines the roles that can view and create annotations that have been added to the object at this status.
- Edit Field in Annotation Mode Roles - defines the roles that edit fields that have had annotations attached.
- Open Record in Annotation Mode - defines the roles that can edit the entire record in annotation mode.
Status History
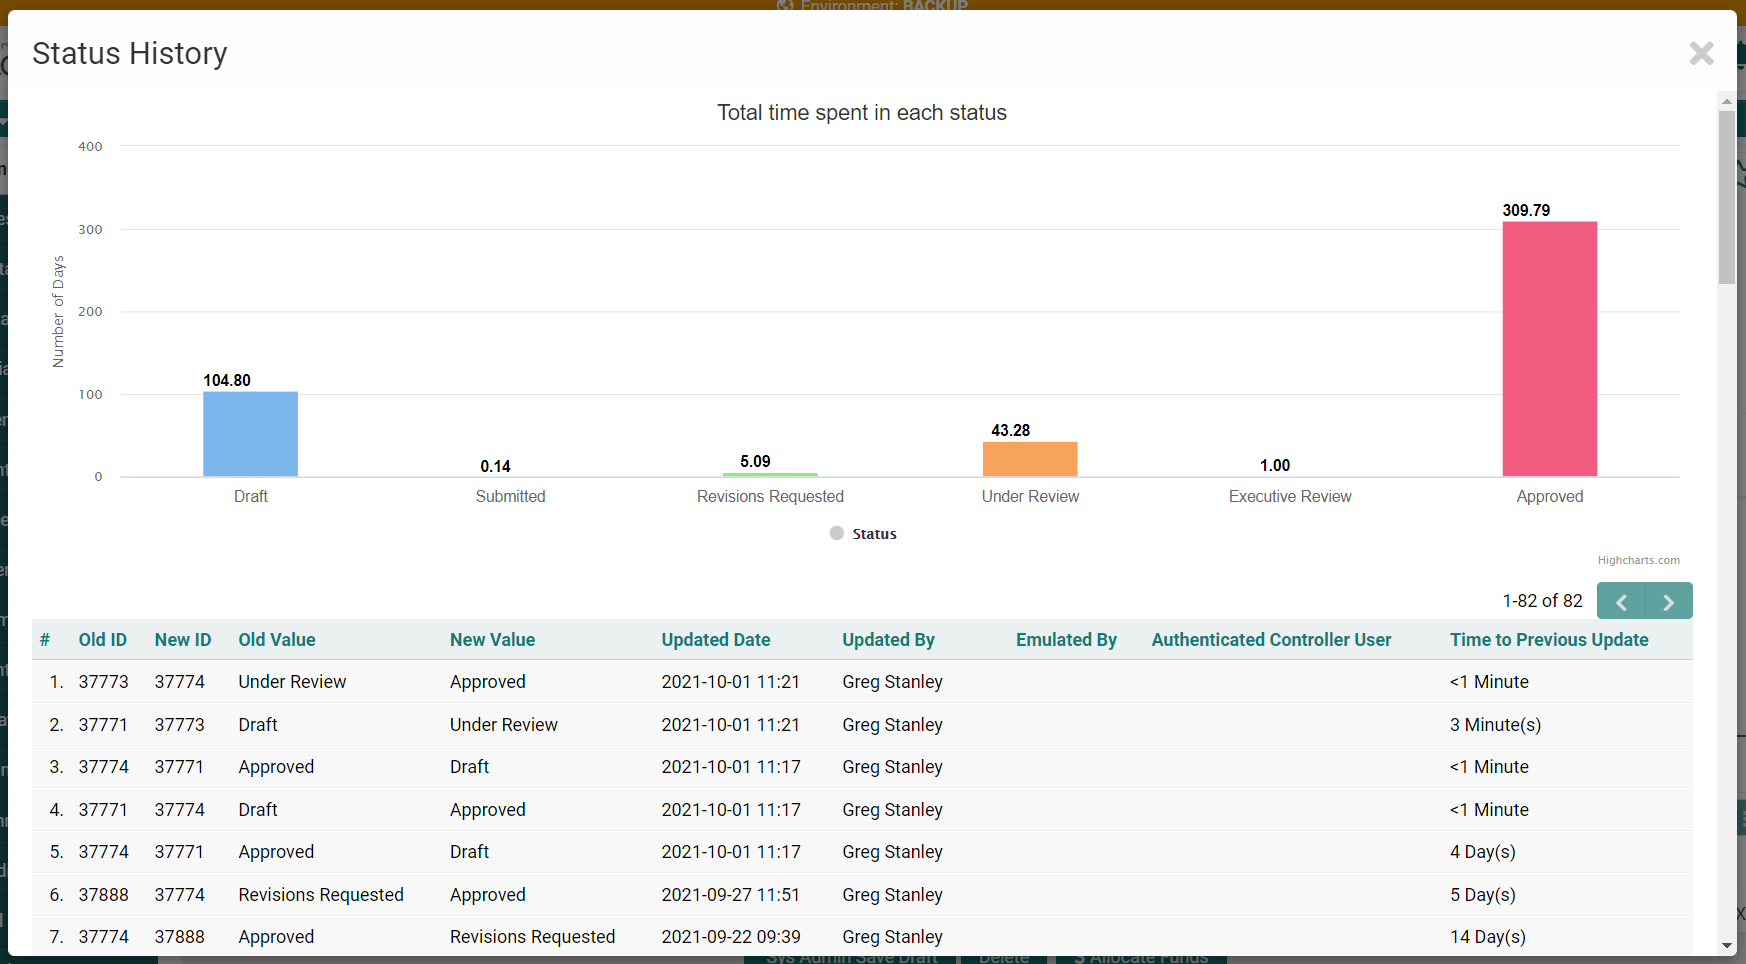
If the Status Standard field is configured with Track Changes enabled then any user with View Field History Permissions will see a small clock and refresh icon under the Status field.
When they click on the History icon then they will see a breakdown of the history plus a bar chart showing the amount of time spent in each status. The duration (in days) can be included when building a report by including data from the "Standard Field Audit Log" dataset.
Status Translation Settings
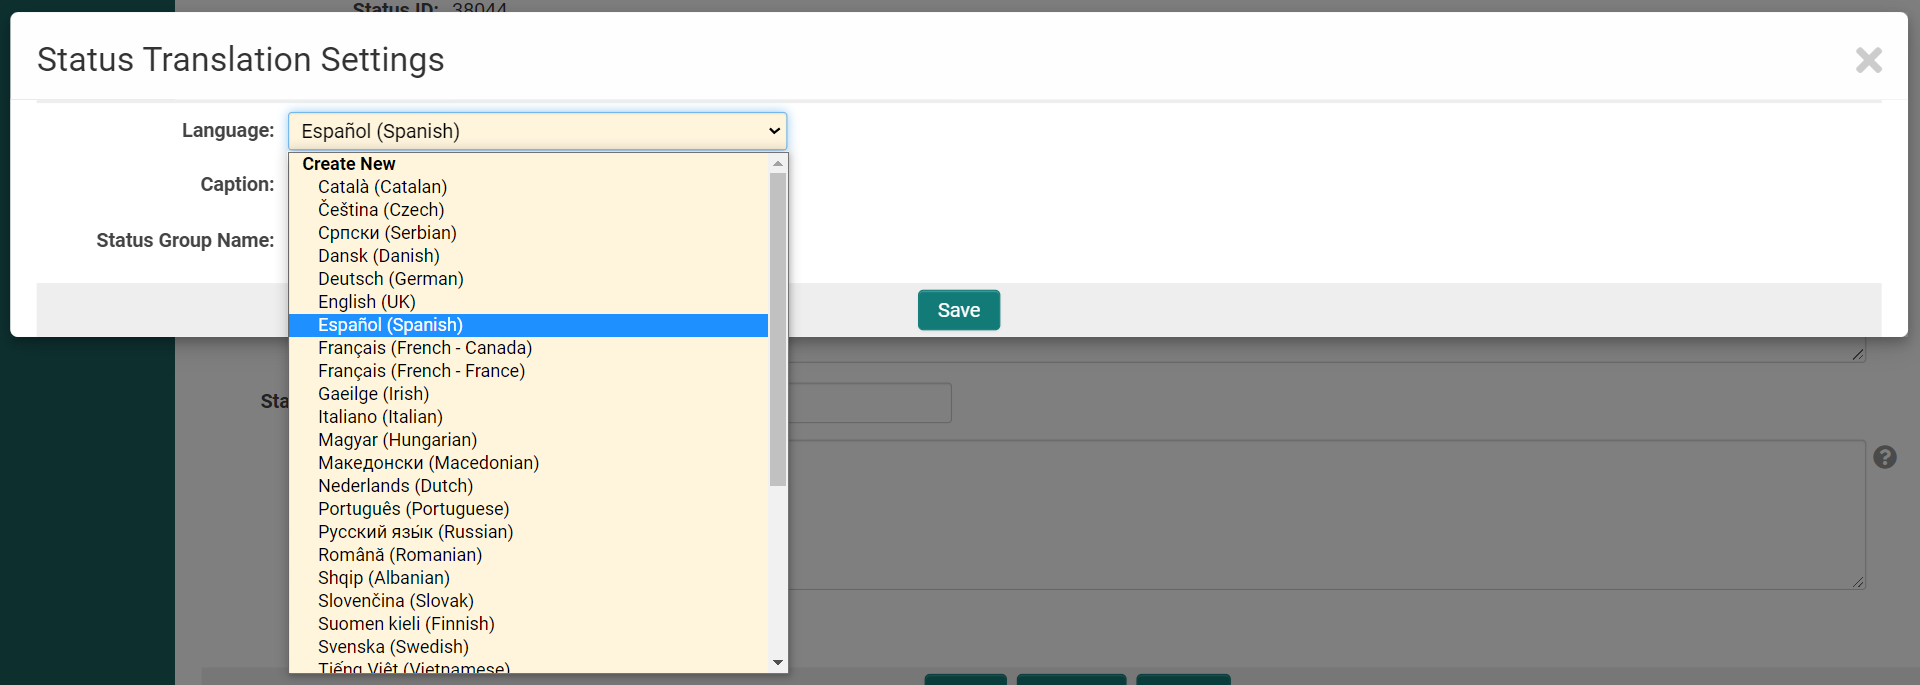
Specify a status Caption and Group Name for each desired language.
- When editing a status, select the Status Translation Settings button from the top of the window.
- Select the language from the Language drop-down list.
- Enter the desired Caption translation and Group Name and click Save.
- The relevant language caption will be displayed to users based on the language specified in their Personal Settings.
See Also
| Level 1 Templates |


