Batch Update
Contents
Overview
The SmartSimple Batch Update feature will save members of your team a significant amount of the time. It offers the ability to update multiple records from one screen. In particular, Batch Updates is very useful for tasks such as updating payment records from pending to paid, or changing the status of an application already assigned for review. Rather than needing to go into each individual record to update the information, Batch Updates takes care of multiple records from a single list view.
Available Fields
The Batch Update feature allows multiple records to be updated all at once, whether against records within the Universal Tracking Application or against company / user records.
The fields that can be updated are:
- Level 1: Status, Owner and Person
- Contacts can assigned to records with a given Role
- Organizations can be assigned to records with a given Company Role
- UTA Consumer/Provider - ability to assign providers to consumer Level 1s
- Level 1 records can be archived
- Level 1 version can be updated
- Level 1 UTA Provider/Consumer Relationships can be updated
- Level 2: Status and Owner
- UTA Consumer/Provider - ability to assign providers to consumer Level 2s
- Level 2 version can be updated
- Level 2 UTA Provider/Consumer Relationships can be updated
- Level 3: Status and Owner
- Level 3 version can be updated
- Time & Expenses: Status
- Company: Status
- User: Status
- Level 1: Status, Owner and Person
There is a default Batch Update option, which provides the ability to update a preset number of options, as well as a customisable Batch Update option, where individual update options can be made available based on role.
Disambiguation: There is also a Batch Update the for the settings section of Custom Fields,
found on the Field List page when editing Custom Fields.
Click here to go to the associated Wiki article.
Note: Batch update is a very powerful tool. Review the Security Implications below before enabling.
Enabling Batch Update
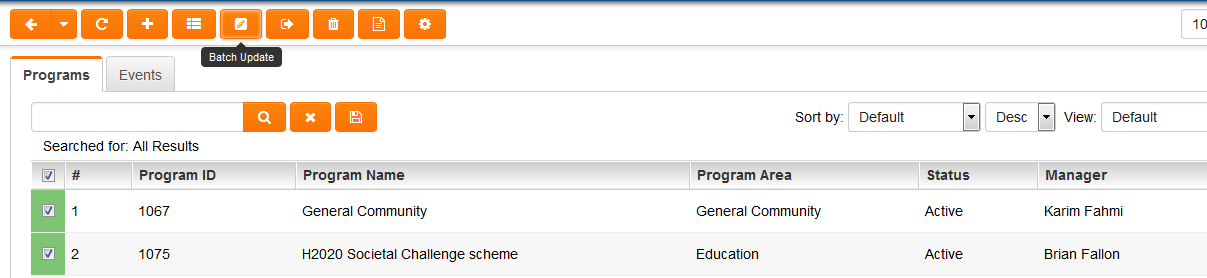
This feature is accessed via the Batch Update button.
In Arcadia mode this button is at the top of the list views:
Visibility of the Batch Update tab is controlled on a per-role basis for each UTA using the Show Batch Update Manager Permission.
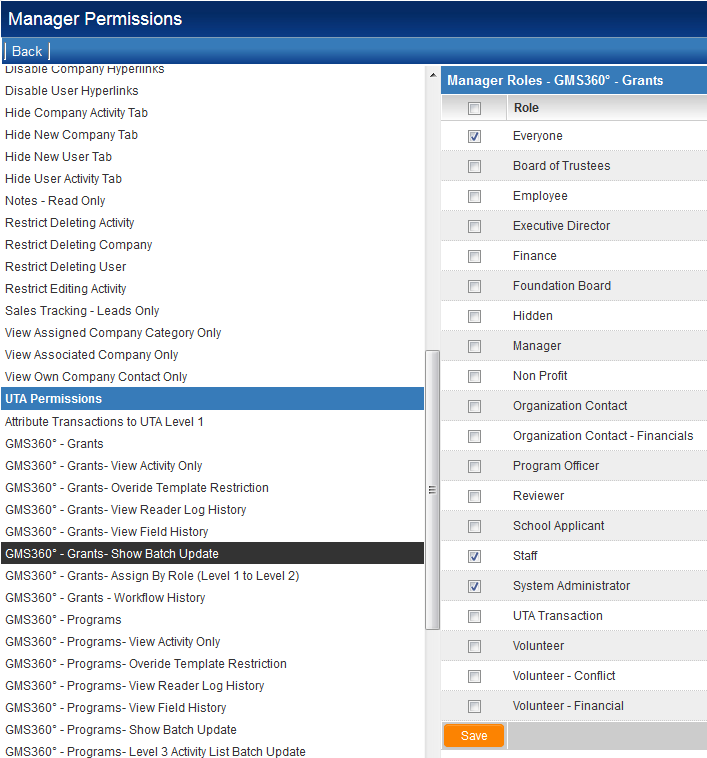
- Important: See below for the security implications of allowing Batch Update to be used.
Customizable batch update options
The Batch update features specific to UTA records can now be configured so that, instead of opening the entire batch update page with all its options, certain batch update options can be made available for specific roles.
The customized batch update buttons are built upon listviews. Each Leve1, 2 and 3 listview builder has a tab called "Batch Update Buttons".

If you click on the New Batch Update Button then you will be presented with the following fields, for use in creating a list of customized batch update buttons for that specific listview. . .
- Button ID: will be initially blank, and populated with a system generated ID on Save
- Display Order: the order of how buttons are displayed among the action buttons
- Button Name: name given to the button. Will not be exposed to end-users of the system when accessing the button.
- Button Label: accepts both text and icon. Text is required as in classic mode the button label must be text for consistency purpose. In Arcadia it will display the icon, and render the text as caption. If icon not defined for Arcadia then the button will show text.
- Description: optional field to enter general description of the button. Will not be exposed to end-users of the system when accessing the button.
- View Roles: Use Lookup button to define the user roles able to view this button
- Option: drop-down listing all existing fields / attributes of the entity that can be updated using the general batch update page (e.g. Status, Owner, Version, Consumer/Provider)
- Value: field to allow you to select the value that field will be updated. The values available are determined by the Option selected.

Once the buttons are created, they will show next to the general Batch Update button alongside the other action buttons. Clicking on these button will perform similar actions as the general batch update button, except that the action is pre-configured.
Using Batch Update
Search
You can use the search panel on the right to find the subset of records you wish to update.
- You can use the Search within result check box to further refine your search.
- If there are more records than fit on one page (depending on the Records per Page preference in your Personal Settings) you may want to click Show All so they can all be displayed:

Select Records
Next you need to select the check box to the left of each record you wish to batch update.
- If you want to select all records click the check box at the very top of the list which will Select All.
- You can then de-select some records if required.
Click on the "Batch Update" Button
Click the Batch Update button (![]() ) at the bottom of the list view. The batch update window will pop up.
) at the bottom of the list view. The batch update window will pop up.
Select Field(s) to Update
Enter the new Status and/or Owner, etc., for those records in the Update Values section.
Select Action
Next you need to select the action to be executed when you run the batch update feature.
The actions available will be dependent on the entity that is being updated.
Level 1s
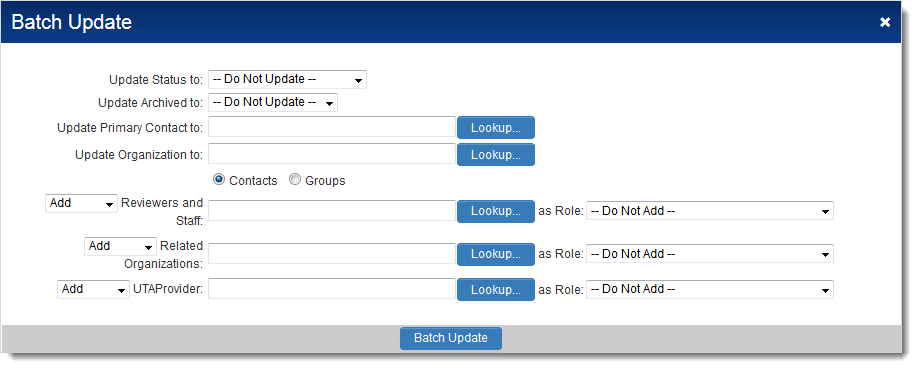
Options available include:
- Update Status to: allows status of the level one to be changed to a value selected from the adjacent drop-down.
- Update Archived to: allows records to be archived.
- Update Primary contact to: allows primary contact in the level one to be updated to contact selected in the adjacent lookup field.
- Update Organization to: allows associated organization in the level one to be updated to organization selected in the adjacent lookup field.
- Update Contacts: allows contacts to be added, updated or removed from the Contacts section of the level one. The option to update, delete or add is based on the action selected in the drop-down list.

- Update Organizations: allows organizations to be added, updated or removed from the Accounts section of the level one. The option to update, delete or add is based on the action selected in the drop-down list.
- Update Providers: allows assignment, updating or removal of L1 providers against the selected level ones. The option to assign, update or remove is based on the action selected in the drop-down list.
- Update Providers(L2): allows assignment, updating or removal of L2 providers against the selected level ones. The option to assign, update or remove is based on the action selected in the drop-down list.
Level 2s / 3s

Options available include:
- Update Status to: allows status of the level 2 or 3 to be changed to a value selected from the adjacent drop-down.
- Update Primary contact to: allows owner in the level 2 or 3 field to be updated to contact selected in the adjacent lookup field.
Batch Update
Important: Ensure the records selected and fields to be updated are correct.
There is no way to reverse the changes once they are applied.
Click the Batch Update button at the bottom of the page.
- As each record is updated a green check will appear beside the record.
- A pop-up box will notify you when the Batch Update is complete.
Note: If you updated the Status, any Workflows associated with the new Status will be triggered during the batch update.
Additional Information
- If you run Batch Update against one or more records but don't select anything to be updated you will be asked if you want to run the Template Formulas against the selected records. Click OK to proceed, or Cancel if you do not want to execute the template formulas. Note: use with caution, as this cannot be undone once performed. Always test thoroughly on your Backup Server and/or using a small number of records.
Important: Security Information
Batch Update is a powerful tool. If the Batch Update tab is displayed, anyone with access to it will be able to change the Owner and Status on any Level 1, 2 or 3 record.
- It ignores the Lock on Status, Roles That Override Lock and Roles That Can Set This Status settings on the Status pages.
- Records can be changed to a Status that is not associated with the given Template.
- Any Visibility Conditions or Browser Scripts that control the Owner or Status fields will be ignored.