Difference between revisions of "Uploading Word Merge Document to a SmartFolder"
From SmartWiki
| Line 11: | Line 11: | ||
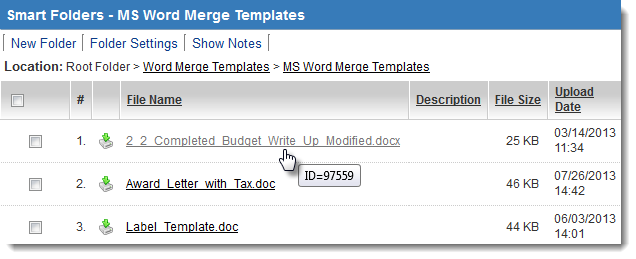
| − | * The file ID | + | * The file ID can be obtained by hovering your mouse over the file link to the uploaded document<br /> |
[[Image:SmartFolder-FileID.png|link=|400px]]<br /> | [[Image:SmartFolder-FileID.png|link=|400px]]<br /> | ||
''The File ID in this case is'' 97559 | ''The File ID in this case is'' 97559 | ||
Revision as of 14:59, 20 August 2013
Configuring a Word Merge in SmartSimple is a three-step process:
- Create the MS Word document that will be used as the template. (See Adding Form Fields to a MS Word Document for instructions.)
- This page describes the second step, uploading the Word template to a SmartFolder.
- Create the Special - MS Word Merge custom field that maps the SmartSimple fields you wish to merge to the Word template.
Detailed instructions on uploading documents to SmartFolders are located on this page: Uploading a File – Step by Step.
Once the Word document has been uploaded, you must obtain the file ID.
- The file ID can be obtained by hovering your mouse over the file link to the uploaded document

The File ID in this case is 97559
-or-
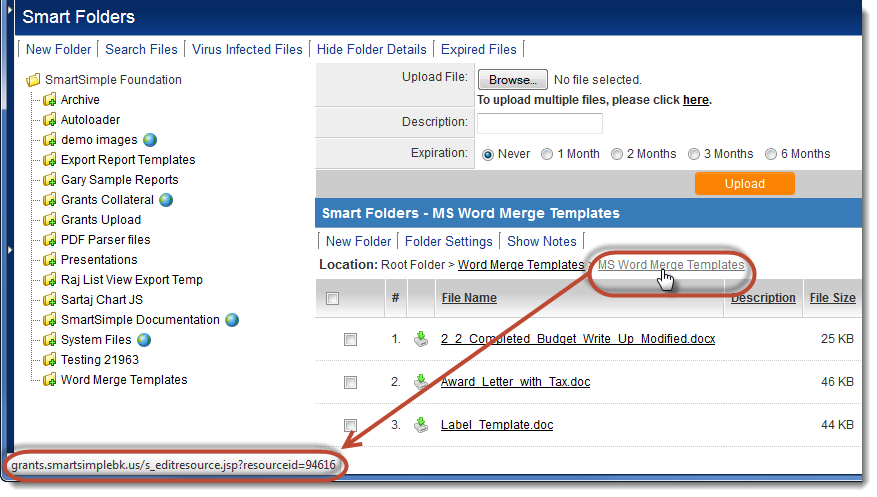
- The folder ID, which can be obtained by hovering your mouse over the folder link (see below) or by right-clicking on the folder link and selecting Properties:

The folder ID is the resourceID. For example, if the URL is
grants.smartsimplebk.us/s_editresource.jsp?resourceid=94616
then the Folder ID is 94616
The file ID or Folder ID that you have taken note of will be used in the third step, creating the Special - MS Word Merge custom field that maps the SmartSimple fields you wish to merge to the Word template.
See Also
To set up a Word merge:
- Step 1 - Create the MS Word document that will be used as the template.
- Step 2 - Upload the Word document to a SmartFolder.
- Step 3 - Create a Special - MS Word Merge custom field.
Advanced Word Merge Features Include:
- Exporting List View Results to Microsoft Word
- Uploading a MS Word Merge Document to a Custom Field
- Including Tables in a Word Merge Document
- Using ReportProperty with a Word Merge Document
- Including Check Boxes on an MS Word Merge Document
- Including XML on an MS Word Merge Document
- Using Conditional Logic on a MS Word Merge Document