Using Contact Fields with Microsoft Outlook Synchronization
Outlook Contact Fields vs. SmartSimple Fields
The following table shows how Outlook Contact fields are mapped to SmartSimple Contact fields.
| SmartSimple Field | Outlook Field |
| Contact First and Last Name | Full Name |
| Contact Title | Job Title |
| Company Address for the company associated with the contact. | Business Address
|
| Contact Address | Home Address |
| Company phone for the company associated with the contact. | Business Phone
|
| Contact phone | Home Phone |
| Contact Email Address | Email Address |
| Custom fields and roles in SmartSimple | No Equivalent in Outlook.
|
Setting a Custom Field Value
Once the folder has been synchronized for the first time, you can set custom field values for any contact or change their role to the extent that your SmartSimple role supports adding or changing roles.
- Double click on any contact.
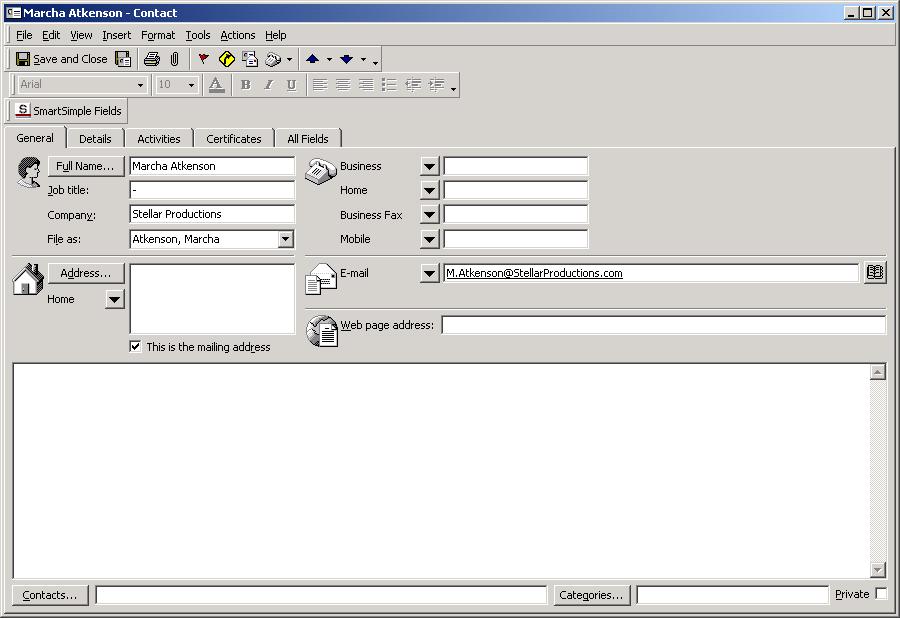
The contact window is displayed.
Note the SmartSimple Fields button.
- Click the SmartSimple Fields button.
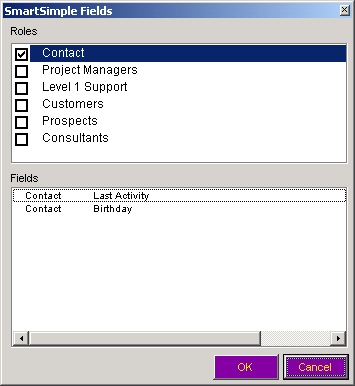
The SmartSimple Fields window is displayed.
The top pane of the window displays the contact roles and the bottom pane displays the fields associated with the selected role.
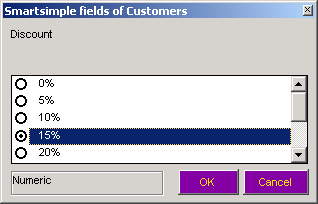
- Double click on a field on the bottom pane to set its value.
The selection options and the validation types will be same as originally established in SmartSimple.
- Click the OK button to save the new value.
- Click the Save and Close button.
The contact record is updated and closed.
Reserved Fields in Outlook
The Outlook Synchronization feature uses three Outlook contact fields to store the custom contact and role information.
These fields are:
- Contact Information – Billing
- Miscellaneous fields – User1 and
- Miscellaneous fields – User2.
You should not use these fields for other purposes. If you do, any information that you enter will be overwritten the next time you synchronize with SmartSimple.


