Uploading Applicants
If you have previous stored applicants in another application, you can upload the applicant information into SmartSimple.
You can only import applicants if you have manager permission in the Applicant Tracking application.
This process is similar to the contact import wizard.
Import Applicants Process Overview
The import process consists of four steps:
- Copy the information to the Windows Clipboard.
- Paste the information into the SmartSimple Import Window from the Clipboard.
- Map the fields in the import data to the fields in the applicant profile.
- Validate the information mapping before uploading.
- Upload the data to SmartSimple.
1. Launch Microsoft Excel.
2. Open the spreadsheet Applicants.xls.
3. Review this data.
There are three columns at the end of this data, which will be used to populate the customer fields you added to the applicant profile.
Important Note - If you are going to upload data into a select one type custom field, the content of the uploaded data must exactly match one of the options in the custom field. Otherwise the value will not be displayed.
If in doubt, change the custom field type to text box.
Pasting Information into SmartSimple
1. Choose the Edit Select All menu or Press Control + Shift + End to select all the data.
2. Select the Edit Copy menu or press Control + C.
3. Switch back to SmartSimple.
4. Select the Applicant Tracking application.
5. Select the Settings menu.
6. Click the Folder link.
7. Select the folder where you wish to store the applicant information.
8. Click the Import applicants tab.
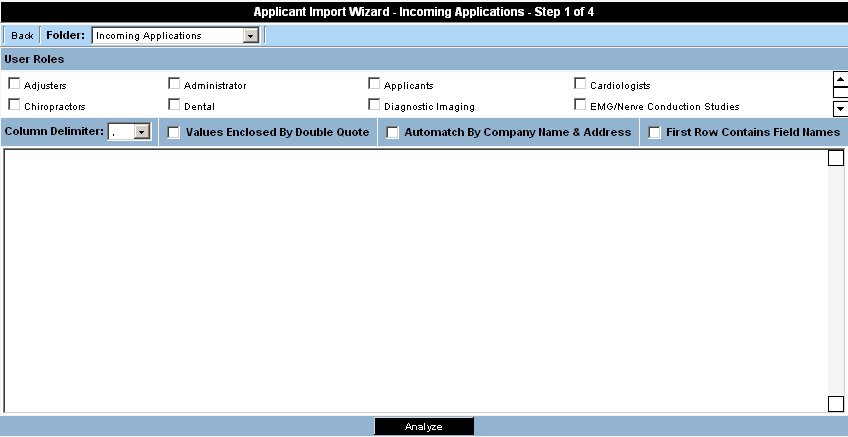
The Import Skill Wizard is displayed.
- You can select an alternate folder and multiple roles for the applicant that you are importing.
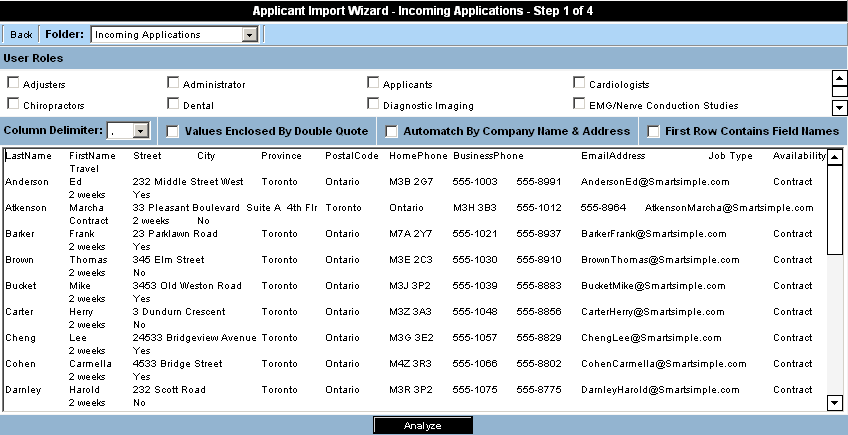
9. Press Control + C or use the browser Edit Paste.
10. Press Control + Home to move to the top of the list.
This data contains the field names and is delimited by tab.
- Data that is copied and pasted from MS-Excel or MS-Access, is always tab delimited.
11. Set the Column delimiter to Tab.
12. Click the First row contains field names check box.
13. Set the Role to External Applicant.
If the group of applicants needs to belong to more that one role you can set multiple roles for a single import.
14. Click the Analyze Structure button.
You are prompted to continue with the selected role(s) and folder.
15. Click OK.
The analyzed data is displayed.
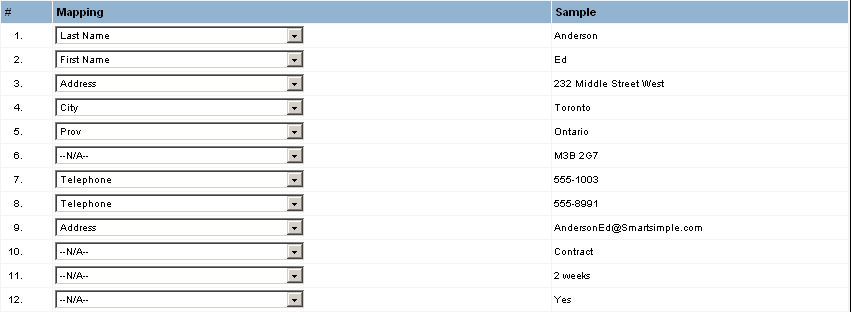
As you selected the first row contains field names, the Wizard has determined the contents of most of the fields.
16. Set the Postal Code field.
In this example, two telephone numbers have been selected, but as each field can only be used once, you will need to remap this field.
17. Set the second telephone number fields to N/A.
18. Set the email address field to the correct field.
19. Map the custom fields as shown below.
20. Click the Analyze Data button.
The applicant list is displayed.
You can now deselect any applicant that you do not wish to load.
You do not want these applicants to log into SmartSimple through the standard interface.
21. Click the Send new user password by email – No option.
22. Click the Upload button.
The applicants are uploaded.
23. Click Settings, Folders, Incoming Applicants.
The new applicants are displayed in the window.
You can also use the new applicant tab in the folder view to add an applicant directly to a folder.
Applicants and Contacts
There is a key, yet subtle, difference between an applicant and a contact. In some cases an applicant may also be a contact.
- An applicant is associated with one or more folders, and optionally can be associated with a company. If an applicant is associated with a company, they are also a contact.
- A contact is associated with a company. If you associate a contact with a folder, they will also be considered an applicant.


