Importing Leads
If you purchase a calling source for telemarketing or have obtained a list of leads in an electronic form, you can import this list directly into the leads section of Sales Tracking.
The import process requires that a delimiter separate each field of information. This delimiter can be a comma “,” a semi-colon “;” or a tab and each row of information is delimited by a “return”.
Information taken from Microsoft Excel can be treated as tab delimited.
The import process consists of five steps:
- Copy the information to the Windows Clipboard.
- Paste the information into the SmartSimple Import Window from the Clipboard.
- Map the fields in the import data to the fields in the company, contact, or activity record.
- Validate the information mapping before uploading.
- Upload the data to SmartSimple.
Each step of this process is described in detail below.
Contents
Copying and Analyzing the Data
This illustration will use an Excel spreadsheet containing leads.
1. Launch Microsoft Excel.
2. Open the file Sales Tracking Leads.XLS.
3. Select the cells A2 to J12.
4. Select the Edit Copy menu or press Control + C.
5. Switch back to SmartSimple.
6. Click the Campaigns tab.
7. Click on any campaign, followed by the Import Leads tab.
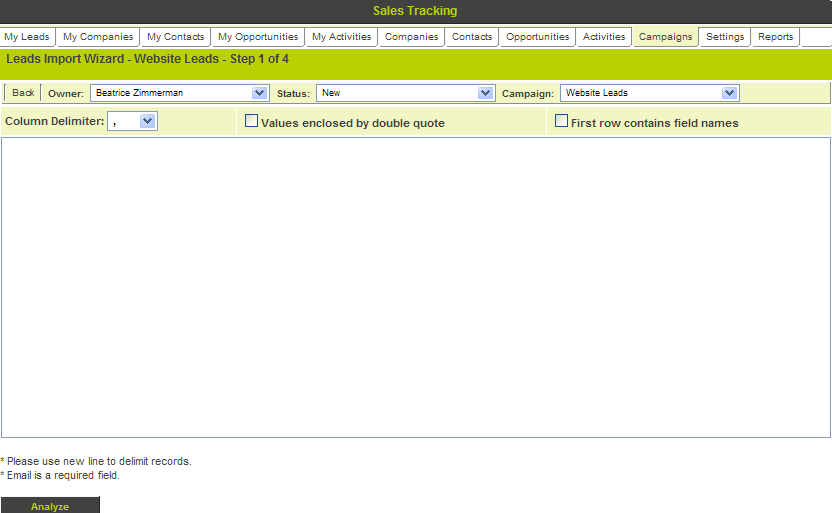
The Lead Import Wizard is displayed.
Pasting Information into SmartSimple
- Once the required information has been copied to the clipboard, it is pasted into the data window in the first step of the Lead import wizard.
- The Browser Edit Paste menu is used to paste the copied information into the SmartSimple import wizard data window.
- The delimiter is selected from the combo box at the top of the data window.
- In some instances, the data will contain the field names in the first row. Clicking the check box can indicate this: First row contains field names will enable this feature.
- Removing Double Quotes - If the export process from the other application placed double quotes around each value, these are removed by clicking the Values enclosed by double quote check box.
- Once the data is pasted into a window and the appropriate options set, the Analyze button is clicked and SmartSimple will determine the fields.
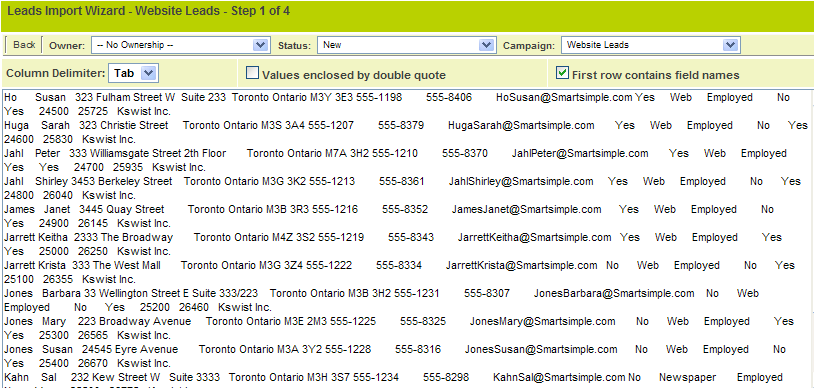
1. Click the mouse in the import text box.
2. Select the Edit Paste menu or press Control + V.
The data is added to the text box.
This data contains the field names in the first row and is delimited by tab.
3. Set the Column delimiter to Tab.
4. Click the First row contains field names check box.
The status of the new leads will be “New”.
The campaign is set to Website lead – the only campaign.
You can set a specific owner for this group of leads or specify no owner.
5. Set the Owner to No Ownership.
You are now ready to analyze the data.
Mapping the Import Data
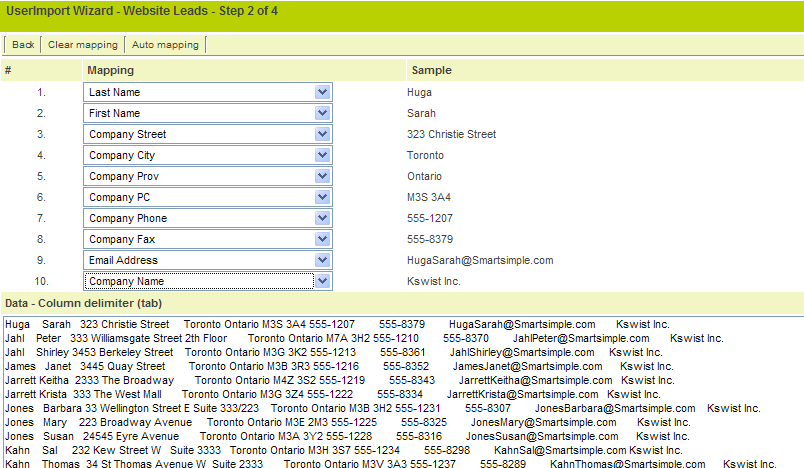
Once the data has been analyzed, each field in the data is linked to a field in the lead table.
- The first row is used as an example, and the field names are selected from a combo box next to each example.
- Both standard and custom fields are listed in each of these combo boxes.
- If the first row was indicated to contain the field names, then SmartSimple will attempt to resolve these names and associate the appropriate field with that value.
- A back button provides the ability to return to the first step and change any setting.
1. Click the Analyze button.
You are prompted to continue with the current owner.
2. Click the OK button.
The analyzed data is displayed.
3. Click the Parse Leads button.
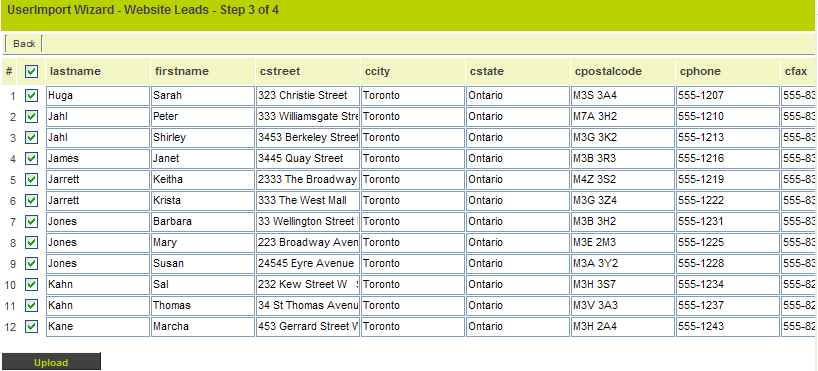
The Import list is displayed.
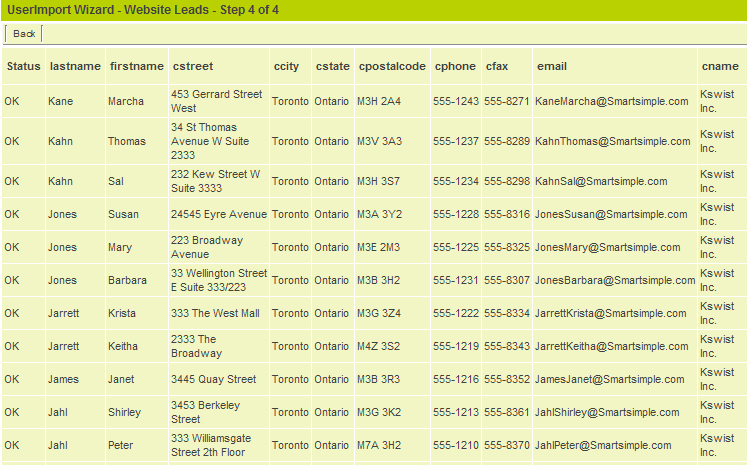
Validating the Uploaded Data
Each row in the upload is displayed using the mapped fields.
- You can alter any value.
- A check box next to each record controls the actual upload of that row. If individual rows seem to be in error, this check box is set to ignore that specific row.
In this instance, there are duplicated companies but each record will be uploaded as a separate lead. When you convert these leads to companies, this duplication will be flagged.
1. Click the Upload button.
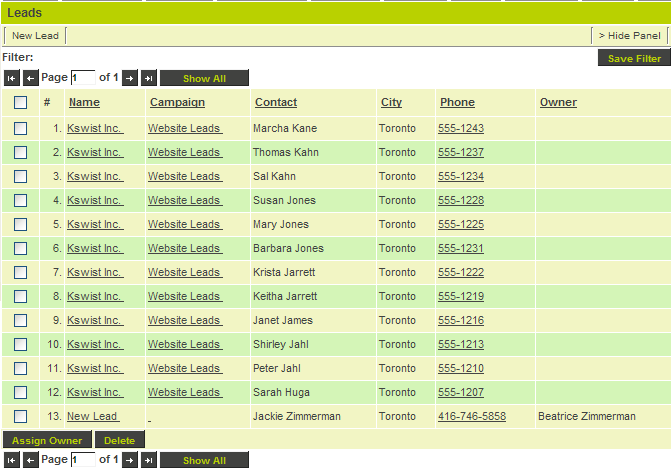
The leads are uploaded.
2. Click the My Leads tab.
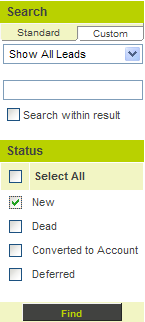
3. Change the Lead Filter to All Leads and the Status to New.
4. Click the Find button.
The new leads are displayed.
If you want to take ownership of any of these leads, open the lead and change the owner to yourself.

