Creating External Organisations and Contacts
Contents
Overview
External organisations are the organisations involved with your business such as customers, prospects, suppliers and partners. These organisations are referred to as “Accounts” within SmartSimple, though you can change this term.
Each external account uses the same basic information as an internal organisation, such as the business name, address, and phone numbers, plus any custom fields that you define specifically for external organisations.
For each account, you store related contacts and, as with internal people, you can enable these external people to access SmartSimple and log into the system.
You can give any external accounts permission to share any of the following SmartSimple Items:
- Calendars.
- Discussion Groups.
- SmartFolders.
- SmartSimple Application programs.
- Contacts can be used as resources in the Project and Job Costing application.
Referencing External Organisations to Specific Applications
Some SmartSimple applications, such as Sales Tracking, and the E-mail Broadcast provide specific features for managing external organisations.
You should consider subscribing to some of these programs if you need specific account or customer management features.
If you plan to use Sales Tracking, then you may wish to use Leads to initially track organisations, rather than setting up an account for each lead.
See the SmartSimple Quick Start guide for Sales Tracking to see how this works.
External Accounts and Roles
You should always create specific user roles for external contacts since doing this will enable you to create custom fields specific to each type of contact, and if you allow your contacts to log in then the role will control the menu items visible to those contacts.
Creating an External Organisation
Wherever you wish to create a new external organisation the same technique is used.
1. Click the Organisation, External Contacts menu.
The Account Organisational Structure is displayed – currently no accounts have been established.
Do not click the root organisation link when adding new external organisations, because the created organisation will be created as an internal organisation – instead always use the New Account tab.
2. Click the New Account tab.
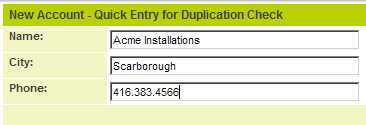
The New Account – Quick Entry for Duplication Check is displayed.
3. Enter the following details:
4. Click the Submit button.
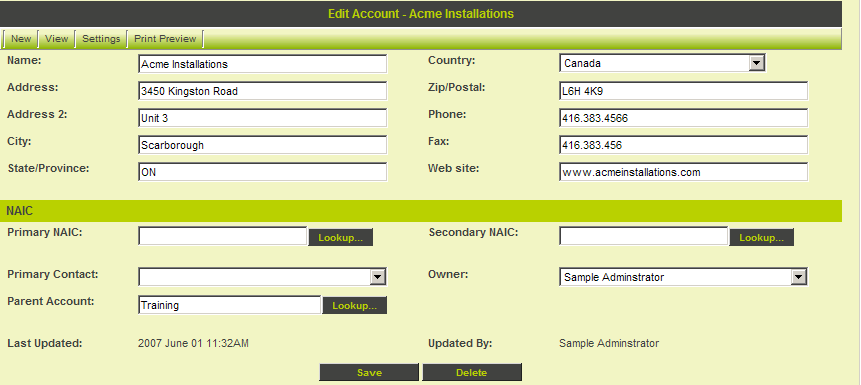
No potential duplicates are located so the New Account window is displayed.
5. Complete the details.
6. Click the Save button.
The record is saved and the account menu is displayed.
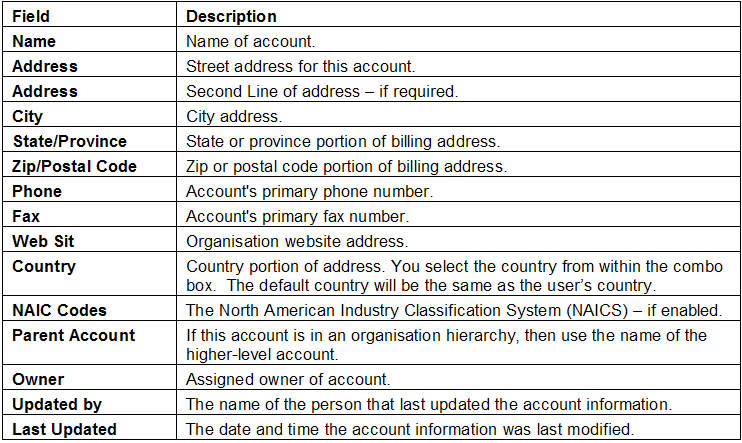
Account Fields
The standard fields that you can set for an account are:
Additional Account Information
You can also manage the following information/setting for an account.
- Notes – display any notes that have been added to the account. You should only use these notes for background information. Notes related to activities can be added to the individual activity.
- Settings Menu – Applications –subscribes SmartSimple application programs to this account.
- Settings Menu – Contact Signup– creates a web sign up page for contacts from this account to register.
- Settings Menu – Company Signup– creates a web sign up page for other companies to register.
- View Menu – Organisation Chart – You can create an organisation chart for any internal or external set of accounts.
- View Menu – Pin Board – displays the account specific pin board.


