Difference between revisions of "Using an Excel Template for List View Export Results"
From SmartWiki
(updating categories) |
|||
| (10 intermediate revisions by one other user not shown) | |||
| Line 1: | Line 1: | ||
{{ListViewHeader}} | {{ListViewHeader}} | ||
| − | When exporting to Excel has been [[Exporting List View Results to Microsoft Excel|enabled]] for your [[List View Overview|list view]], you can also tell the system to use an Excel file as a template into which your. | + | When exporting to Excel has been [[Exporting List View Results to Microsoft Excel|enabled]] for your [[List View Overview|list view]], you can also tell the system to use an Excel file as a template into which your results will be exported. |
<!--{{ExportListViewPage}} | <!--{{ExportListViewPage}} | ||
--> | --> | ||
| + | |||
| + | To enable this feature: | ||
| + | # Create an Excel spreadsheet you wish to use for a list view export template. | ||
| + | # [[Uploading a File – Step by Step|Upload]] the Excel file to a [[SmartFolder]]. | ||
# Go to the [[Accessing the List View Configuration Page|list view configuration page]]. | # Go to the [[Accessing the List View Configuration Page|list view configuration page]]. | ||
# Click into the list view for which you wish to enable exporting. | # Click into the list view for which you wish to enable exporting. | ||
# Click on the "Export" tab. | # Click on the "Export" tab. | ||
| − | # | + | # Next to the "SmartFolder" field, click on the {{LookupButton}} button and select the [[SmartFolder]] in which you have uploaded your spreadsheet. |
| − | + | * Now, when you export your [[List View Overview|list view]], the following screen will appear: | |
| − | + | {{SelectAFile}} | |
| − | |||
| − | |||
| − | + | * If there are multiple files in your SmartFolder, select the spreadsheet you wish to use as your template and click the {{SubmitButton}} button. | |
| − | |||
| − | |||
| − | |||
| − | + | * This feature can be used in conjunction with the [[Positioning Exported List View Results in your Excel Spreadsheet]] feature. | |
| − | |||
{{ListViewFooter}} | {{ListViewFooter}} | ||
* [[Positioning Exported List View Results in your Excel Spreadsheet]] | * [[Positioning Exported List View Results in your Excel Spreadsheet]] | ||
| + | [[Category:Document Generation]] | ||
Latest revision as of 16:30, 20 July 2017
 Click here to watch a video on creating and editing List Views.
When exporting to Excel has been enabled for your list view, you can also tell the system to use an Excel file as a template into which your results will be exported.
To enable this feature:
- Create an Excel spreadsheet you wish to use for a list view export template.
- Upload the Excel file to a SmartFolder.
- Go to the list view configuration page.
- Click into the list view for which you wish to enable exporting.
- Click on the "Export" tab.
- Next to the "SmartFolder" field, click on the
 button and select the SmartFolder in which you have uploaded your spreadsheet.
- Now, when you export your list view, the following screen will appear:
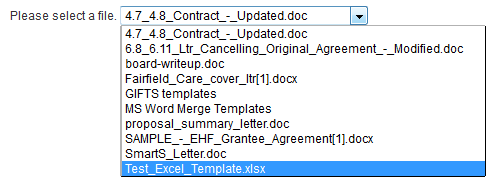
- If there are multiple files in your SmartFolder, select the spreadsheet you wish to use as your template and click the
 button.
- This feature can be used in conjunction with the Positioning Exported List View Results in your Excel Spreadsheet feature.
See Also
- List View Overview
- Accessing the List View Configuration Page
- Configuring List Views
- Setting the Sort Order on a List View
- Exporting List View Results to Microsoft Excel
- Exporting List View Results to Microsoft Word
- Download files from List View
- Preparing Existing Word Template for List View Export
- Quick Edit
- Historic List View
- Configuring Interactive List View Charts
- Positioning Exported List View Results in your Excel Spreadsheet