Transaction Status
Transaction Statuses can be used to track the state or condition of the transaction record.
They can be configured to be generic to all transaction types, whether a Personal Transaction or Company Transaction, or can be tied to a specific transaction type.
Creating Generic Status
1. Click the Transaction Types hyperlink on the Global Settings menu under the Company & Account Settings heading.
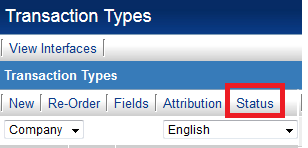
2. Click the Status tab above the list of Transaction Types.
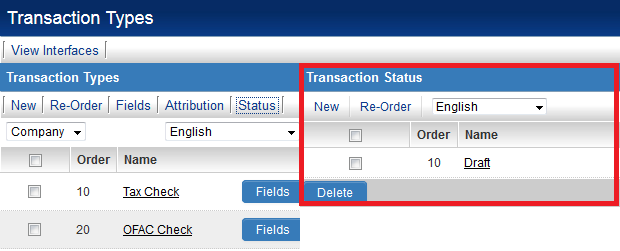
3. The Transaction Status window, and any existing statuses, should appear to the right of the Transaction Type list
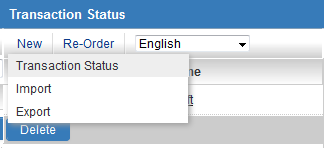
4. Click on New - Transaction Status to begin adding a new status.
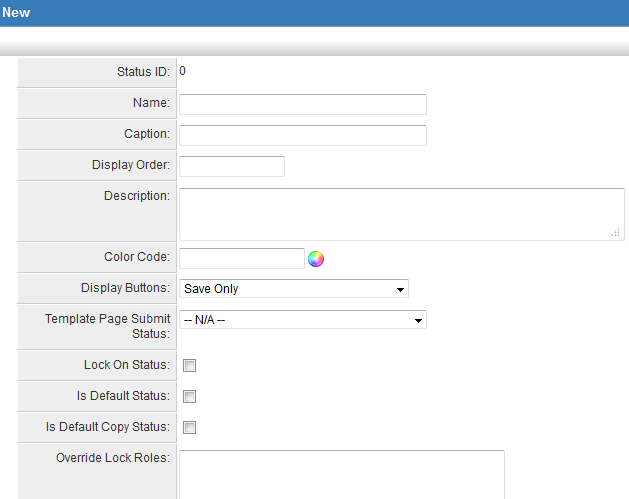
5. This exposes a panel on the far right of the screen for entering the details of the new generic transaction status.
6. Each status has the following settings:
- Status ID - Internal unique system ID used when referencing the status.
- Language - Language that the current Name value will apply against. Users can specify different translation options for the languages used when accessing the system.
- Name - Name for the Status.
- Caption - Default display name for the status.
- Display Order - The order that statuses are displayed in the Status combo box.
- Group Name - Used in conjunction with the Arcadia Settings to mask multiple individual statuses with a single overall status.
- Description - Any comments or notes you wish to include. Note: These don't manifest anywhere except on this page.
- Colour Code - The colour code used to indicate each status. This colour will be used in the list view and the details view. Click the colour palette button to display a colour picker.
- Display Buttons - Controls which buttons are available to the user for a record at this status. (See Button Options below).
- Template Page Submit Status - Controls the assigned status when submitted via a template page.
- Lock On Status - This setting is used to lock the record so that it cannot be changed until it is unlocked.
- Is Default Status - Determines the default status to be selected when the item is saved or submitted.
- Is Default Copy Status (Level 2 & 3 only) - When the Copy button is used to create a copy of a Level 2 or Level 3 record, the new record will have the status that has this setting enabled. If no status is set as Is Copy Status, copied Level 2 or Level 3 records will have the same status as the original record.
- Status Availability - Only available when configuring Level 2 Statuses. By default any statuses created for a Level 2 will be available to both Level 2 and Level 3 records, but can be restricted to either Level 2 or Level 3 using the Status Availability section. (See Status Availability below).
- Allow to Set Roles - The specific roles that can set the status. If you do not set a role, then any user can set any status.
- Override Lock Roles - The specific roles that can unlock a locked item. If you enable Lock on Status and do not set a role, then the item cannot be unlocked.
- Note: Any Role with the UTA Manager Permission will be able to override the Lock on Status setting, even if not specified here.


