Difference between revisions of "Configuring Settings for the SmartSimple Outlook Synchronization Add-In"
(→Configuring the Add-In) |
(→Configuring the Add-In) |
||
| Line 13: | Line 13: | ||
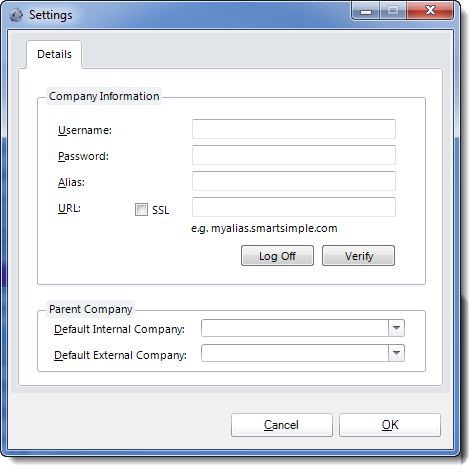
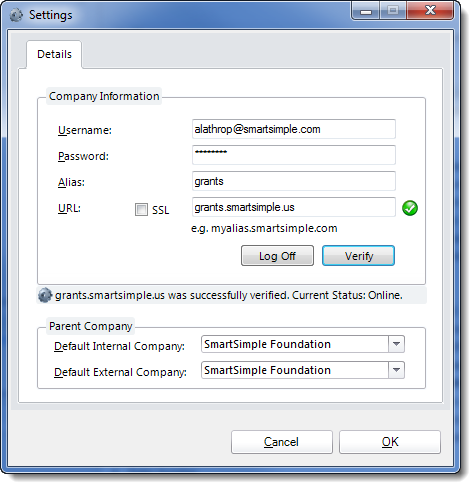
* Enter your [[Username|username]], [[Password|password]], company [[Alias|alias]] and [[URL]]. | * Enter your [[Username|username]], [[Password|password]], company [[Alias|alias]] and [[URL]]. | ||
| − | [[Image: | + | [[Image:Outlook-CompleteSettingsPage.png|link=]] |
* Click the '''Refresh''' button to validate the setting. | * Click the '''Refresh''' button to validate the setting. | ||
Revision as of 09:10, 28 August 2013
The following instructions show you how to set user information for the SmartSimple Outlook Synchronization Add-In.
Contents
Configuring the Add-In
You only need to set these values the first time you use the Synchronization tool.
- Click the SmartSimple Settings button.
The SmartSimple Settings Options are displayed.
- Click the Refresh button to validate the setting.
- Click the Close button.
If any of the values are incorrect the following message will be displayed.

Configuring Outlook
Creating a New Outlook Folder
Displaying the Outlook folder list before you create the folder makes it easier to see where the folder will be created.
- If the folder list is not displayed, choose the View Folder List menu.

- Select the level where you wish to add the new folder.
- Choose the File, New Folder menu.

- Type a folder name – be sure to include the word "smartsimple".
![]()
- Set the folder type to either Appointment items (for Calendar Synchronization) or Contact items (for Contact Synchronization).

- Click the Ok button.
![]()
The folder icon will indicate either contacts or appointments.
Creating a Shortcut on your Outlook Sidebar
You can drag the folder name to the Outlook sidebar to create a shortcut. This will make it easier to locate the folder in the future.
- Drag the Folder name to the required location on the Outlook sidebar.

You can repeat the folder creation process with a new calendar folder.

Once complete you can use the View Folder List menu to hide the folder list.