Difference between revisions of "Exporting Reports"
(→Export to XML) |
(→Custom Export) |
||
| Line 152: | Line 152: | ||
=Custom Export= | =Custom Export= | ||
| − | + | The Custom Export settings allows users to configure the information they wish to export from SmartSimple to external applications such as MS Word, MS Excel or Quickbooks. | |
| − | |||
| − | The | ||
[[Image:Reps200.png]] | [[Image:Reps200.png]] | ||
Revision as of 16:35, 18 February 2020
Contents
Overview
There are two techniques to access report data from other applications.
- If you want to access reports from Microsoft Excel or Microsoft Word, then you can use the SmartSimple Plug-Ins for Microsoft Office for these applications to access report data.
- See Plug-Ins for Microsoft Office for details
This article explains how to use the 2nd method, which is exporting.
- If you want to export the report data to any other data format (for example comma separated values), then you can use the Export settings for the report to create the file format required.
- You can also use this technique to create a MS-Excel or MS-Word file, without the need to use the Plug-In application.
File Export
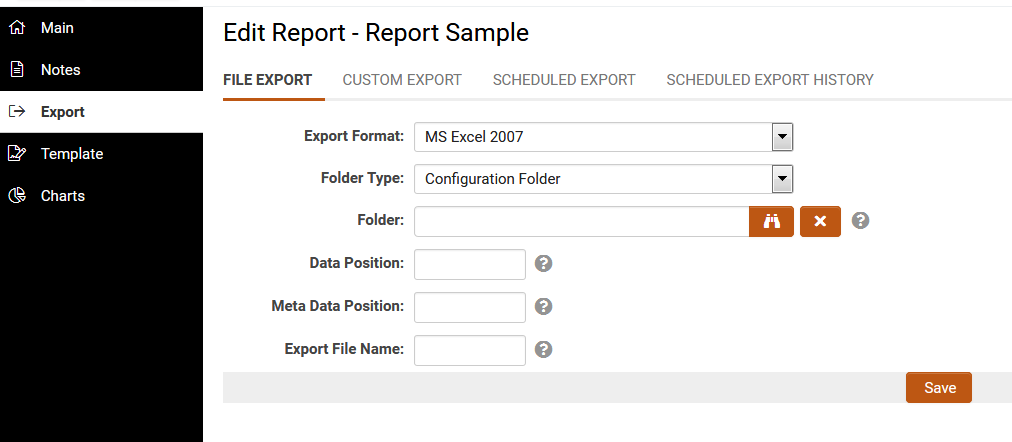
- Export Format - a dropdown list of different file format you can export the report to.
- Folder Type - can be exported to either a SmartFolder or a Configuration Folder
- Folder - choose the subfolder where you want to export the file to.
- Data Position - determines the starting position of your list view results (the "data").
- Meta Data Position - determines the starting position of the report criteria (the "metadata"). If your report does not utilize [wiki/Criteria criteria], the Meta Data will be blank.
- Export File Name - set a filename that is applied when the report is exported. If left empty then the default name for exported file is "Book".
Note: The syntax for both the "Data Position" and "Meta Data Position" fields is ''worksheet'';''column'';''row''
The default setting is 0;0;0 for both fields. This means that your list view results will be exported, with the topmost, leftmost value appearing in the first worksheet, in cell A1.
The numbering begins at zero, so the first worksheet, first column or first row would be referenced with a 0, as opposed to 1.<br /> Therefore, if you wanted either the list view results or the metadata to be placed in the<br /> third worksheet of your Excel file, starting in cell B4, you would enter ''2;1;3''<br /> The syntax for the first worksheet, cell A1 would be ''0;0;0''
File Extension
A report can be exported into a flat file with the following file extension:
- txt – Windows Notepad.
- xls – Microsoft Excel.
- iif – QuickBooks.
- csv - Comma Separated Values.
- xml - Extensible Markup Language (can be opened in Notepad).
1. Set the Extension to txt.
The extension txt is generally associated with Notepad.
2. Click the Save button.
3. Click the Edit Report button.
4. Click the Reports tab.
The report list is displayed and the Employee list report is now displayed with an Export button.
5. Click the Export button.
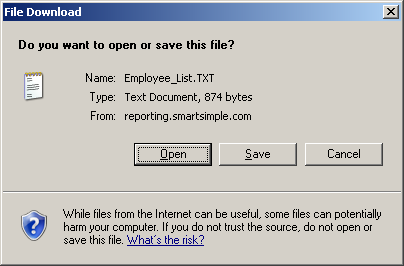
Depending on your Browser and Security setting, you may need to answer some prompts before the file can be opened.
6. If required, click the Open button.
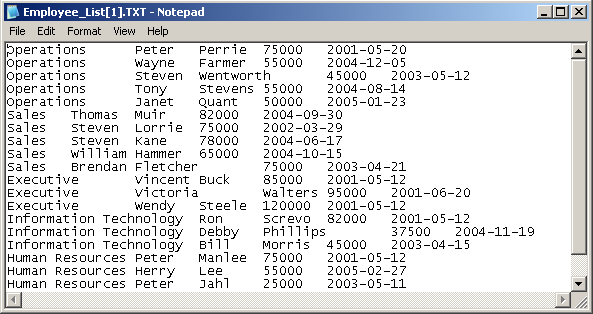
The file is opened in the associated application – Notepad.
The file name is set to the report name plus the extension specified.
7. Close the Notepad application.
IMPORTANT: In order to support special characters such as French accented letters, euro symbols etc SmartSimple uses UTF-8 encoding. When opening exported files Microsoft Excel always imports using ASCII, so special characters do not appear correctly. This is a flaw with Excel. In order to export data containing special characters to Excel use one of the procedures outlined on the Exporting Reports with Special Characters to Excel article.
Note: If the report has sub reports attached then you must set up the Custom Export settings for each of the sub report attached.
Export to XML
If you change the File extension to xml, then the report will construct an XML document from the report results.
1. In the Header section enter the XML declaration and open the root element, details:
<!--?xml version="1.0" encoding="ISO-8859-1"?-->{BREAK}
<details>{BREAK}
2. In the Detail section add the child elements, in the sample below the child is employee with subchildren firstname, lastname, salary and startdate.
The {TAB}s and {BREAK}s will give the XML document proper indentation:
{TAB}<employee>{BREAK}
{TAB}{TAB}<firstname>@Users - First name@</firstname>{BREAK}
{TAB}{TAB}<lastname>@Users - Last name@</lastname>{BREAK}
{TAB}{TAB}<salary>@Users - Salary@</salary>{BREAK}
{TAB}{TAB}<startdate>@Users - Start Date@</startdate>{BREAK}
{TAB}</employee>{BREAK}
3. In the Footer section, close the root element:
</details>
4. The Export XML document opened in Notepad:
<?xml version="1.0" encoding="ISO-8859-1"?>

<details>
	<employee>
		<firstname>Peter</firstname>
		<lastname>Jahl</lastname>
		<salary>25000</salary>
		<startdate>11/05/2003</startdate>
	</employee>
	<employee>
		<firstname>Herry</firstname>
		<lastname>Lee</lastname>
		<salary>55000</salary>
		<startdate>27/02/2005</startdate>
	</employee>
	<employee>
		<firstname>Peter</firstname>
		<lastname>Manlee</lastname>
		<salary>75000</salary>
		<startdate>12/05/2001</startdate>
	</employee>
</details>
Exporting with Subreports
In order to export a report that contains subreports or merged reports you must define the Advanced Export Settings for the subreports, as well as the main report. Example:
- The following would export a report and subreport in Comma Separated Values format (CSV):
@Companies/Accounts - Company name@,
@Companies/Accounts - Address 1@,
@Companies/Accounts - City@,
@Companies/Accounts - State@,
@Companies/Accounts - Company ID@,
@subreport_0@
{BREAK}
Custom Export
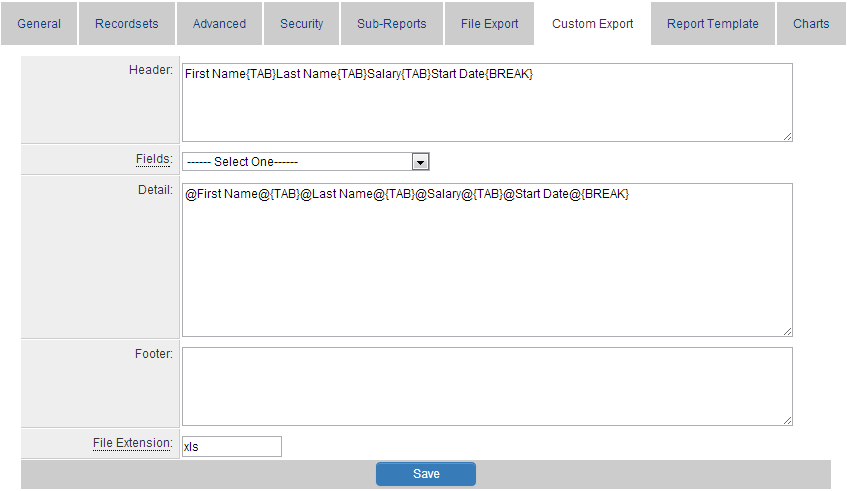
The Custom Export settings allows users to configure the information they wish to export from SmartSimple to external applications such as MS Word, MS Excel or Quickbooks.
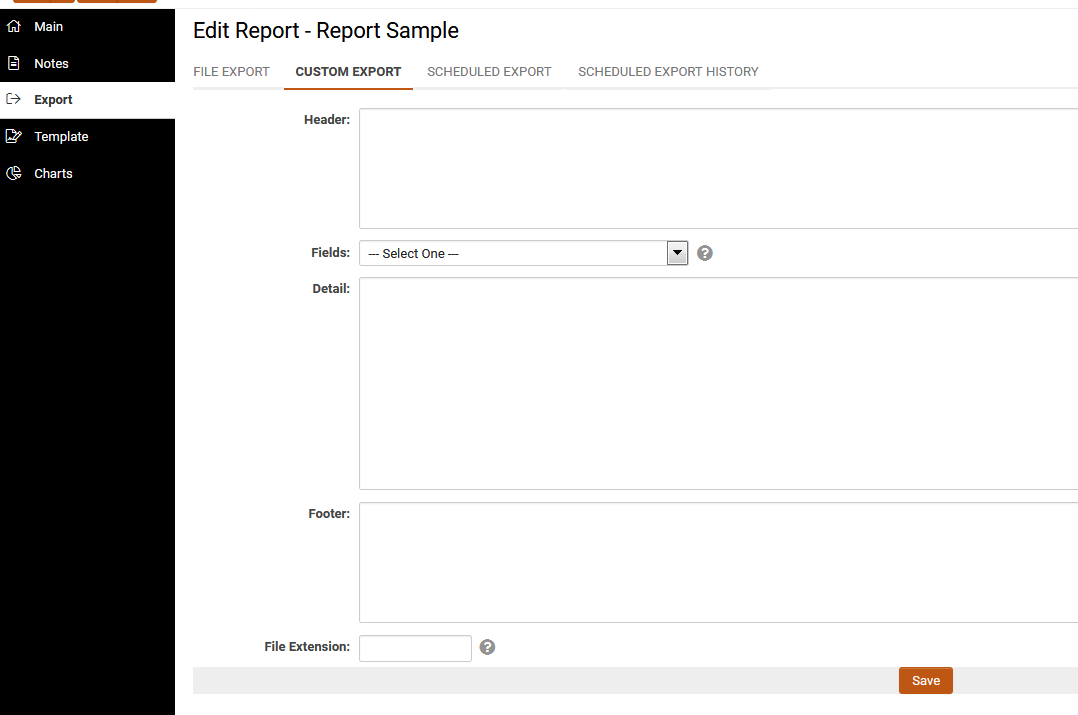
This window consists of the following settings:
- Header - Static or variables that you need to display at the top of the export file.
- Fields - A list of fields taken from the report that is being used to create the report. In addition, you can select two special settings – {tab} – used to add a tab character to the specification and {break} – used to add a line feed to the specification.
- Detail - You construct the actual record layout for the specification in this area. This section can consist of multiple lines.
- Footer - Static or variables that you need to display at the bottom of the export file.
- File Extension - The extension that you wish to associate with the export specifications. By setting this value to any valid Windows file extension, the appropriate application will be launched when the data is exported.
Other settings:
- Delimiter - tab character ({TAB}), comma, semi-colon, colon
- Line breaks - use either a UNIX line break ({LINEFEED}) or a Windows line break ({BREAK})
- Aggregate Functions in Header or Footer
- COUNT - count the total rows per report. @COUNT(column_name)@
- SUM - sum of a column in the report. @SUM(column_name)@
- Please refer to Exporting Reports with Total Group By when exporting reports when Using Total Group Options in Report Builder
Using Custom Export to export Excel
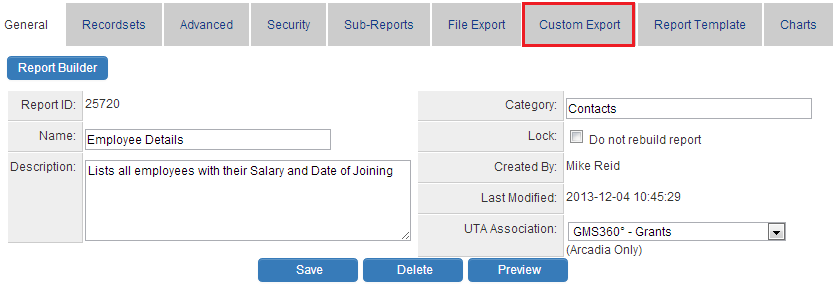
1. Click the Reports tab.
2. Click the Edit button for the Employee List report.
3. Click the Custom Export tab.
You can specify the layout of the report to be exported in the next screen
Header section : you specify the column headings for your report to be exported.
Fields drop down : gives a list of variables that correspond to the fields selected in the report through report builder.
Details section : you specify the fields for the report to be exported. The fields that you select will be displayed right to left in exported report so select the field for the last column first.
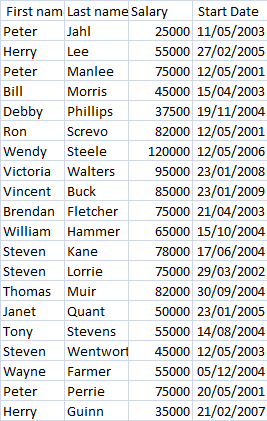
4. Change the Extension to XLS or CSV.
5. Save the Layout.
6. Return to the Report list and click the Export button.
The File is opened in MS-Excel.
Export to SmartFolder or SFTP
A report can now be automated to export as report as per schedule on a daily, weekly, or monthly basis to a SmartFolder or an external SFTP site.
Go to Scheduled Report Export on how to configure scheduled report exports.
See Also
 Creating a Dashboard to Display a Set of Charts
Back to Reports Category 
