Accessing Job Costing and Setting the Defaults
You will now set the global options of the job costing system, then create a new project and enter summary job details on the project.
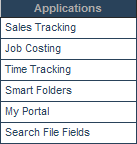
1. Select the Job Costing application.
The Job Costing application is displayed.
This window consists of the following tabs
- My Estimates – estimates where you are the manager.
- My Jobs – jobs or projects where you are the manager.
- My Tasks – tasks in projects where you are an assigned resource.
- All Estimates – all estimates within the job costing system.
- All Jobs – all jobs within the job costing system.
- Resources – all resources within SmartSimple. This includes people, facilities, and equipment, and material type resources.
- Settings – Job Costing application settings.
- Reports & Dashboards – link to the reports and dashboard features.
If you don’t have access to the Job Costing application, you will need to ask your SmartSimple System Administrator to activate the application.
Contents
Setting Job Costing Defaults
These current units of time can be set for the current project, and all future projects that you create, by selecting the Set as Default button.
1. Click the Settings tab.
The Settings tab is displayed.
Settings are divided into two categories: Job Settings and Task Settings.
Job Settings
- Job View – defines the fields that should be displayed when viewing estimates and jobs in a list view.
- Estimate Statuses – defines the stages/statuses of an estimate before it is converted into a job.
- Budget Statuses – defines the stages/statuses of a job once it has been converted from an estimate.
- Project Custom Fields – you can add custom fields to the estimate/job level.
- Task Custom Fields – you can add custom fields to the task level.
Task Settings
- Task Statuses – defines the stages/statuses of a task.
Setting Estimates and Job Statuses
First you will set the estimate and job statuses.
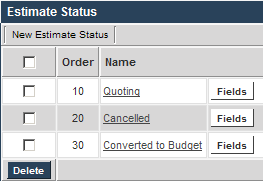
1. Click the Estimate Status link.
The Estimate Status page is displayed.
The statuses will be listed to the left of the page, and new statuses are added to the right of the page.
Each status has three settings:
- Name – the name of the status.
- Display order – the order of the statuses should be displayed in the Status combo box.
- Color Code – an optional color code for the status when displayed in the list.
2. Add the following statuses:
Color codes are a useful way of identifying estimates and jobs.
Setting the Job/Budget Statuses
These statuses will only be used once you have converted the estimate into a budget.
1. Click the Settings tab.
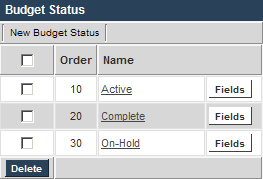
2. Set the following Job/Budget Statuses.
Setting Task Statuses
Finally, you will set up the task statuses. These statuses can only be estimated at the Budget stage and not at the task or estimate of job stage.
1. Click the Settings tab.
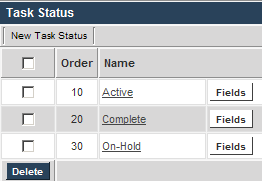
2. Set the following Task Statuses:
You can now create the estimate.


