Difference between revisions of "Configuring Settings for the SmartSimple Outlook Synchronization Add-In"
From SmartWiki
(Created page with 'The following instructions show you how to set user information for the SmartSimple Outlook Synchronization Add-In. You only need to set these values the first time you…') |
|||
| Line 3: | Line 3: | ||
You only need to set these values the first time you use the '''Synchronization''' tool. | You only need to set these values the first time you use the '''Synchronization''' tool. | ||
| − | + | * Click the '''SmartSimple Settings''' button. | |
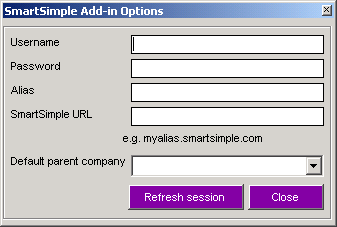
The '''SmartSimple Settings Options''' are displayed. | The '''SmartSimple Settings Options''' are displayed. | ||
| Line 9: | Line 9: | ||
[[Image:Exc21.png]] | [[Image:Exc21.png]] | ||
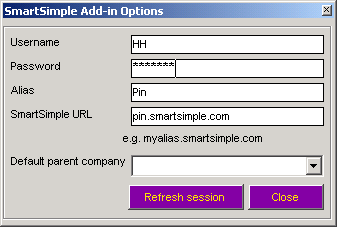
| − | + | * Enter your [[Username|username]], [[Password|password]], company [[Alias|alias]] and [[URL]]. | |
[[Image:Exc22.png]] | [[Image:Exc22.png]] | ||
| − | + | * Click the '''Refresh''' button to validate the setting. | |
| − | + | * Click the '''Close''' button. | |
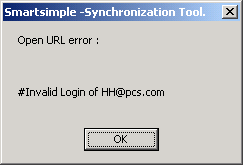
If any of the values are incorrect the following message will be displayed. | If any of the values are incorrect the following message will be displayed. | ||
Revision as of 15:15, 26 August 2013
The following instructions show you how to set user information for the SmartSimple Outlook Synchronization Add-In.
You only need to set these values the first time you use the Synchronization tool.
- Click the SmartSimple Settings button.
The SmartSimple Settings Options are displayed.
- Click the Refresh button to validate the setting.
- Click the Close button.
If any of the values are incorrect the following message will be displayed.


