Difference between revisions of "Arcadia Settings"
From SmartWiki
m |
|||
| Line 1: | Line 1: | ||
| − | + | Once Arcadia has been [[Enable Arcadia|enabled]] then you can configure the Arcadia settings specific to each UTA by clicking on the Settings tab in the relevant UTA. | |
| − | [[ | + | This includes the ability to have cross-tabbed standard views with drill down options and [[KPI]]s for simplified presentation of important metrics. |
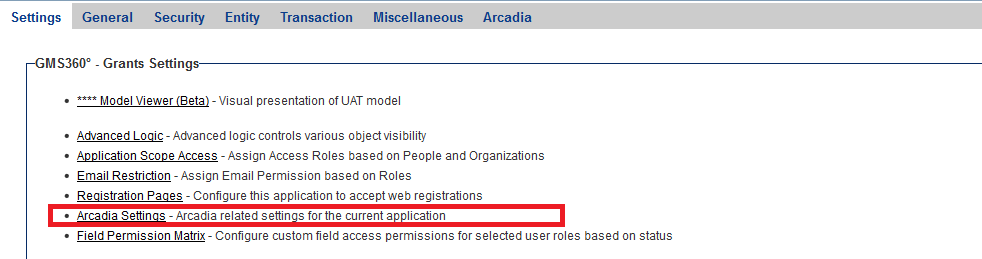
| + | There should be a link within the overall Settings tab called Arcadia Settings. Click on this. | ||
| + | [[Image:ArcadiaUTASettings.png|border|link=]] | ||
| − | + | [[Image:ArcadiaUTAOptions.png|border]] | |
| − | |||
| − | [[Image: | ||
| − | |||
| − | |||
| − | |||
| − | |||
| − | |||
| − | |||
| − | |||
| − | |||
| − | |||
| − | |||
| − | |||
| − | |||
| − | |||
| − | |||
| − | |||
| − | |||
| − | |||
* A number of additional options are now exposed to the end-user: | * A number of additional options are now exposed to the end-user: | ||
Revision as of 15:22, 9 October 2013
Once Arcadia has been enabled then you can configure the Arcadia settings specific to each UTA by clicking on the Settings tab in the relevant UTA.
This includes the ability to have cross-tabbed standard views with drill down options and KPIs for simplified presentation of important metrics.
There should be a link within the overall Settings tab called Arcadia Settings. Click on this.

- A number of additional options are now exposed to the end-user: