UTA Invoicing by Connecting Level 3 Items to Level 2's

|
This article will explain how you can implement this feature for use on your SmartSimple system. |
Overview
This feature enables Level 3 items to be reported on invoices located on different Level UTA's. This allows the invoicing of transactions from different UTA's to be included on the Level 2 of another UTA.
How To Implement This
From the Consumer UTA
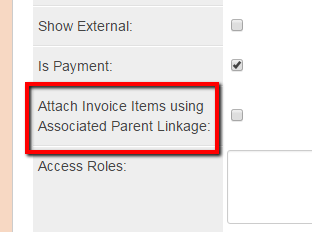
The first step to enabling the invoicing of Level 3 items on different Level 2 UTA's is to turn on the feature labeled: Attach Invoice Items using Associated Parent Linkage
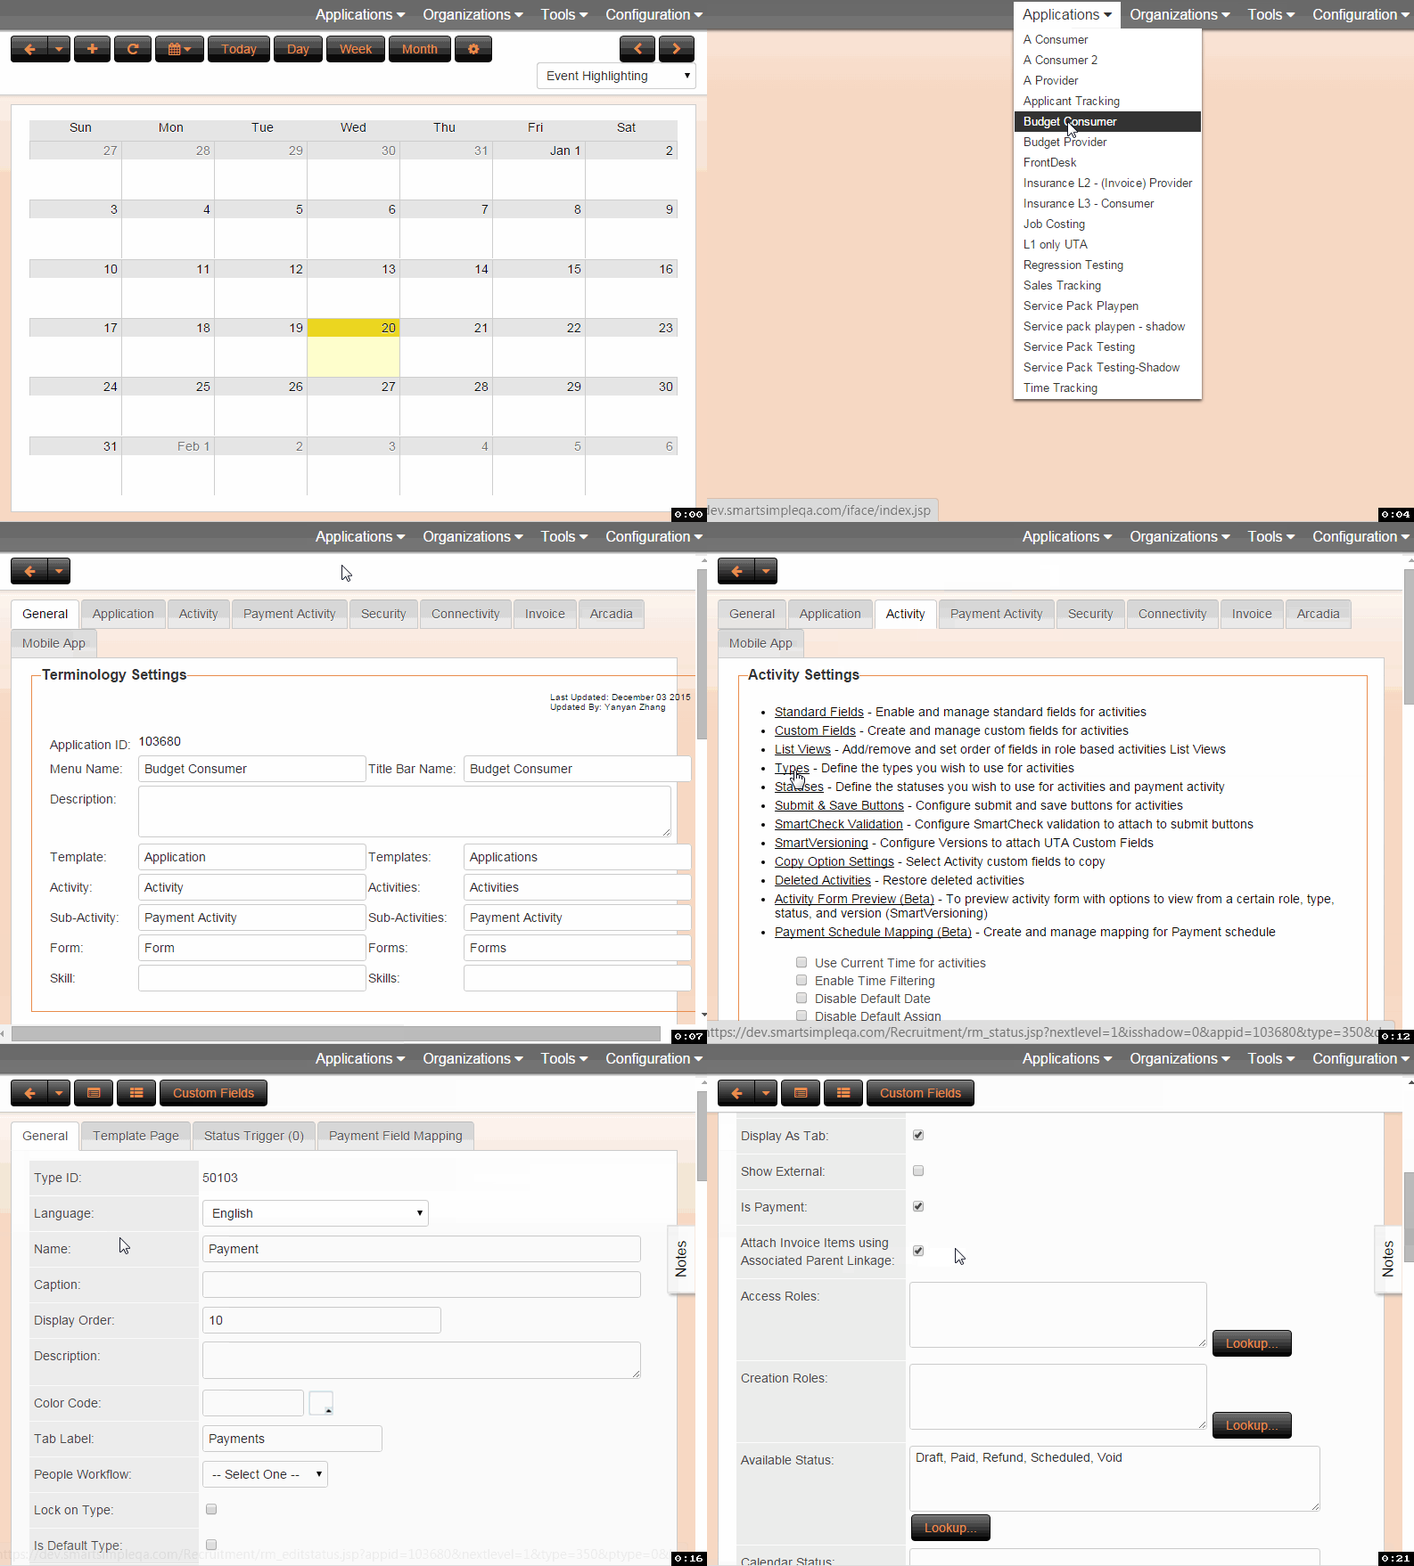
1. Click on the settings icon.
2. Click on the Level 2 tab, then click on the Types hyperlink.
3. If you do not already have a Payment activity type already created, click on the + button to create the new New Type.
- If you already have a Payment activity, click on the edit icon.
4. In the Payment Activity Type add a check mark to the box labled "Attach Invoice Items using Associated Parent Linkage:". This check mark will indicate to the Level 2 that instead of referencing a related Level 3 that the invoice details are under a different Level 2 UTA.
From the Provider UTA
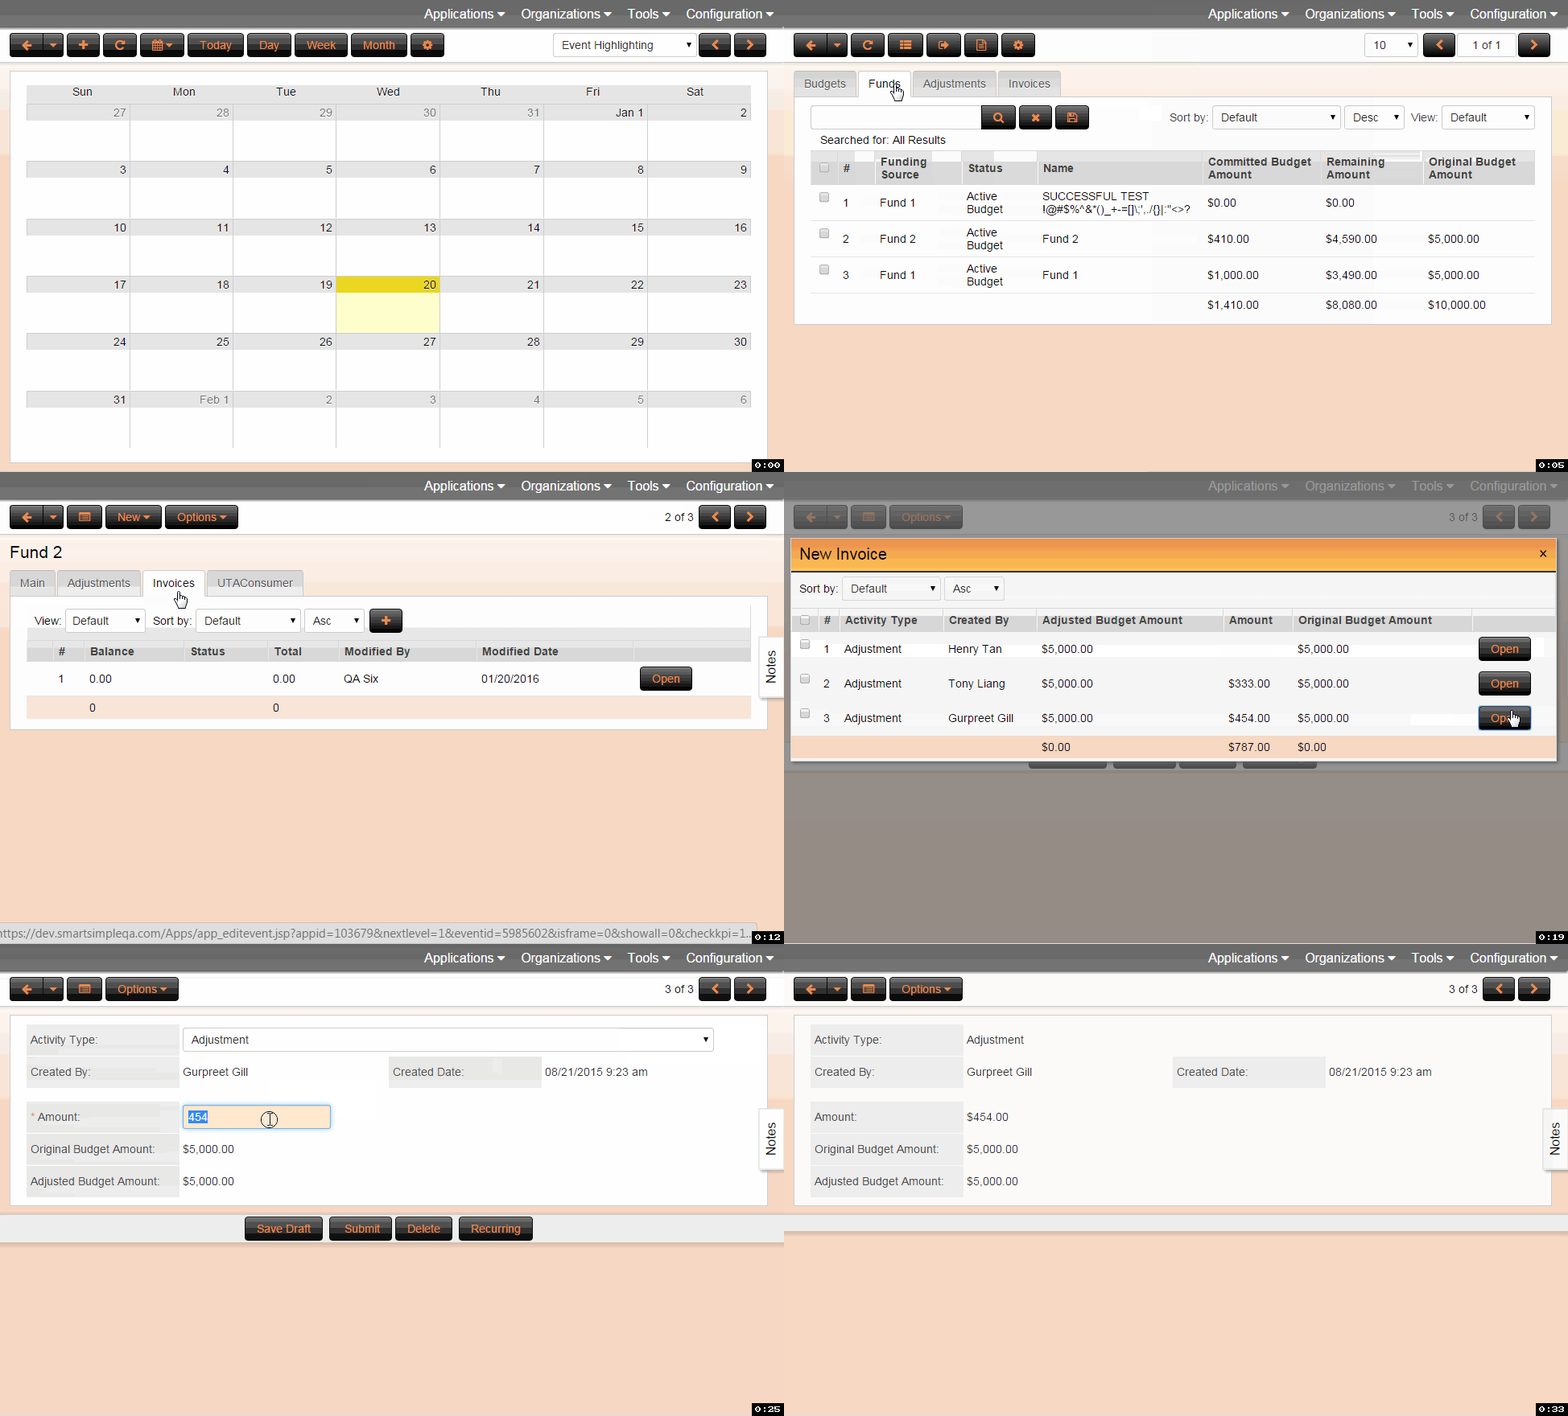
Click on the Funds tab.
1. Select the appropriate Funding Source, and click on the Invoices tab.
2. Click the '+ icon to view the New Invoice activity display. Click Open on the appropriate line item.
3. Confirm the Activity Type and the Amount and click Submit.
Illustrated
From the Consumer UTA
The process to Attach Invoice Items using Associated Parent Linkage as described above is illustrated below.
From the Provider UTA
The process to create a new invoice that includes items associated with parent linkage as described above is illustrated below.
Notes
- If the option labelled Attach Invoice Items using Associated Parent Linkage is not check marked, when the Level 2 is looking for Level 3 items to include on the invoice it will look to the Level 3's within it's UTA.


