Customizable UTA Batch Update Options

|
This article will explain how you can implement this feature for
use on your SmartSimple system. |
Contents
Overview
This feature adds the ability for System Admins to create customizable batch update buttons available to users based on their specific user role. Each customizable button(s) is associated with an individual List View.
How to implement it?
1. Go to the desired UTA, click on the Configuration Settings icon
2. Select Level 1, Level 2, or Level 3
3. Click on the List Views hyperlink under the Properties section
4. The List Views page is displayed
5. Click on the New or + icon to create a new List View
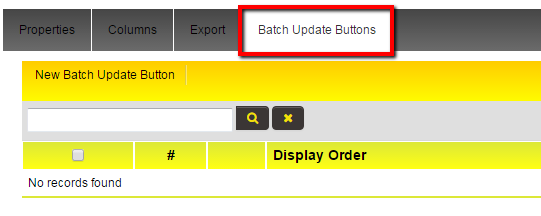
6. Click on the Batch Update Buttons tab header
7. The Batch Update Button page is displayed. Any previously created batch update buttons that you’ve created will be displayed. If you are adding your first batch update button then the list will be
empty.
8. Click on New
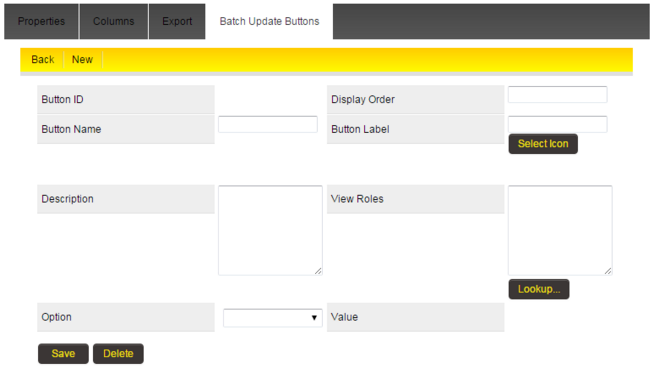
9. Complete the required fields (name, description, display order, and label), select any options and specify the roles who will see the batch update button.
| Field | Description |
| Display Order | the order of how buttons are displayed among the action buttons |
| Button Label | accepts both text and icon. Text is a must as in classic mode the button label must be text for consistency purpose. In Arcadia it will display the icon, and render the text as caption. If icon not defined for Arcadia then the button will show text |
| View Role | defines the user allowed to view this button |
| Option & Value | same as each option in the general batch update page. Currently only one option per button. |
10. Click Save
Notes
- Each customizable button(s) is associated with an individual List View.

