System Security Summary
Contents
Overview
The System Security Summary is a useful feature in your SmartSimple instance that allows you to review the access risk of your current instance configuration.
Accessing the System Security Summary
To access the System Security Summary, follow these steps:
1. Click on the 9-square menu icon on the top right of your page.
2. Under the heading Configuration, select Global Settings.
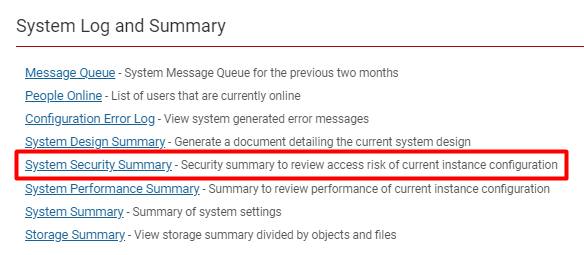
3. Under the first tab (labelled System) scroll down to the bottom of the page to the subsection labelled System Log and Summary.
4. Click on the hyperlink labelled System Security Summary.
System Security Summary Features
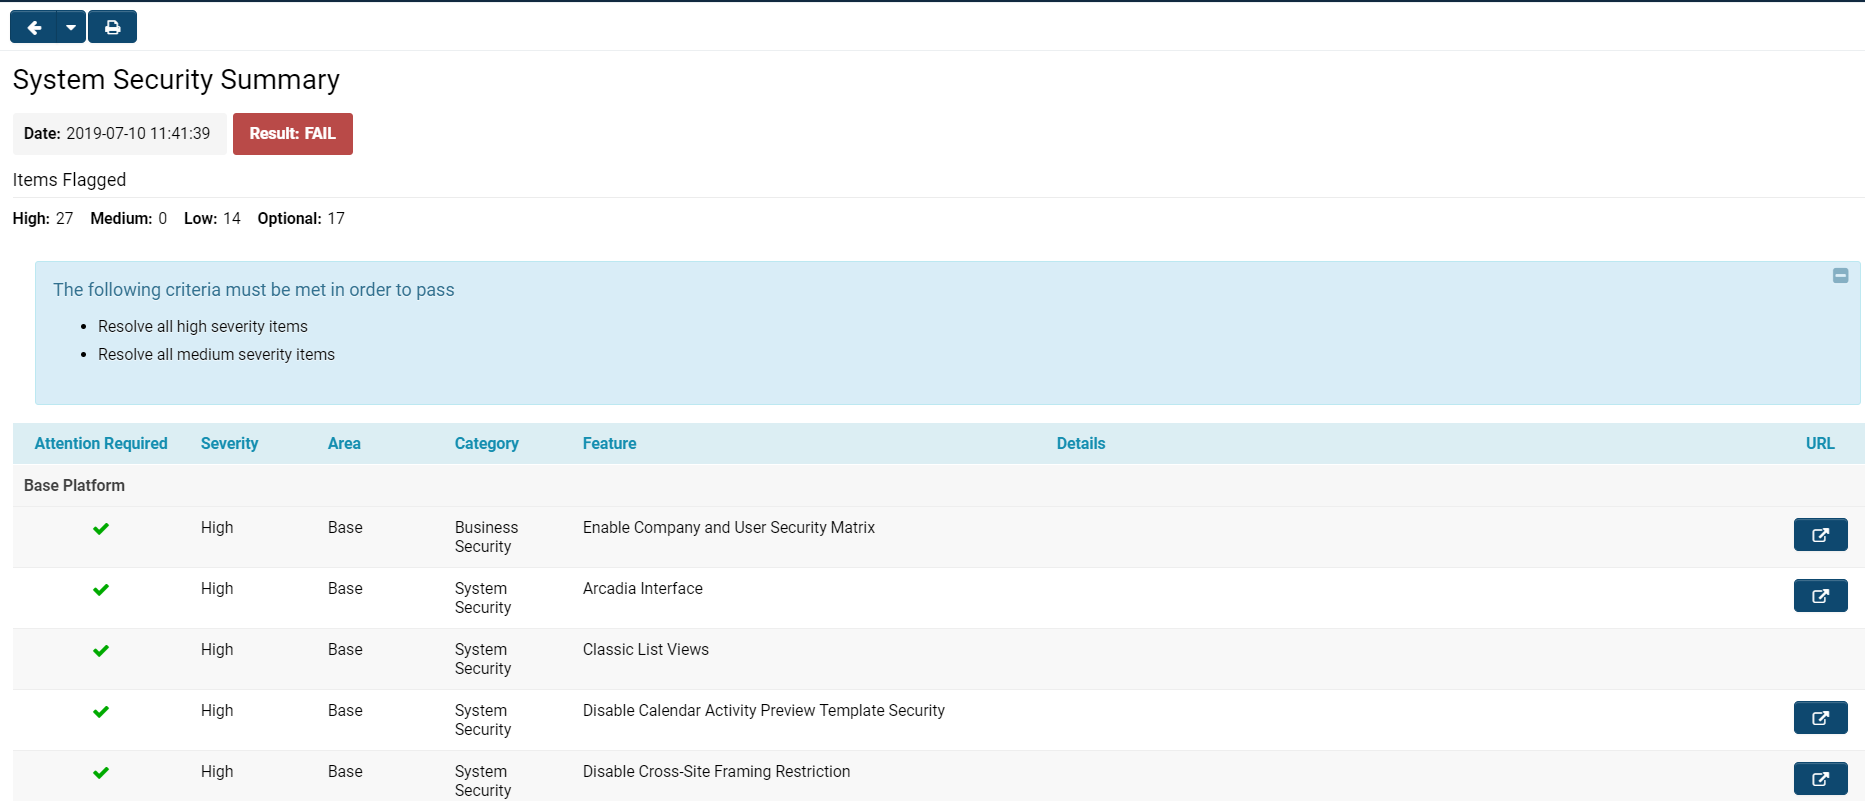
When you open the System Security Summary, you will see a page displayed with details similar to those in the image below:
The System Security Summary has different components.
At the very top left of your page are two buttons:
-
- The right arrow allows you to go back to the last page that you were from (typically the Global Settings page from which you accessed the System Security Summary.
- Clicking the drop down arrow will allow you to choose from a list of several of the most recent pages you accessed.
- The printer icon will allow you to print a PDF report of all the system security summary information in the same list and structure as is organized on the page in the platform.
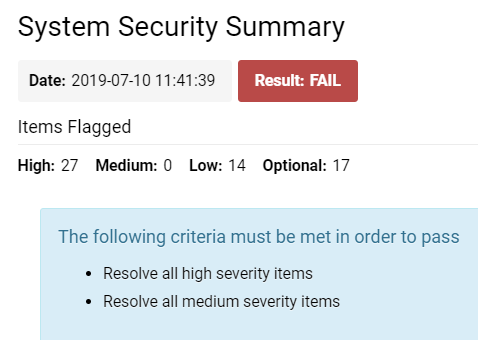
Below these buttons and right underneath the System Security Summary title, you will see the following information:
| Date | The time and date stamp of when the system security summary was most recently run - this will be the time that you clicked into the System Security Summary hyperlink from Global Settings. |
| Result | This will be the result generated from your most recent run of the system security. It will either be a FAIL (red) or PASS (green). |
| Items Flagged |
High - The number of items in the system that the system security counts as high severity. It is highly recommended to change the security settings on high severity items; otherwise, your system security is vulnerable and insecure. Medium - The number of items in the system that the system security counts as medium severity. It is recommended to change the security settings on medium severity items to improve your overall system security. Low - The number of items in the system that the system security summary counts as low severity; you are recommended to change the security settings on these low severity items, but it will not be a critical detriment to your overall system security. Optional - These are the number of items in the system that the system security does not mandate you need to improve the security on. You can choose whether or not you want to increase the security settings on these items. |
| The following criteria must be met in order to pass | This text box that appears at the top of your System Security Summary page will give you a list of the steps necessary in order to change your security status from FAIL to PASS. In this example, for instance, a System Administrator should resolve all high severity items and all medium severity items. Once they do so, running their System Security Summary again should ensure that they get a PASS status. |
Below these top notifications is the list view of System Security features.
The columns included in the list view for System Security are each explained below:
| Column | Function |
|---|---|
| Attention Required |
|
| Severity | High, Medium and Low severity level will be listed for all security items, corresponding to the level of severity for each item. |
| Area |
Base - A security item with a Base area indicates that the feature exists in the Base Platform. These are security settings that impact the user experience of the overall system, such as the Arcadia interface, login accessibility, APIs and more. UTA - A security item with a UTA area indicates that the feature exists specifically to an application in the system. Any UTA security item will be listed under a heading that specifically names which UTA it is relevant to. UTA security items can be associated with Level 1, Level 2, or Level 3 settings. |
| Category |
Every security item will fall under a broad category. Security - |
| Feature | The name of the security feature. Some examples might include Classic List Views, Arcadia Interface, Disable Login Token Check, Enable Desktop API, Reports, Password Policy, Enable SSL, and more. |
| Details |
This will provide more information about what the security risk is. For example, for the Password Policy feature, a High Severity, Attention Required issue might have the details Password Expiration must be greater than 0. |
| URL |
Clicking on the button that corresponds to the item will bring you to the part of the system that allows you to configure the security settings. For example, clicking on this button for a High Severity, Attention Required, UTA security row might bring you to the security matrix for that 's Level 1 entity. You can then permission the security settings on that page appropriately based on the Details provided with the security risk. |


