Difference between revisions of "Creating a Universal Tracking Application"
| Line 52: | Line 52: | ||
5. Click any of the '''Save''' buttons. | 5. Click any of the '''Save''' buttons. | ||
| − | [[Image:UTA Setting Enable Activity]] | + | [[Image:UTA Setting Enable Activity.png]] |
* Enabling the Level 2 activities changes the '''Configuration''' screen layout and adds a section for defining these activities. | * Enabling the Level 2 activities changes the '''Configuration''' screen layout and adds a section for defining these activities. | ||
Revision as of 14:51, 16 May 2014
In this article, you will start to create a Contract Tracking application. Initially, this application will use Level 1 items only.
1. Click the Configuration, Tracking Applications menu.
The Tracking Applications window is displayed. Currently there are no applications created.
Generally, this list will display the name of the application, the name as it appears in the menu bar, and the description that you define for the application.
2. Click the New Application tab.
The New Application window is displayed.
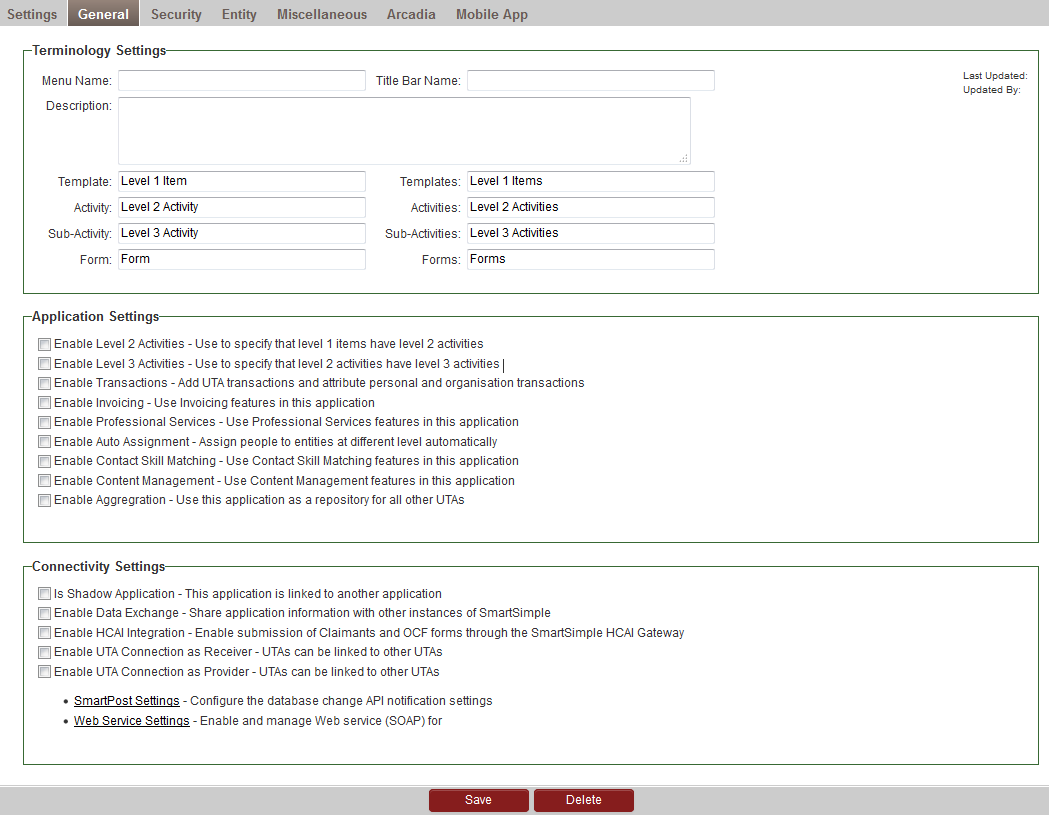
This page is used to set many characteristics for the new application and is divided into ten sections.
- Application Settings – Controls the overall functioning of the application.
- Level 1 Item Settings – Defines the attributes of the Level 1 Entity. You will need to save the application at least once to see these settings.
- Level 2 Activity Settings – Defines the attributes of the Level 2 Entity. You will need to activate Level 2 to see these settings.
- Access Role Settings – Defines the roles of the user that can access the application.
- Contact Assignment Role Settings – Determines the roles that contacts can “play’ in a specific Level 1 Entity.
- Account Assignment Role Settings – Determines the roles that organisations can “play” in a specific Level 1 Entity.
- Account and Contact Settings – Defines the relationship between Level 1 and Level 2 items in other parts of SmartSimple, such as the account screen and the contact screen.
- Publication Service Settings – Connects Level 2 items to external web services, such as publication databases.
- Terminology Settings – Defines the object names to be used throughout the application for Level 1, 2 and 3 entities.
- Field Settings – Defines the display of activities in the workflow list and the calendar.
Application Settings
- Enable Level 2 Activities – Specifies that the Level 1 Entity should have Level 2 items.
- Enable Level 3 Activities – Specifies that each Level 2 item should have Level 3 items.
- Enable Transactions – Specifies that user-based personal transactions can be associated with the Level 1 item. This feature is generally only used when a person’s activity, such as a certification or a degree, needs to be attributed back to a grant.
- Enable Security Matrix – Specifies that comprehensive security control is required within the application.
- Is Shadow Application – Specifies that this application is really linked to another UTA. Generally, this technique is used to create the same application in more than one language (as the standard and custom fields can be labeled differently), or to restrict functionality to a group of users.
- Enable Data Exchange – Specifies that a Level 1 item can be exchanged with other copies of SmartSimple. This feature is used when creating an intra-organisational case management system.
- Allow External Owner – Specifies that the owner of a Level 1 item can be an external contact – rather than an internal user.
- Menu Name – The name you wish to display in the left navigation panel within SmartSimple.
- Title Bar Name – The name you wish to display in the title bar of the application.
- Description – A general narrative description of the application.
Defining Application Settings
1. Enable Level 2 Activities.
2. Set the Menu Name to Contract Tracker.
3. Set the Title Bar Text to Contract Tracker.
4. Set the Description to: This application tracks sales, support and NDA contracts.
5. Click any of the Save buttons.
- Enabling the Level 2 activities changes the Configuration screen layout and adds a section for defining these activities.
Once you save these basic settings the configuration page will display the Level 1, Level 2 (and Level 3, if enabled) entity settings.


