Difference between revisions of "SmartSimple Microsoft Outlook Synchronization"
| Line 38: | Line 38: | ||
#Ensure that the Manager (Owner) field is set to your name. | #Ensure that the Manager (Owner) field is set to your name. | ||
#Click '''Save'''. | #Click '''Save'''. | ||
| + | |||
| + | As a company can only have one owner (Manager), only one user can synchronize contacts in a given company in SmartSimple with their Outlook. | ||
| Line 78: | Line 80: | ||
| − | ===Outlook Synchronization Installer for Windows 32-bit=== | + | ===Outlook Synchronization Installer for '''Windows 32-bit'''=== |
| − | + | :1. Select the '''Help, Downloads''' menu. | |
| − | + | [[Image:HelpDownloads.png]] | |
| − | + | :2. Under the Microsoft Outlook header, find Outlook Synchronization for '''Windows 32-bit'''. To the right you’ll find a download link. Click '''Download''' and choose to '''Save''' the '''SSOutlookAddInSetup32.zip''' file. | |
| + | :3. Place this file in any folder. | ||
| + | ===Outlook Synchronization Installer for '''Windows 64-bit'''=== | ||
| + | :1. Select the '''Help, Downloads''' menu. | ||
| + | [[Image:HelpDownloads.png]] | ||
| + | :2. Under the Microsoft Outlook header, find Outlook Synchronization for '''Windows 64-bit'''. To the right you’ll find a download link. Click '''Download''' and choose to '''Save''' the '''SSOutlookAddInSetup64.zip''' file. | ||
| + | :3. Place this file in any folder. | ||
| − | |||
| − | + | =Installing the SmartSimple Outlook Synchronization Add-In= | |
| + | |||
| + | Depending on the version of Windows you are running and the security settings applied on your computer, you may need Administrative access to install the plug-in. | ||
Be sure to download the appropriate version from your copy of [[SmartSimple]] before proceeding. | Be sure to download the appropriate version from your copy of [[SmartSimple]] before proceeding. | ||
| Line 93: | Line 102: | ||
Use the following step-by-step instructions to install this feature. | Use the following step-by-step instructions to install this feature. | ||
| − | The images in this example are taken from Outlook | + | The images in this example are taken from Outlook 2010. |
| + | |||
1. Launch '''Microsoft Outlook'''. | 1. Launch '''Microsoft Outlook'''. | ||
Revision as of 16:24, 9 October 2012
Contents
- 1 Overview
- 2 SmartSimple Initial Setup
- 3 Downloading the SmartSimple Outlook Synchronization Add-In
- 4 Installing the SmartSimple Outlook Synchronization Add-In
- 5 Using the Settings button
- 6 Setting your User Information
- 7 Setting up a SmartSimple Enabled Calendar or Contact List
- 8 Creating a New Folder
- 9 Creating a Shortcut on your Outlook Sidebar
- 10 Using Outlook Synchronization
- 11 Outlook Contact Fields Verse SmartSimple Fields
- 12 Setting Custom Fields Values for Contacts
- 13 Setting Additional Contact Roles
- 14 Setting a Custom Field Value
- 15 Updating Calendar Events
- 16 Adding Event Notes
- 17 Reserved Fields in Outlook
Overview
The SmartSimple Microsoft Outlook Synchronization tool provides the following features:
- Maintenance of contact and company information in Outlook or SmartSimple. Note: only companies and their associated contacts, where the company "ownership" is set to the current SmartSimple user, will be synchronized. This feature also supports the use of custom fields and roles for contacts and multiple notes.
- Maintenance of your personal calendar in Outlook or SmartSimple. This feature also supports multiple notes for each calendar entry and the use of any custom calendar fields defined in SmartSimple. Notes can be created in Outlook or SmartSimple.
- If you are using the SmartSimple Applicant Tracking system you can synchronize applicant information including applicant resumes.
SmartSimple Initial Setup
There are several items that must be configured in SmartSimple to enable you to be able to synchronize your Contacts and Calendar events with Outlook.
SmartSimple Manager Permissions
The ability to synchronize between SmartSimple and Outlook is controlled by a Manager Permission. Only users in a role which has been given the “Contacts – Allow Outlook Synchronization of All” will be able to use this feature.
- Login to SmartSimple using an account with Global User Administrator access.
- On the left navigation bar, under Configuration, click on Roles and Permissions.
- In Permission Settings, click on Manager Permissions.
- Click on the Contacts – Allow Outlook Synchronization of All permission.
- In the Manager Roles box on the right, select the roles you would like to have access to use the Outlook Add-In.
- Click Save.
Note: All users in the selected roles will be able to use the Outlook Add-In based on their configuration as described below.
SmartSimple Company Ownership
Only contacts in companies that the user is an owner (Manager) of will be available for that user to synchronize to their Outlook. This applies to either internal or external companies or branches.
- Login to SmartSimple using an account with Global User Administrator access.
- Navigate to view the companies (branches) that you would like to exchange contacts with. From the left navigation bar, under Communications, click Contacts.
- Click on Accounts on the menu bar at the top.
- You can search for particular companies by using the Account Search on the right side.
- Open the company record, typically by clicking on the company name from the list.
- Click Edit from the menu bar.
- Ensure that the Manager (Owner) field is set to your name.
- Click Save.
As a company can only have one owner (Manager), only one user can synchronize contacts in a given company in SmartSimple with their Outlook.
SmartSimple User Role Permissions
Each user will only be able to synchronize contacts which possess roles that they have selected in their personal system settings. In order for the role list to appear in a user’s system settings, they must first be given the ability to set (assign) those roles. If a user has multiple roles, only one of their roles needs to be given this access.
- Login to SmartSimple using an account with Global User Administrator access.
- On the left navigation bar, under Configuration, click on Roles and Permissions.
- In Role & Category Settings, click on User Roles.
- Click Edit for the role that the user belongs to
- In the Role Permissions section, select all of the roles that include the contacts that you want to synchronize.
- Click Save.
SmartSimple Outlook Synchronization Roles
Users can set which roles will be used for synchronization.
- Login to SmartSimple using the account of the user you want to configure for Outlook Synchronization.
- Open the user’s profile either through a clicking on an icon or clicking on the user’s name at the top of the page.
- Click on Settings then System.
- Scroll down the page until you see a section called Outlook synchronization.
- If you have set the User Role Permissions properly (as above) then you will see a list of roles. Only the roles selected will be available for synchronization.
- Check off roles you wish to enable for synchronization.
- Click Save.
Downloading the SmartSimple Outlook Synchronization Add-In
You can download the Outlook Synchronization Add-in from your copy of SmartSimple.
There are 2 versions of the Plug-in, one for Microsoft Windows 32 bit and a separate one for Microsoft Windows 64 bit. Download and install the corresponding file for the version of Windows that you are running.
- It does not matter what version of Microsoft Outlook you are running (32 bit vs 64 bit), you just need to install the proper version for the operating system you are running (Windows 32 bit vs Windows 64 bit).
- There are no longer different installer files for the older versions of Outlook (2003, 2007). Use the same installer regardless of which version of Outlook you are running.
- Microsoft .NET Framework 4 is required for the Add-In to work and will be installed automatically as part of the setup.
Outlook Synchronization Installer for Windows 32-bit
- 1. Select the Help, Downloads menu.
- 2. Under the Microsoft Outlook header, find Outlook Synchronization for Windows 32-bit. To the right you’ll find a download link. Click Download and choose to Save the SSOutlookAddInSetup32.zip file.
- 3. Place this file in any folder.
Outlook Synchronization Installer for Windows 64-bit
- 1. Select the Help, Downloads menu.
- 2. Under the Microsoft Outlook header, find Outlook Synchronization for Windows 64-bit. To the right you’ll find a download link. Click Download and choose to Save the SSOutlookAddInSetup64.zip file.
- 3. Place this file in any folder.
Installing the SmartSimple Outlook Synchronization Add-In
Depending on the version of Windows you are running and the security settings applied on your computer, you may need Administrative access to install the plug-in.
Be sure to download the appropriate version from your copy of SmartSimple before proceeding.
Use the following step-by-step instructions to install this feature.
The images in this example are taken from Outlook 2010.
1. Launch Microsoft Outlook.
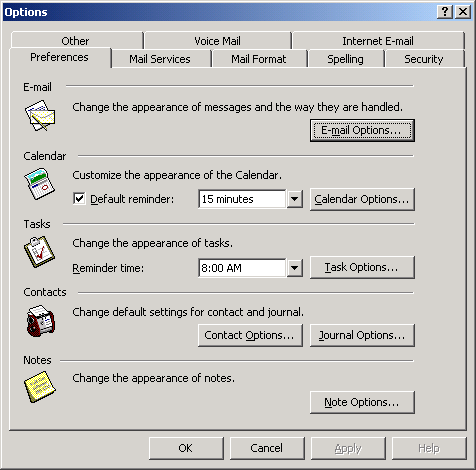
2. Choose the Tools, Options menu.
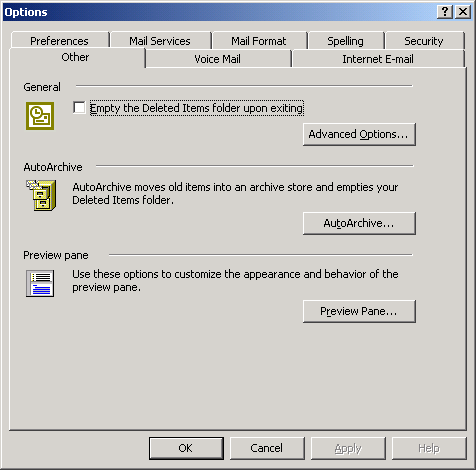
3. Click the Other tab.
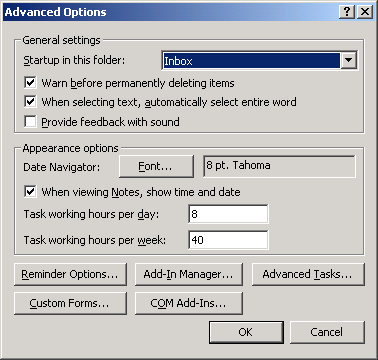
4. Click the Advance Options button.
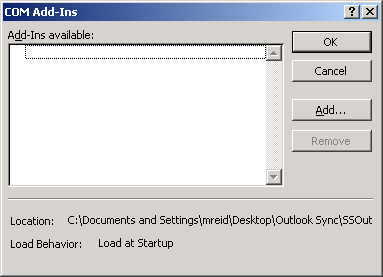
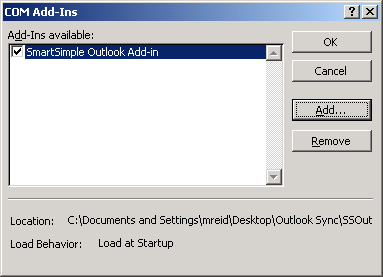
5. Click the COM Add-ins button.
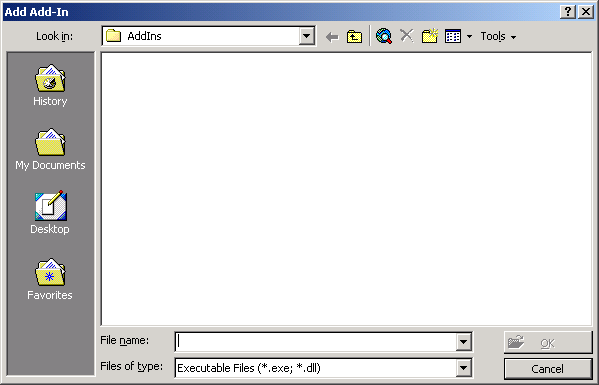
6. Click the Add button.
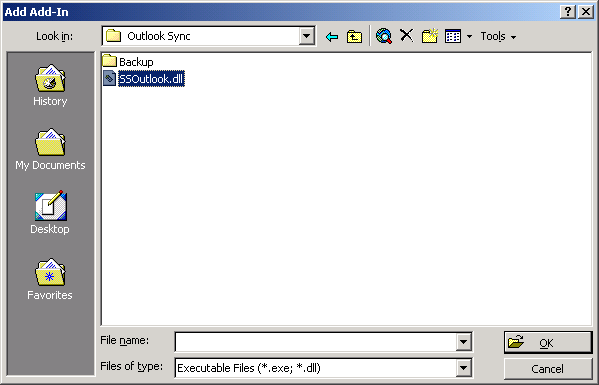
7. Browse to the folder where you stored the file SSOutlook.dll.
8. Select the File - SSOutlook.dll.
9. Click the OK button.
The Add-in is added and selected.
10. Click the OK button on each screen until you are returned to Outlook.
The new buttons will be added to the Outlook toolbar – Setting and Sync.
You are now ready to configure the settings.
Using the Settings button
There are three buttons on the SmartSimple toolbar:
Setting your User Information
The following instructions show you how to set user information.
You only need to set these values the first time you use the Synchronization tool.
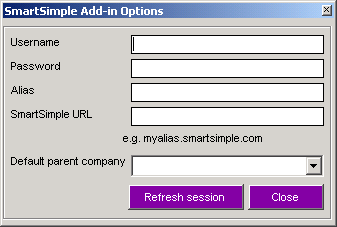
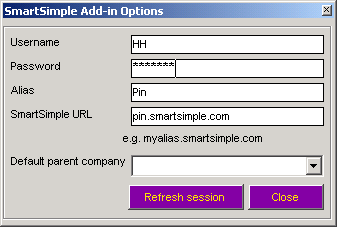
11. Click the SmartSimple Settings button.
The SmartSimple Settings Options are displayed.
12. Enter your username, password, company alias and URL.
13. Click the Refresh button to validate the setting.
14. Click the Close button.
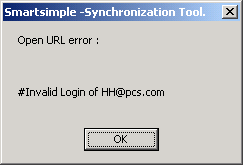
If any of the values are incorrect the following message will be displayed.
Setting up a SmartSimple Enabled Calendar or Contact List
The Synchronization feature uses the name of the folder to identify if the selected folder – either contacts or calendar – that should be synchronized with SmartSimple.
- If the name of a selected folder contains the word "smartsimple" (not case sensitive) then the Sync Calendar or Sync Contact button will be enabled depending on the folder type.
- If you wish to synchronize your personal calendar or personal contacts you must add the word “smartsimple” to the description, as you cannot change the names of these personal folders. To add the word SmartSimple to the calendar description use the following instructions.
Right click on the calendar or contacts icon and choose properties.
The description will be displayed as a large text box in the middle of the settings.
Type SmartSimple.
Click the OK button.
- If you wish to synchronize an existing list of contacts in Outlook with SmartSimple then you will need to rename the folder to contain the word "smartsimple" - not case sensitive.
Creating a New Folder
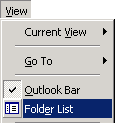
Displaying the Outlook folder list before you create the folder makes it easier to see where the folder will be created.
15. If the folder list is not displayed, choose the View Folder List menu.
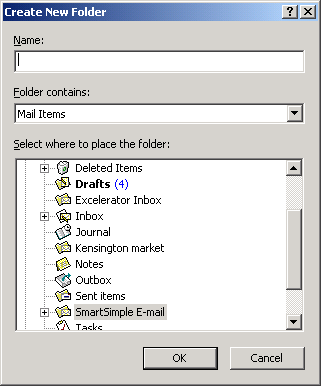
16. Select the level where you wish to add the new folder.
17. Choose the File, New Folder menu.
18. Type a folder name – be sure to include the word "smartsimple".
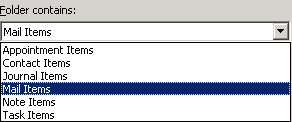
19. Set the folder type to either Appointment items (for Calendar Synchronization) or Contact items (for Contact Synchronization).
20. Click the Ok button.
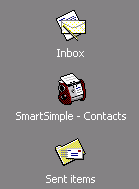
The folder icon will indicate either contacts or appointments.
Creating a Shortcut on your Outlook Sidebar
You can drag the folder name to the Outlook sidebar to create a shortcut. This will make it easier to locate the folder in the future.
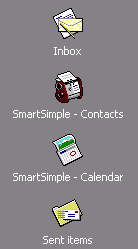
21. Drag the Folder name to the required location on the Outlook sidebar.
You can repeat the folder creation process with a new calendar folder.
Once complete you can use the View Folder List menu to hide the folder list.
Using Outlook Synchronization
22. Click on the Contact folder.
The Sync Contacts button is enabled.
23. Click the Sync Contacts button.
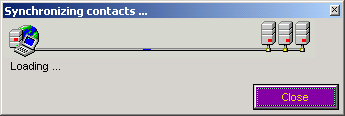
The Synchronization process is for contacts is executed.
24. Click on the Calendar folder.
The Sync Contacts button is enabled.
25. Click the Sync Calendar button.
The Synchronization process for the calendar is executed.
Outlook Contact Fields Verse SmartSimple Fields
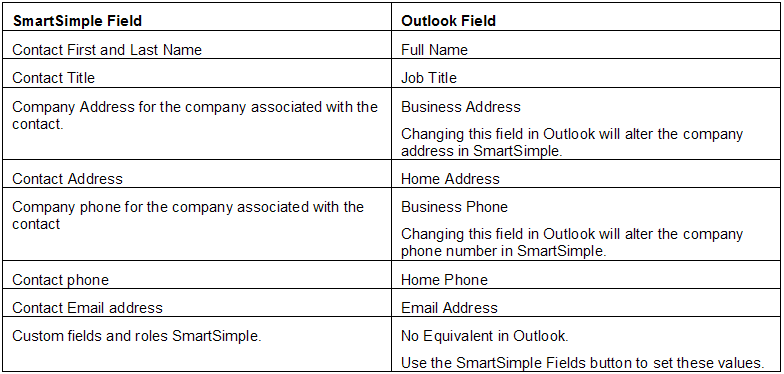
The following table shows how Outlook Contact fields are mapped to SmartSimple Contact fields.
Setting Custom Fields Values for Contacts
Once the folder has been synchronized for the fist time you can set custom field values for any contact or change their role to the extent that your SmartSimple role supports adding or changing roles.
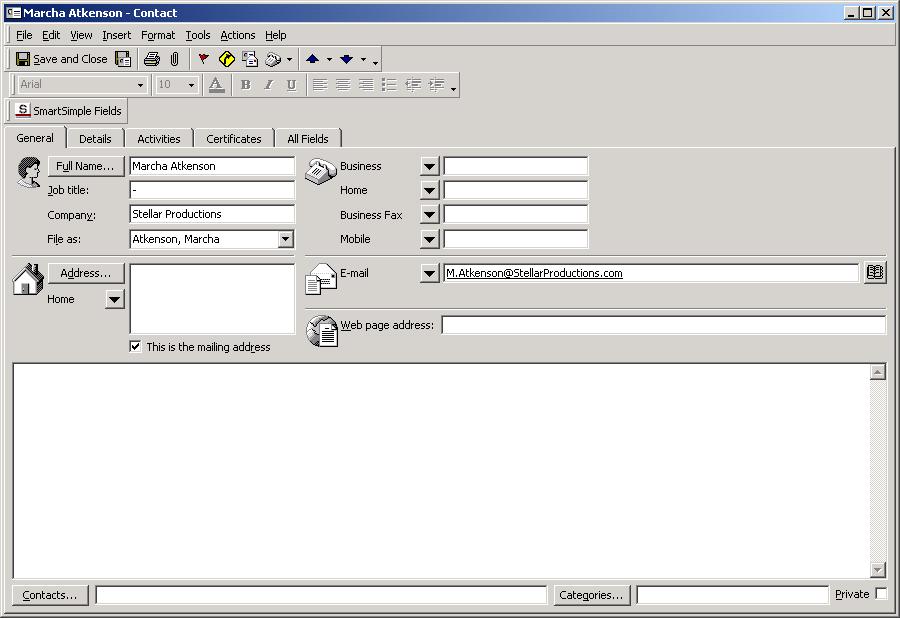
26. Double click on any contact.
The contact window is displayed.
Note the SmartSimple Fields button.
27. Click the SmartSimple Fields button.
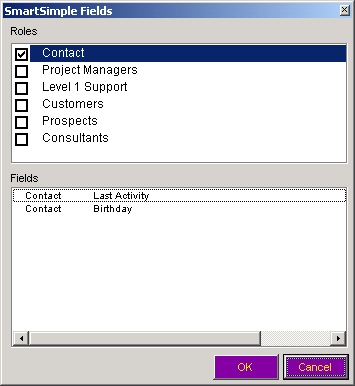
The SmartSimple Fields window is displayed.
The top pane of the window displays the contact roles and the bottom pane displays the fields associated with the selected role.
Setting Additional Contact Roles
This window is used to set additional roles for the contact.
- Current roles are indicated with a tick mark next to the role name.
- Other additional roles you can set are displayed.
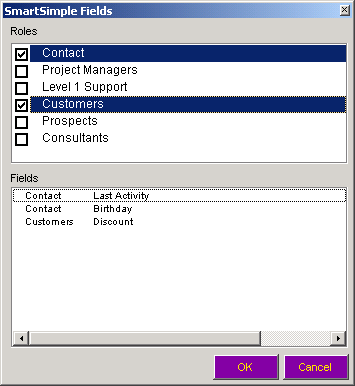
- As you select additional roles the field list will change to display any additional fields associated with the selected role.
- If roles have not been established then only custom fields associated with a contact will be displayed.
- If no custom fields are set for a role, you can still set the role for the contact.
You cannot create a new role or a custom fields in Outlook. This must be done in SmartSimple.
28. Select an additional role.
Additional fields will be displayed if they are associated with the new role.
Setting a Custom Field Value
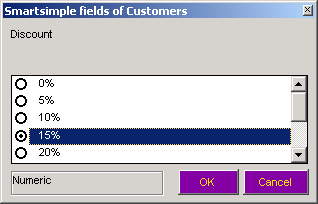
29. Double click on a field on the bottom pane to set its value.
The selection options and the validation types will be same as originally established in SmartSimple.
30. Click the OK button to save the new value.
31. Click the Save and Close button.
The contact record is updated and closed.
Updating Calendar Events
Synchronized calendar events can also have custom fields and multiple notes for each event.
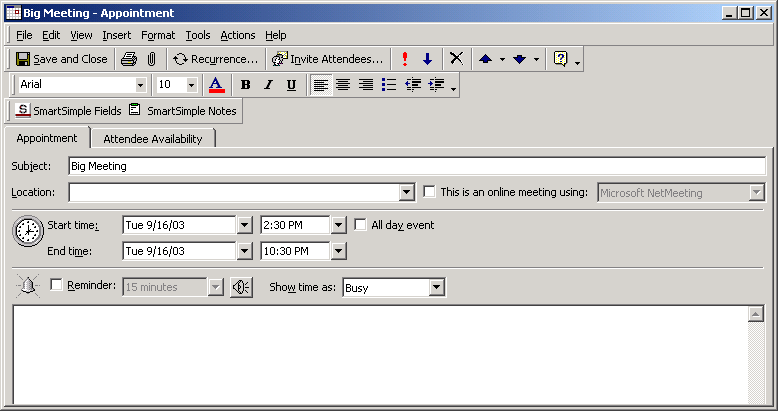
32. Create a new appointment in your SmartSimple Synchronized folder.
33. Save and redisplay the appointment.
34. Click the SmartSimple Fields button.
If any event custom fields exist, you can set their values.
Adding Event Notes
You can add multiple notes to a single event in SmartSimple. This functionality is replicated in the Outlook Calendar event.
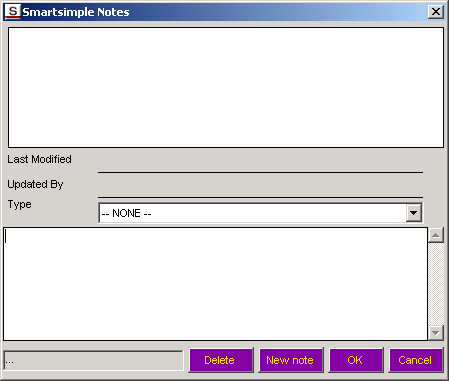
35. Click the SmartSimple Notes button.
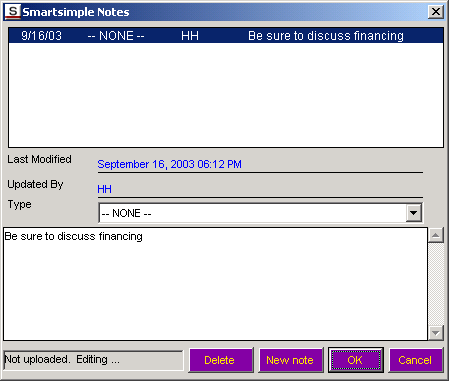
Existing notes are displayed in the top pane of the window.
A new note is composed in the bottom pane of the window.
If there are multiple types of notes with different permissions then you can select the note type form the Note Type combo box.
36. Click the New Note button.
37. Type the new Note.
38. Click the OK button.
The Note is added.
These notes will be uploaded the next time you synchronize with SmartSimple.
Reserved Fields in Outlook
The Outlook Synchronization feature uses three contact outlook fields to store the custom contact and role information.
These fields are Contact Information – Billing, Miscellaneous fields – User1 and User2.
You should not use these fields for other purposes. If you do any information that you enter will be overwritten the next type you synchronize with SmartSimple.

