Difference between revisions of "Creating User Roles"
Julia Decker (talk | contribs) |
Julia Decker (talk | contribs) |
||
| Line 4: | Line 4: | ||
The Roles & Permissions window is displayed. | The Roles & Permissions window is displayed. | ||
| + | |||
| + | [[Image:Roles.png]] | ||
2. Click the '''User Roles''' link. | 2. Click the '''User Roles''' link. | ||
The Roles window is displayed. | The Roles window is displayed. | ||
| + | |||
| + | [[Image:Roles2.png]] | ||
Each [[Role|role]] is displayed with a name, '''Edit''' button (to access the [[Role|role]] name, description, roles controlled by this role and [[Custom Fields|custom fields]]), description, [[Menu|menu]] button (to control the role menu items), portal indicator, [[Portal]] button (to create a portal view for this role) and a '''Reports''' button (to control the reports that are visible to this role). | Each [[Role|role]] is displayed with a name, '''Edit''' button (to access the [[Role|role]] name, description, roles controlled by this role and [[Custom Fields|custom fields]]), description, [[Menu|menu]] button (to control the role menu items), portal indicator, [[Portal]] button (to create a portal view for this role) and a '''Reports''' button (to control the reports that are visible to this role). | ||
3. Click the '''New Role''' tab. | 3. Click the '''New Role''' tab. | ||
| + | |||
| + | [[Image:Roles3.png]] | ||
'''Role Based – Resume & Skills Check Box''' | '''Role Based – Resume & Skills Check Box''' | ||
| Line 18: | Line 24: | ||
Enabling this check box will display a '''Skills & Resume''' tab in the contact profile as shown below. | Enabling this check box will display a '''Skills & Resume''' tab in the contact profile as shown below. | ||
| + | |||
| + | [[Image:Roles4.png]] | ||
4. Create the following [[Role|role]]: | 4. Create the following [[Role|role]]: | ||
| + | |||
| + | [[Image:Roles5.png]] | ||
5. Click the '''Save''' button. | 5. Click the '''Save''' button. | ||
The complete [[Role|role]] window is displayed. | The complete [[Role|role]] window is displayed. | ||
| + | |||
| + | [[Image:Roles6.png]] | ||
==Role Permissions== | ==Role Permissions== | ||
| Line 37: | Line 49: | ||
* Individually, by finding them in the [[Organisation Hierarchy|organisation hierarchy]] or people search window, and then setting the [[Role|role]] by using the Settings, '''Roles & Access''' [[Menu|menu]]. | * Individually, by finding them in the [[Organisation Hierarchy|organisation hierarchy]] or people search window, and then setting the [[Role|role]] by using the Settings, '''Roles & Access''' [[Menu|menu]]. | ||
* In bulk, by finding people in the [[Role|role]] screen and assigning multiple people at the same time to the role by clicking the '''Add Users''' tab. | * In bulk, by finding people in the [[Role|role]] screen and assigning multiple people at the same time to the role by clicking the '''Add Users''' tab. | ||
| + | |||
| + | [[Image:Roles7.png]] | ||
In this instance, you will set both users to the '''employee''' role. | In this instance, you will set both users to the '''employee''' role. | ||
1. Click the '''Add User''' tab. | 1. Click the '''Add User''' tab. | ||
| + | |||
| + | [[Image:Roles8.png]] | ||
As there are currently no [[User|users]] in any [[Role|role]], no users are displayed. | As there are currently no [[User|users]] in any [[Role|role]], no users are displayed. | ||
| Line 47: | Line 63: | ||
All the [[User|users]] are displayed. | All the [[User|users]] are displayed. | ||
| + | |||
| + | [[Image:Roles9.png]] | ||
3. Click the '''check box''' next to '''each''' name. | 3. Click the '''check box''' next to '''each''' name. | ||
| Line 55: | Line 73: | ||
All the [[User|users]] are added to the [[role|role]]. | All the [[User|users]] are added to the [[role|role]]. | ||
| + | |||
| + | [[Image:Roles10.png]] | ||
[[Category:System Management]][[Category:Security]][[Category:Roles]] | [[Category:System Management]][[Category:Security]][[Category:Roles]] | ||
Revision as of 15:07, 2 October 2007
There are only two fields that need to be defined for a role: the name of the role and a narrative description.
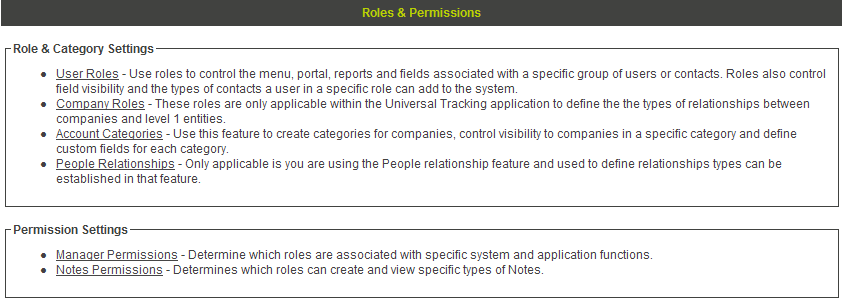
1. Click the Configuration, Roles & Permissions menu.
The Roles & Permissions window is displayed.
2. Click the User Roles link.
The Roles window is displayed.
Each role is displayed with a name, Edit button (to access the role name, description, roles controlled by this role and custom fields), description, menu button (to control the role menu items), portal indicator, Portal button (to create a portal view for this role) and a Reports button (to control the reports that are visible to this role).
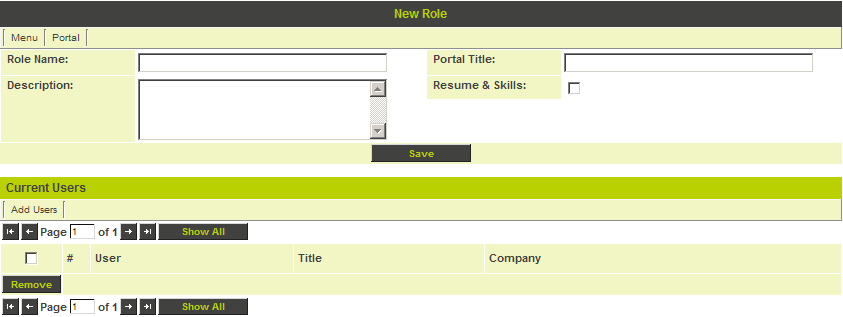
3. Click the New Role tab.
Role Based – Resume & Skills Check Box
If you are using the role to track people’s skills and resumes, you can enable the Skills & Resume check box.
Enabling this check box will display a Skills & Resume tab in the contact profile as shown below.
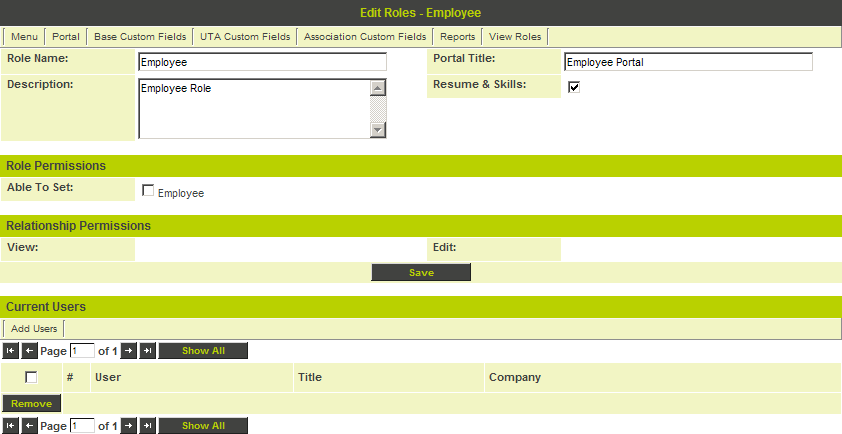
4. Create the following role:
5. Click the Save button.
The complete role window is displayed.
Role Permissions
You control which other roles a user has permission to access, by associating a role with a roles.
- For example, someone in a sales role may be able to create a customer (and associate the customer role), but not another sales person.
- In this instance, if you wished for people in the employee role to give other contacts the employee role; you would click the check box next to the employee.
Adding People to a Role
There are two ways to add people to a role.
- Individually, by finding them in the organisation hierarchy or people search window, and then setting the role by using the Settings, Roles & Access menu.
- In bulk, by finding people in the role screen and assigning multiple people at the same time to the role by clicking the Add Users tab.
In this instance, you will set both users to the employee role.
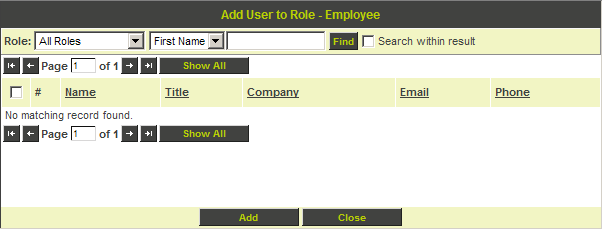
1. Click the Add User tab.
As there are currently no users in any role, no users are displayed.
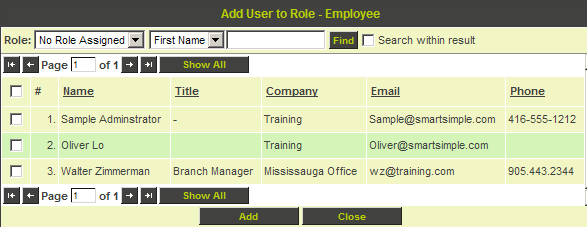
2. Change the Role to No Role Assigned.
All the users are displayed.
3. Click the check box next to each name.
4. Click the Add button.
5. Click the Close button.
