Difference between revisions of "Setting Manager Permission to the Shadow Application"
Julia Decker (talk | contribs) |
(→See Also) |
||
| (3 intermediate revisions by one other user not shown) | |||
| Line 11: | Line 11: | ||
Both [[Application|applications]] are listed. | Both [[Application|applications]] are listed. | ||
| − | 4. Set the '''Manager Permission''' to a [[Role|role]] that you are in for the '''Contracts – Customer View | + | 4. Set the '''Manager Permission''' to a [[Role|role]] that you are in for the '''Contracts – Customer View''' [[UTA]]. |
5. Click the '''Save''' button. | 5. Click the '''Save''' button. | ||
| Line 45: | Line 45: | ||
The tab bar is now displayed with '''Contracts''', '''Settings''', and '''Reports'''. For a [[User|user]] without the manager permission in the application this would be further reduced to just Contracts and Reports. | The tab bar is now displayed with '''Contracts''', '''Settings''', and '''Reports'''. For a [[User|user]] without the manager permission in the application this would be further reduced to just Contracts and Reports. | ||
| − | [[ | + | ==See Also== |
| + | * [[Benefits of a Shadow Application]] | ||
| + | * [[Creating and Enabling a Shadow Application]] | ||
| + | * [[Configuring Templates and Statuses in a Shadow Application]] | ||
| + | * [[Security Matrix and the Shadow Applications]] | ||
| + | |||
| + | {{PrevNextStart}} [[Creating and Enabling a Shadow Application]] | ||
| + | {{PrevNextMid}} [[Configuring Templates and Statuses in a Shadow Application]] | ||
| + | {{PrevNextEnd}} | ||
| + | [[Category:Universal Tracking Application]] | ||
Latest revision as of 14:08, 17 July 2013
As with all other applications, you need to have the manager permission to that application before you can access the settings page.
1. Choose the Configuration, Roles & Permissions menu.
2. Click the Manager Permissions link.
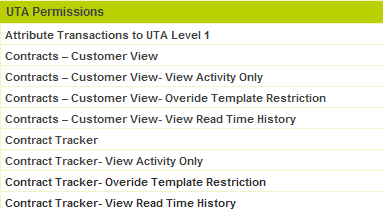
3. Scroll to the UTA section.
Both applications are listed.
4. Set the Manager Permission to a role that you are in for the Contracts – Customer View UTA.
5. Click the Save button.
6. Refresh your Browser.
The applications will be listed under the Applications menu.
7. Click the Contracts – Customer View application.
The application is displayed
8. Click the Settings tab.
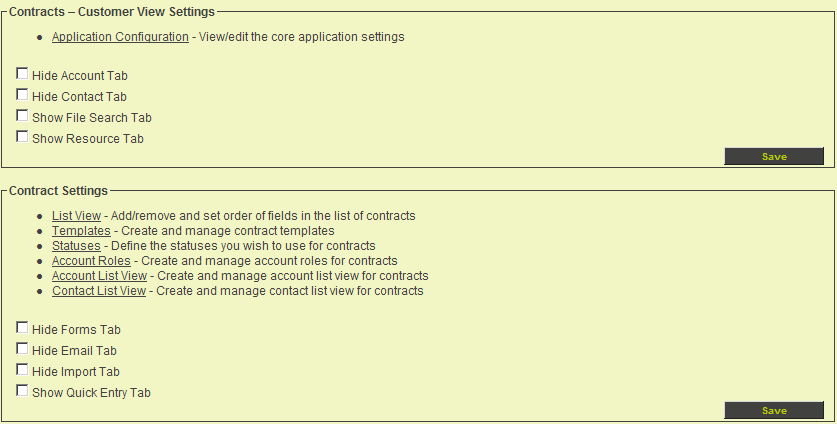
The Settings page is displayed.
There are only two main sections: General Settings and Contract Settings, as you are not using Level 2 or 3 these settings are not displayed.
As the check boxes to control the tabs are available, you can control these separately in the shadow application to the parent application.
9. Click the check boxes for the Hide Account tab, Hide Contract tab, Hide Forms tab, Hide Email tab and Hide Import tab.
10. Click any Save button.
11. Click the Application name in the left navigation bar.
The tab bar is now displayed with Contracts, Settings, and Reports. For a user without the manager permission in the application this would be further reduced to just Contracts and Reports.
See Also
- Benefits of a Shadow Application
- Creating and Enabling a Shadow Application
- Configuring Templates and Statuses in a Shadow Application
- Security Matrix and the Shadow Applications


