Payment Allocation Mapping
SmartSimple provides the ability to earmark allocations and disburse payments towards specific budgets, allowing administrators to easily set up complex budget allocation and attribution models for their users.
Administrators can bulk create Level 3 disbursement records and attach them to Level 2 budget items, all while performing various validations.
Contents
- 1 Configuration
- 2 Payment Allocation Mapping for Disbursements
- 3 Payment Allocation Mapping for Allocations
- 4 Mapping between Fiscal Year Budget L1 and Funding Category L2 for Disbursements
- 5 Mapping between Fiscal Year Budget L1 and Funding Category L2 for Allocations
- 6 Mapping Disbursement Status
- 7 Mapping Allocation Status
- 8 See Also
Configuration
Previously the Payment Allocation Mapping settings were accessible under Level 3 settings. Currently it has moved to the Level 2 type under "Payment Allocation Mapping" tab.
This feature is configured on the Type Settings page.
In this example, a Level 3 type called "Disbursement" will link a payment with a uta provider record.
Click the Payment Allocation Mapping tab under the Type Settings for Level 2.
This feature consists of 3 parts to complete configuration.
Payment Allocation Mapping for Disbursements
The Payment Allocation Mapping tab will appear at the top of the page. Map the provider uta to the budget manager to define which uta is tracking the disbursed funds.
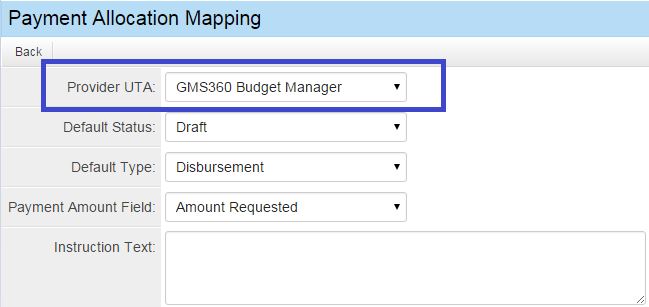
For Provider UTA: set this to Budget Manager uta.
For Default Status: set to Draft.
For Default Type: select Disbursement L3.
For Payment Amount Field: set to Amount field.
For Subject enter content, including Variables, to appear in the payment header in the quick payments screen.
For Instruction Text enter content to appear in quick payments screen.
For Budget Calculation select Committed Amount Reduction. Note: Choosing this setting applies the following formula to the Available Amount, Obligated Allocation - Paid.
Hit Save.
Payment Allocation Mapping for Allocations
The Payment Allocation Mapping tab will appear at in the header of the Level 2 type settings for Budget Allocation. Map the provider uta to the budget manager to define which uta is tracking the allocated funds.

For Provider UTA: set this to Budget Manager uta.
For Default Status: set to Draft Allocation.
For Default Type: select Allocation L3.
For Payment Amount Field: set to Allocation Amount field.
For Subject enter content, including Variables, to appear in the payment header in the quick payments screen.
For Instruction Text enter content to appear in quick payments screen.
For Budget Calculation select Constant Committed Amount. Note: Choosing this setting applies the following formula to the Available Amount, Adjusted-Tentative-Committed.
Hit Save.
Mapping between Fiscal Year Budget L1 and Funding Category L2 for Disbursements
Specify the fields in budget manager that the system updates when disbursement record is created. Key piece of information about this feature is that the L2 funding category shows funding released for disbursements of that fund, and the L1 budget shows the total funds released for all of the funding categories.
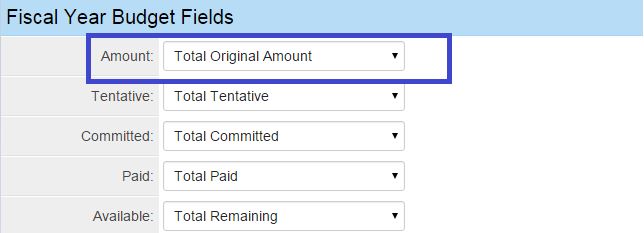
For Amount: set this to Budget Manager Total Original Amount field.
For Tentative: set this to Budget Manager Total Tentative Amount field.
For Committed: set this to Budget Manager Total Committed field.
For Paid: set this to Budget Manager Total Paid field.
For Available set this to Budget Manager Total Balance Remaining field.
Hit Save.
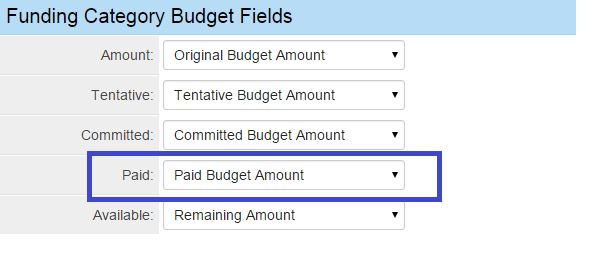
For Amount: set this to Budget Manager Original Amount field.
For Tentative: set this to Budget Manager Tentative Amount field.
For Committed: set this to Budget Manager Committed field.
For Paid: set this to Budget Manager Paid field.
For Available set this to Budget Manager Balance Remaining field.
Hit Save.
Mapping between Fiscal Year Budget L1 and Funding Category L2 for Allocations
Specify the fields in budget manager that the system updates when allocation record is created. Key piece of information about this feature is that the L2 funding category shows funding earmarked for allocation from that fund, and the L1 budget shows the total funds earmarked for all of the funding categories.
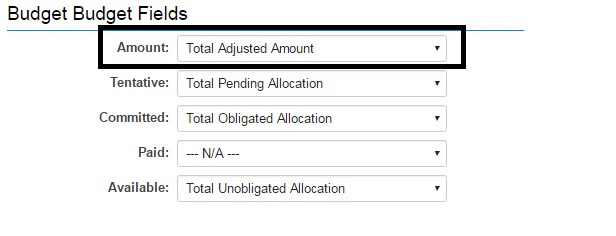
For Amount: set this to Budget Manager Total Adjusted Amount field.
For Tentative: set this to Budget Manager Total Pending Allocation field.
For Committed: set this to Budget Manager Total Obligated Allocation field.
For Available set this to Budget Manager Total Un Obligated Allocation field.
Hit Save.
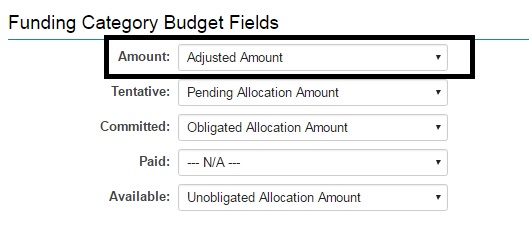
For Amount: set this to Budget Manager Adjusted Amount field.
For Tentative: set this to Budget Manager Pending Allocation Amount field.
For Committed: set this to Budget Manager Obligated Allocation Amount field.
For Available set this to Budget Manager Unobligated Allocation Amount field.
Hit Save.
Mapping Disbursement Status
It's important to note the key here is when status of the disbursement record changes it controls when fields are updated in budget manager.
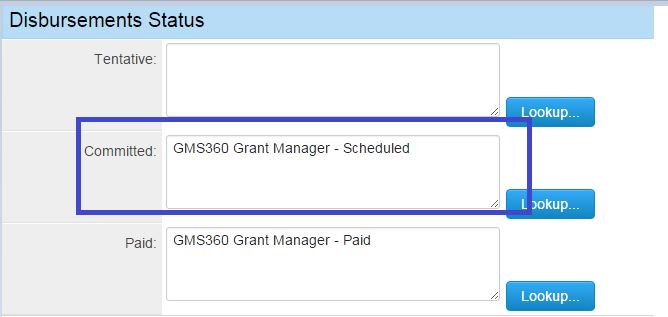
For Tentative: set this to the default Disbursement status when the record is created.
For Committed: set this to the Disbursement status for Cheque Pending or Scheduled.
For Paid: set this to the the Disbursement status for when funds have been released i.e. Paid.
Hit Save.
Mapping Allocation Status
It's important to note the key here is when status of the Allocation record changes it controls when fields are updated in budget manager.
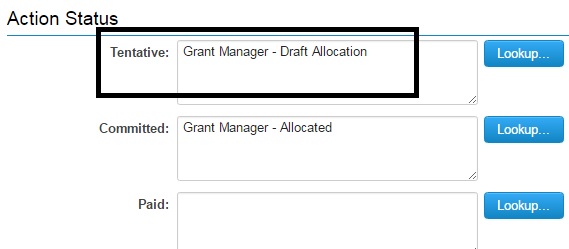
For Tentative: set this to the default Allocation status when the record is created.
For Committed: set this to the Allocation status for Allocation Completed.
Hit Save.