ORCID Reviewer Attribution Integration
Contents
Overview
Configuration – Essentials
Start here to Enabling ORCID Within Your System.
Configuration - Advanced
UTA Settings
Fields Setup
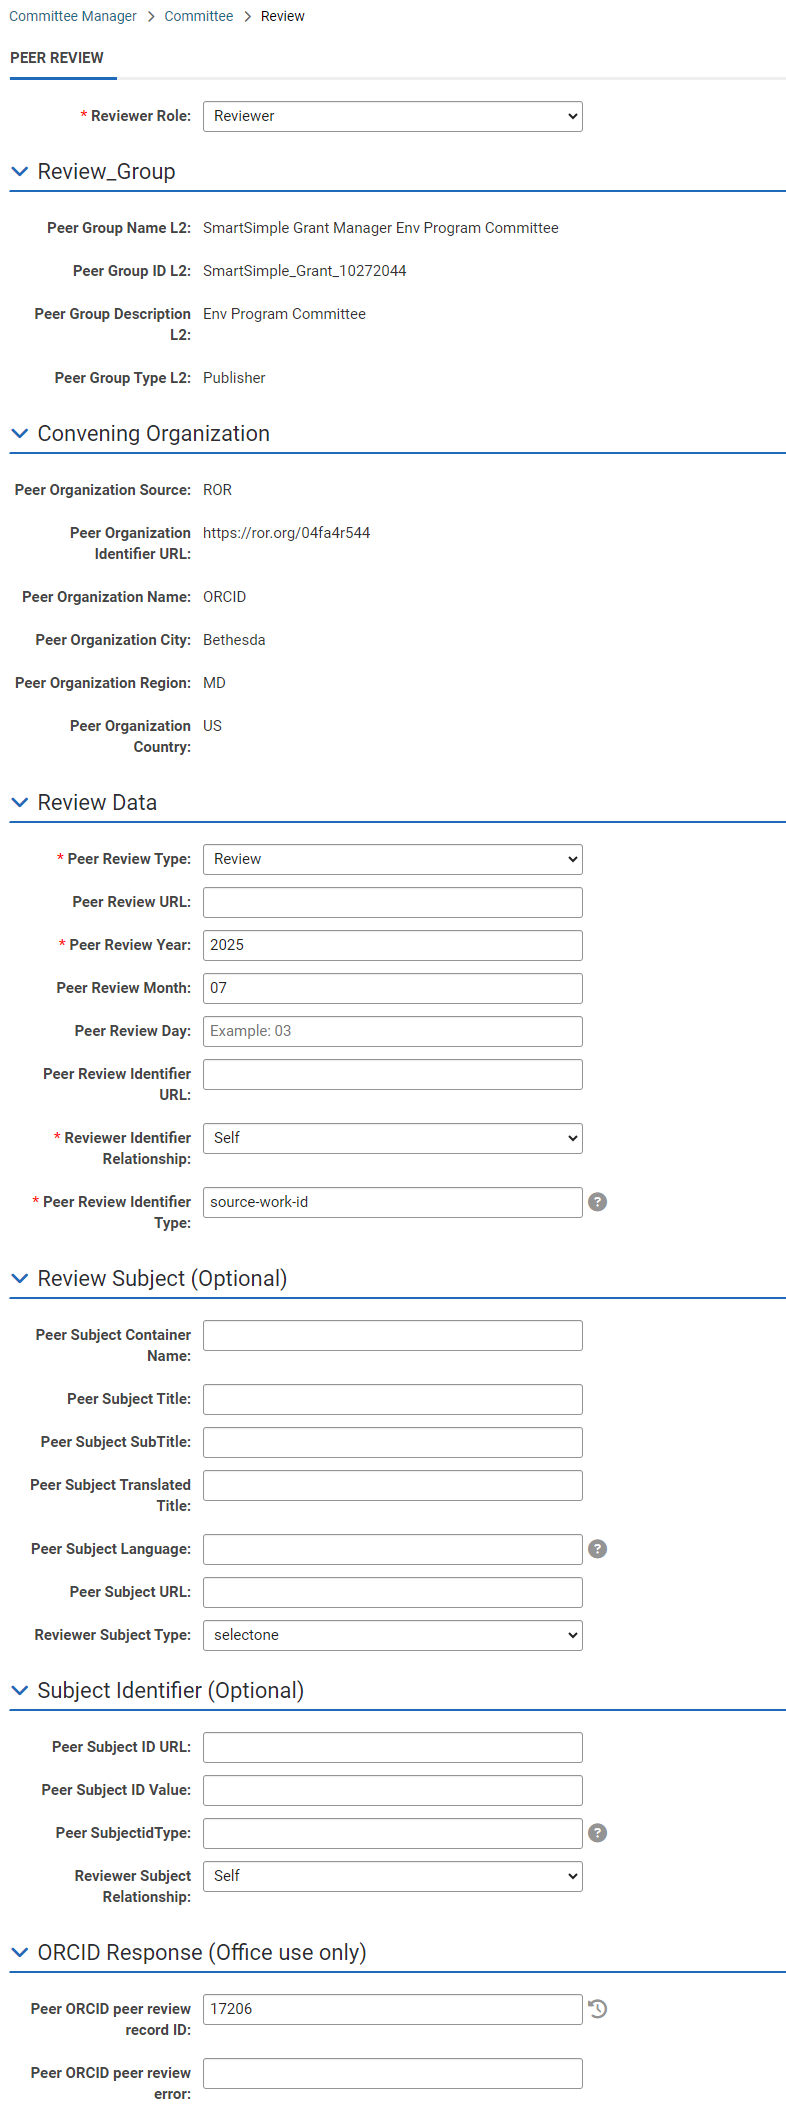
Navigate to the UTA where you want to configure your fields mapping used for reviewer attribution and add all necessary fields for mapping. Usually this is a L2 object e.g. review form as per example screenshot below.
In the example above, we have only set a few mandatory fields. In your setup, you can decide which information you want to pass to the ORCID. In the section below, you will see which fields should always be mandatory from the integration setup perspective.
Connection Setup
- Go to the UTA settings page where you have created all attribution fields.
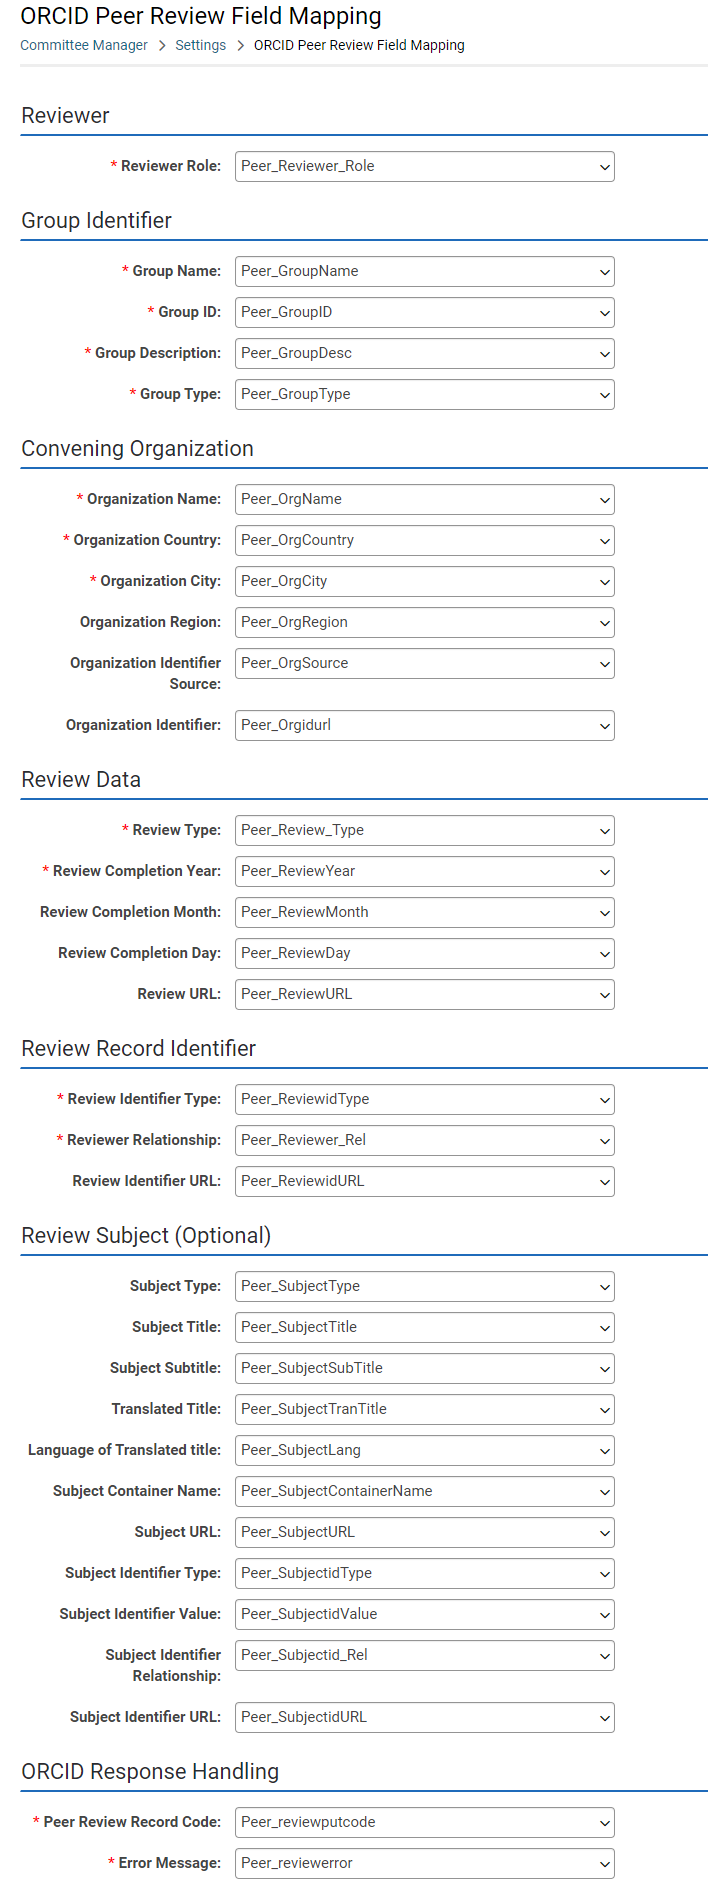
- Go to Settings > Connectivity > ORCID Peer Review Field Mapping.
This mapping page is part of an integration designed to allow research clients to give public recognition to researchers who have contributed to peer review activities. Research organizations can utilize this integration to post details of a researcher's participation in peer reviews to their ORCID profile. If the owner of a Level 2 peer review has their ORCID profile authorized in the system, the peer review activity will be added to their ORCID profile under the peer review section. The peer review section does not appear on an ORCID profile until an organization has added at least one peer review activity.
To learn more about ORCID, visit orcid.org. To learn more about peer reviews in ORCID, visit support.orcid.org.
| Reviewer Role | |
| Reviewer | Use this field to indicate the role the individual assumed during the peer review process. We recommend mapping to a Level 2 custom field with the following permitted values: "chair", "editor", "member", "organizer", "reviewer". |
| Title of funded project | |
| Language of this title | Matches ORCID values. Field values should be limited to ORCID specified language codes. |
| Currency code | Matches ORCID values. Field values should be limited to ORCID specified currency codes. |
| Total Funding Amount | |
| Funding Agency Identifier | ORCID verifies this link with the CrossRef list. |
| Funding Agency Name | ORCID uses the identifier link to identify the funding organization. |
| Funding Agency City | |
| Funding Agency Country | Matches ORCID values. |
| Record Identifier Type | Matches ORCID values. For awards, choose “grant_number”. |
| Record Relationship | Matches ORCID values. Field values should be limited to: self, part-of |
| Contributor role | Field values should be limited to: lead, co-lead, supported-by, other-contribution |
| Contributor Fund Code | Stores uploaded ORCID fund code. If funding data is uploaded to contributor's ORCID profile successfully, a fund code is returned as the unique identifier of this fund data on user's profile. |
| Exclude Contributor | Value should be 0 or 1. A value of 0 or empty means contact will be exported to ORCID as contributor of the fund record. A value of 1 means contact will not be exported to ORCID. |
| Error Message | Stores error message returned from ORCID |
Once the mapping is set press the Save button to update the integration settings.
Workflow Setup
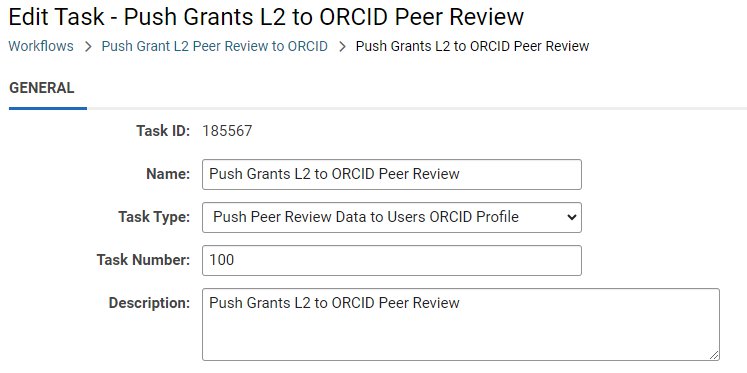
Information is published to ORCID using a workflow object (with the Type set to "Tracking Activities") and a Task Type called: Push Peer Review Data to User ORCID Profile.
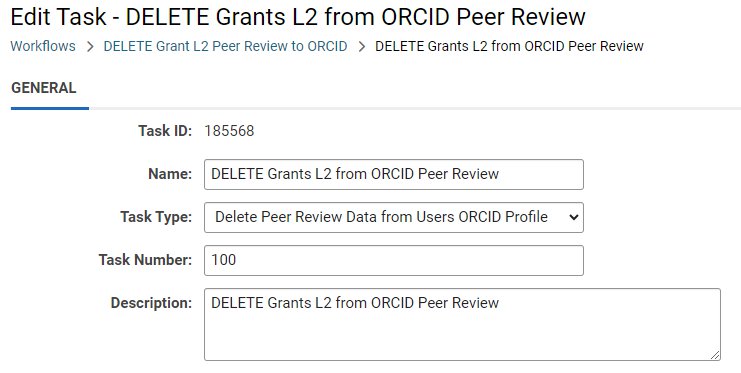
Peer reviews may be removed from a user's profile using the workflow Task Type called: Delete Peer Review Data from Users ORCID Profile.
Note: Each review activity combines three elements: information about the reviewer, information about the organization sponsoring (or convening) the review, and information about the review.
Publishing Review to the ORCID
- Navigate to Workflows in the system.
- Create a new workflow by clicking on the + button.
- Set System Call Identifier name so you can refer to the workflow later. This name must be unique across all workflows.
- Add a new task type Push Peer Review Data to Users ORCID Profile.
- Save the task.
- Go back to the Tasks list and connect all tasks from start to complete.
Removing Published Review from ORCID
- Navigate to Workflows in the system.
- Create a new workflow by clicking on the + button.
- Set System Call Identifier name so you can refer to the workflow later. This name must be unique across all workflows.
- Add a new task type Delete Peer Review Data from User ORCID Profile.
- Save the task.
- Go back to the Tasks list and connect all tasks from start to complete.
System Call Setup
Now that you have workflows setup you can create a system call button which will be available to the end user to trigger relevant ORCID action from each review activity.
In order to add a system call you need to add a custom field to a review activity in your system.
- Navigate to the UTA where you want to add the system call too.
- Go to the L2 tab and click on the Custom Fields link.
- Add a new custom field type Special - Browser Script and permission it so it is visible where required in your business process.
- See the Trigger Type to On Demand.
- Add Custom Script to call your preconfigured workflow.
<! --SysCall_workflow(@objtype@,@objid@,"system call name")-->
alert("custom completion message.")
- system call name - System Call Identifier of the workflow you want to run.
- custom completion message. - this text will displayed after the workflow has run.


