Arcadia X - Building a Role Based Portal
Building a Role-Based Portal with Arcadia X
1. Click on Roles and Security in the Configuration section and then click on "User Roles". The Roles window is displayed.
NOTE: Arcadia X portals can be created for new and existing user roles.
2. Create a new role or select an existing role that will have access to the Arcadia X portal. (In this example we create a new role called "Reviewer ArcadiaX2") The Edit Roles window is displayed.
3. Click “Portal” tab, select “Arcadia X” from the Style drop-down box, select appropriate Icon Size, click Save.
4. Click “Arcadia X” Tab, add a checkmark to “Activate”, select size of logo, press Save
Click on the Preview button at the bottom of the page to review the newly created Arcadia X Portal with Logo, user’s name, and logout option included in the header.
Configuring User Menu Items
The User Menu are those items that will appear along the top right corner of the web browser. These links can link to the user profile, control the language displayed, or link to a specified custom page. Header links can be displayed across the top of the browser or within a drop down list.
Under the User Menu section → Click Add button.
Select the “Link Type”:
- Custom - Add links to pages using URL from within the system
- Drop Down - Allows the addition of new dropdown menus with custom links
- Language - Adds the language switching options
- User Profile - Adds a link to the User Profile page
- Company Profile - Adds a link to the Company Profile page
Additional options include:
- Caption - The text entered here will be displayed at the link text
- Description - Used to store a general description for the user menu item
- Display Order - Determines the order in which the link is displayed in the header
- URL - The URL address of the page that will be returned by the custom. Only appears for Custom Link Type.
- Language Options- Displays list of language switching options. Only appears for Language Link Type.
Configuring Main Menu Items
The Main Menu items are the main navigation links on the Arcadia X portal.
Under the Main Menu section → Click the Add button.
Complete all appropriate fields:
- Caption - This will be the text used for the navigation link* Description - Used to store a general purpose for the navigation link
- Description - User to store a general description of the main menu item
- Display Order - Determines the order in which this navigation link will be displayed
- Content Type: three options:
- Single Page - Creates a page using the URL provides from within the system
- Sections - Allows a page to be segmented in sections / or a grid displaying different information
- Sub Tabs - Allows the addition of new dropdown menus with custom links
- URL: The URL address of the page that will be returned by the navigation link (for the Single Page - Content Type)Different Content Types:
Content Type Samples
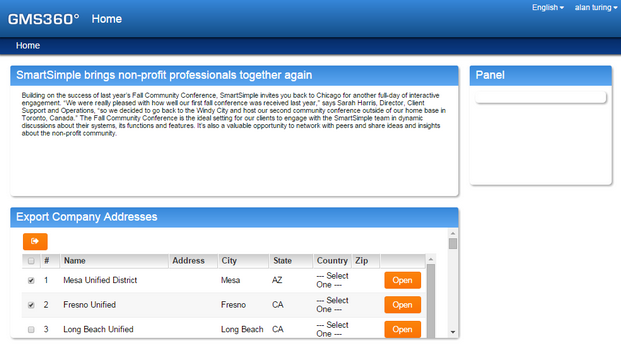
Example of the Action Tab (Caption = Home) using Content Type: "Sections" (below)

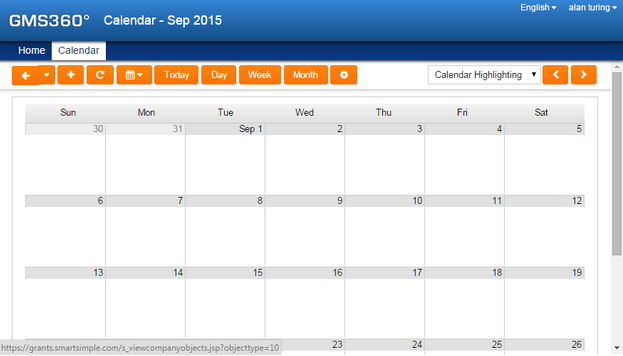
Example of the Action Tab (Caption = Calendar) using Content Type: "Single Page" (below)

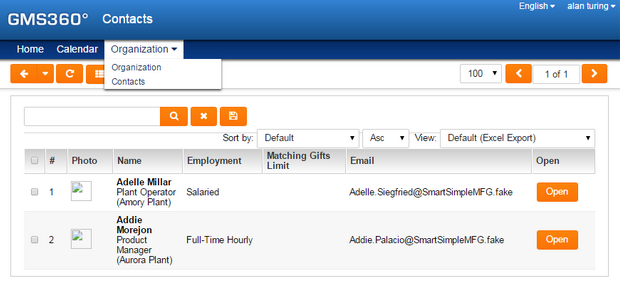
Example of the Action Tab (Caption = Organization) using Content Type: "Sub Tabs" (below)


