Difference between revisions of "Adding a Chart to the Pin Board"
From SmartWiki
| Line 30: | Line 30: | ||
This report will be refreshed for each [[User|user]] as they view the pin board. You can use the same technique to add the report [[URL]] to a [[Custom Fields|custom field]] – type '''Text – Display only'''. | This report will be refreshed for each [[User|user]] as they view the pin board. You can use the same technique to add the report [[URL]] to a [[Custom Fields|custom field]] – type '''Text – Display only'''. | ||
| + | |||
| + | {{PrevNextStart}} [[Creating Charts and Dashboards - Overview]] | ||
| + | {{PrevNextMid}} [[Setting a Chart as a Custom Field]] | ||
| + | {{PrevNextEnd}} | ||
| + | |||
[[Category:Reports]][[Category:Pin Board]] | [[Category:Reports]][[Category:Pin Board]] | ||
Revision as of 14:24, 26 April 2013
You can use the Chart URL and add the chart to the pin board.
1. Edit the Pie Chart.
2. Select the Chart URL.
3. Copy to the Clipboard (Control + C).
4. Click the Communications, Pin Board menu.
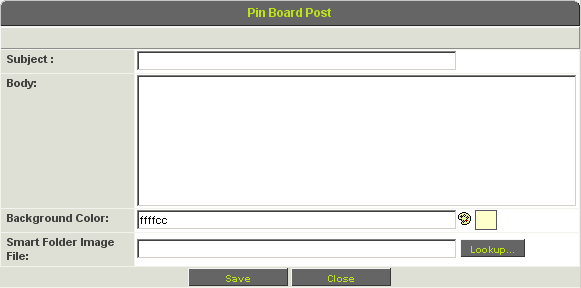
5. Click the New Post tab.
6. Set the Subject to Employee Stats.
7. Paste the Report URL into the body of the Post.
8. Click the Save button.
9. Click the Close button.
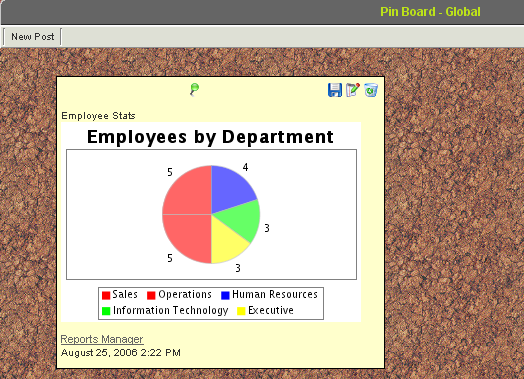
The chart has been added to the pin board.
This report will be refreshed for each user as they view the pin board. You can use the same technique to add the report URL to a custom field – type Text – Display only.


