Configuring Templates and Statuses in a Shadow Application
The system does not assume that you would want to expose all the same templates and statuses in the shadow application that you have created in the original application.
So before you can use the shadow application it is necessary to define exactly which templates and statuses are available.
1. Click the Settings tab.
2. Click the Templates link.
No template from the original application is displayed. But you can create new templates and link each template to a template in the parent application.
The parent application templates are listed in the combo box.
This is useful if you wish to change the language of the template name in a shadow application used to provide access in another language. It can also be used if you wish to change the name of the template for a different group of users.
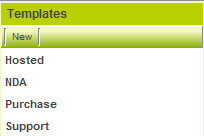
3. Create the following templates:
The complete list will look as follows:
Next you will need to map the statuses in the original application into new statues names in the shadow application. Again this is useful when changing languages.
4. Click the Settings tab, Statuses link.
As with the templates, you link each status that you wish to make available in the shadow application to a status in the parent application.
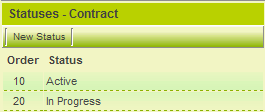
5. Create the following statuses:
The complete list will look as follows:
Only two statuses are used in order to restrict the contracts that can be displayed within the shadow application.
Note that any Submit Buttons defined on statuses on the parent application will not be displayed in the shadow application.
Assigning Statuses to Templates
Even though this is a shadow application it is necessary to assign specific statuses to specific templates.
1. Assign both statuses to each of the templates that you previously created.
See Also
- Benefits of a Shadow Application
- Creating and Enabling a Shadow Application
- Setting Manager Permission to the Shadow Application
- Security Matrix and the Shadow Applications


