ORCID Reviewer Attribution Integration
Contents
Overview
ORCID integration in SmartSimple Cloud streamlines the grant application process for researchers by enabling the populating of their professional review summary to ORCID profiles. This automation saves time, reduces errors, and minimizes administrative burden, allowing researchers to focus more on their research activities.
For research funding organizations, this integration offers improved data quality and accuracy. By leveraging ORCID’s verified data, these organizations can ensure precise information for funding decisions, reducing the need for extensive data verification.
In the peer review process, ORCID integration links reviewers’ expertise and histories with their ORCID iDs, ensuring appropriate matching to grant applications. This improves the relevance and quality of reviews. Additionally, ORCID allows peer reviewers to include their reviewing activities in their ORCID records, providing professional recognition and encouraging more researchers to participate in the peer review process.
The ORCID API is essential for the integration process, enabling real-time access to researchers’ ORCID records. This facilitates authentication, data synchronization, and continuous updates within grant management systems. By automating these tasks, the API enhances user experience for researchers and administrators, ensuring accurate and up-to-date information.
In the following sections, we will describe how to configure this integration in the SmartSimple Cloud system.
Configuration – Essentials
Start here to Enabling ORCID Within Your System.
Configuration - Advanced
UTA Settings
Fields Setup
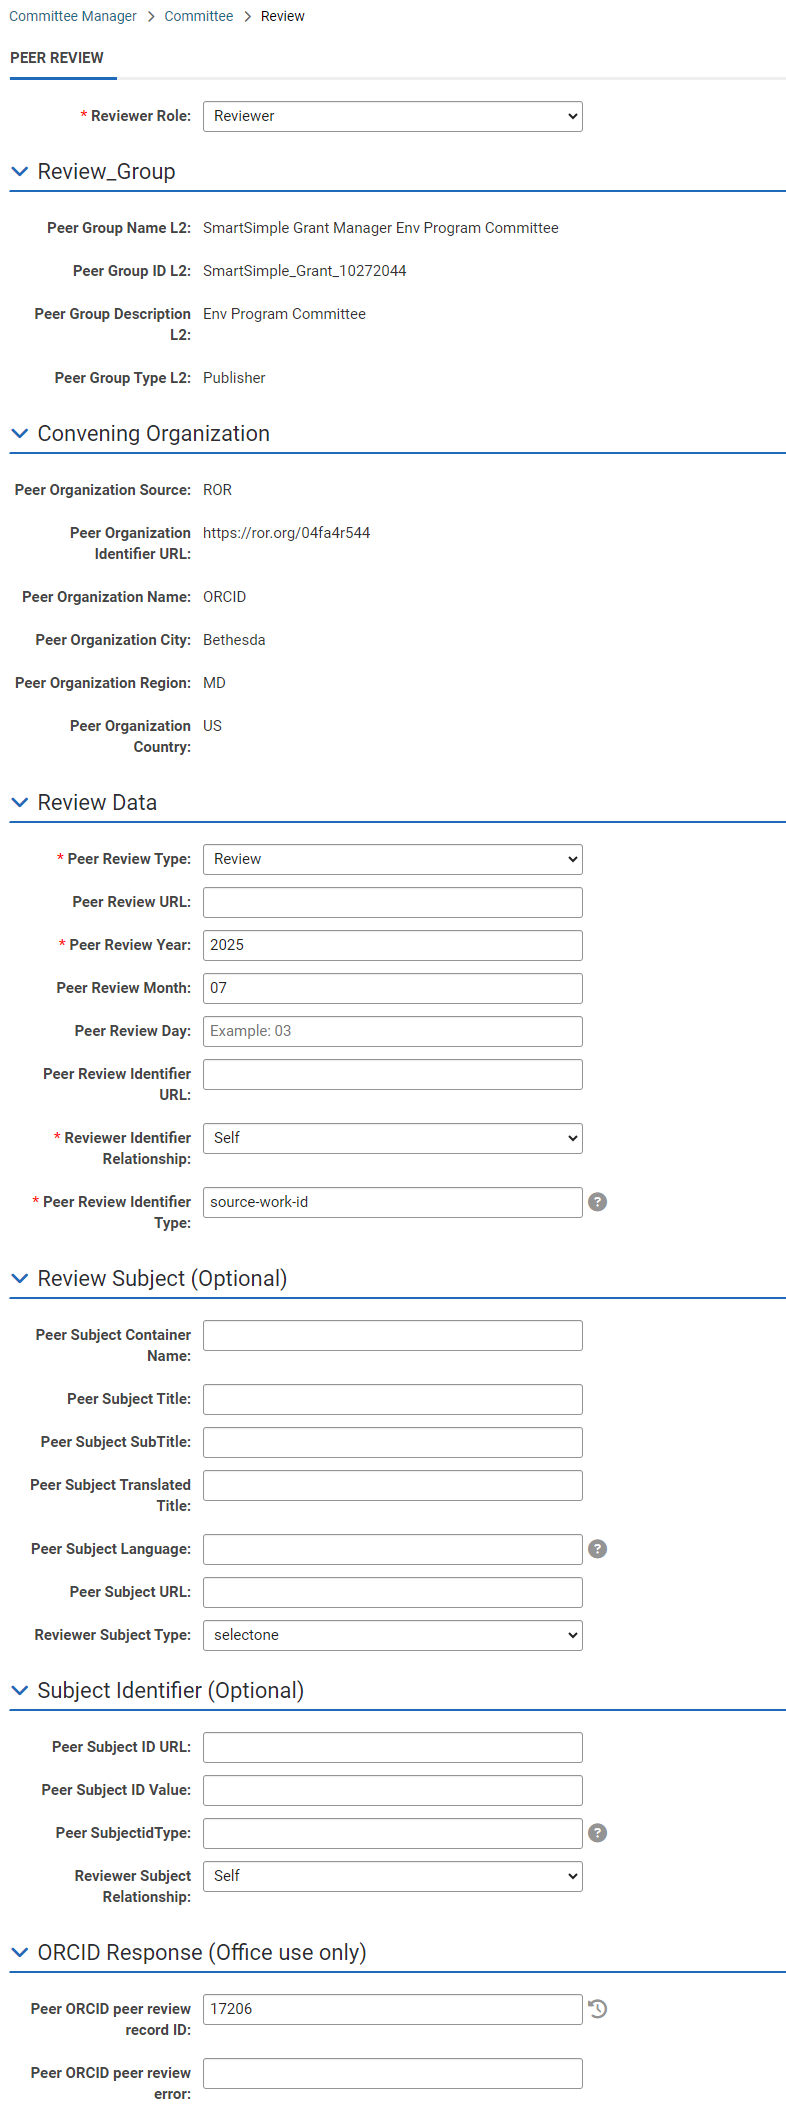
Navigate to the UTA where you want to configure your fields mapping used for reviewer attribution and add all necessary fields for mapping. Usually this is a L2 object e.g. review form as per example screenshot below.
In the example above we have only set a few mandatory fields. In your setup, you can decide which information you want to pass to the ORCID. In the section below you will see which fields should always be mandatory from the integration setup perspective.
Connection Setup
- Go to the UTA settings page where you have created all attribution fields
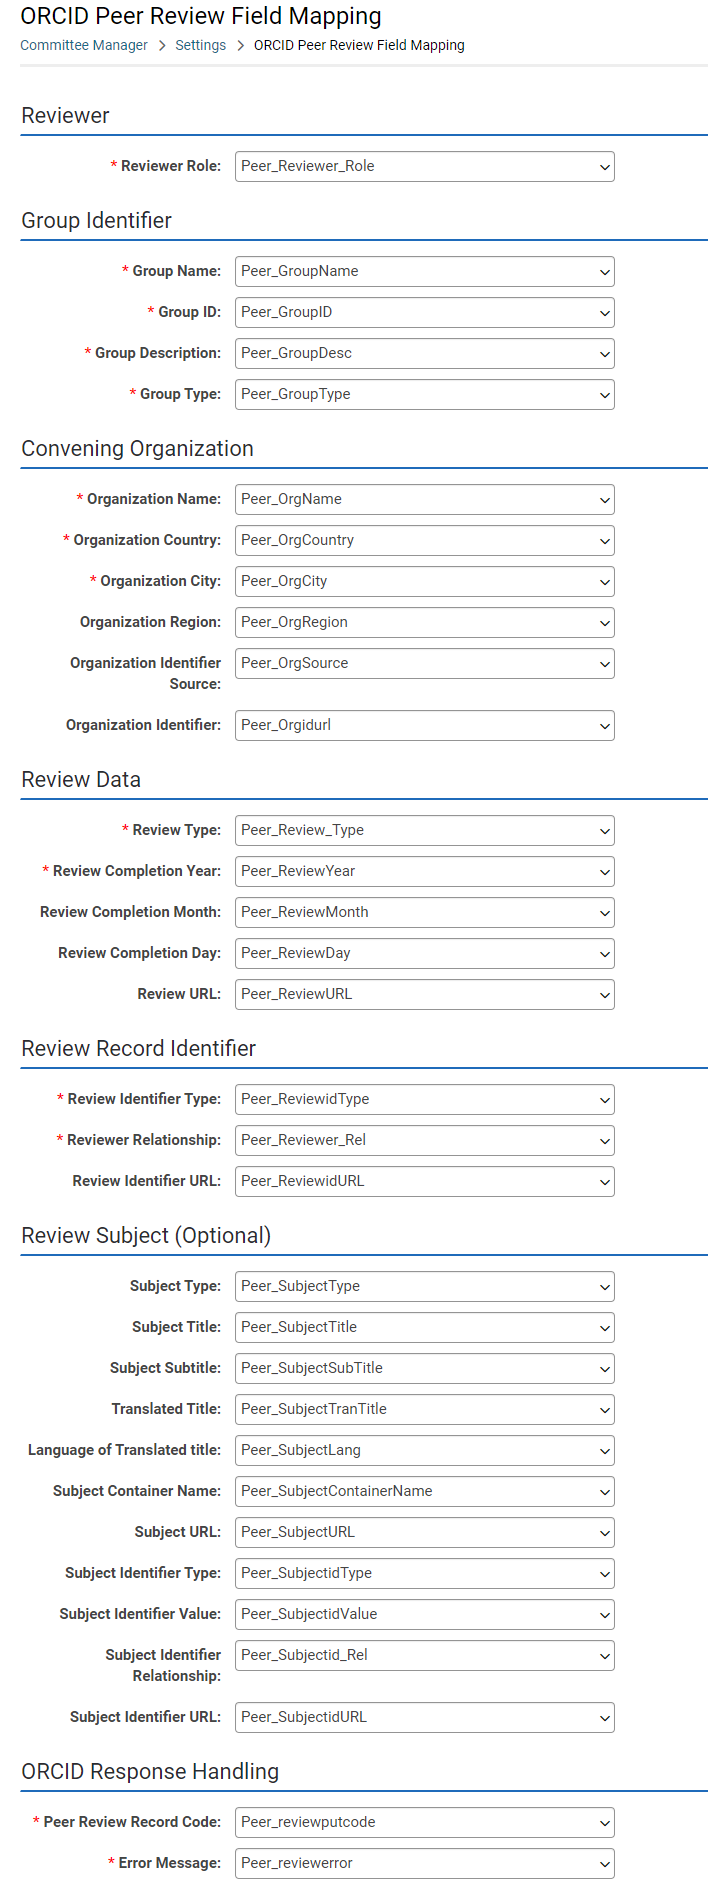
- Go to Settings > Connectivity > ORCID Funding Field Mapping.
Not all fields are mandatory to complete.
Mandatory fields are described below
| Funding type | Matches ORCID values. Field values should be limited to: award, contract, grant, salary-award. |
| Title of funded project | |
| Language of this title | Matches ORCID values. Field values should be limited to ORCID specified language codes. |
| Currency code | Matches ORCID values. Field values should be limited to ORCID specified currency codes. |
| Total Funding Amount | |
| Funding Agency Identifier | ORCID verifies this link with the CrossRef list. |
| Funding Agency Name | ORCID uses the identifier link to identify the funding organization. |
| Funding Agency City | |
| Funding Agency Country | Matches ORCID values. |
| Record Identifier Type | Matches ORCID values. For awards, choose “grant_number”. |
| Record Relationship | Matches ORCID values. Field values should be limited to: self, part-of |
| Contributor role | Field values should be limited to: lead, co-lead, supported-by, other-contribution |
| Contributor Fund Code | Stores uploaded ORCID fund code. If funding data is uploaded to contributor's ORCID profile successfully, a fund code is returned as the unique identifier of this fund data on user's profile. |
| Exclude Contributor | Value should be 0 or 1. A value of 0 or empty means contact will be exported to ORCID as contributor of the fund record. A value of 1 means contact will not be exported to ORCID. |
| Error Message | Stores error message returned from ORCID |
- Once the mapping is set press the Save button to update the integration settings.
Workflow Setup
- Navigate to Workflows in the system.
- Create a new workflow by clicking on the + button.

