Configuring the Claimant Form
Overview
In addition to using the SmartSimple HCAI gateway to transfer OCF forms to HCAI you can also use this feature to transfer claimant information.
This feature can be used by insurers and clinics wishing to activate a claim with HCAI from their instance of SmartSimple.
The process to configure this feature is similar to the activation process previously outlined for the integration of OCF form:
- Enable HCAI integration within the application.
- Configure the HCAI integration feature with your HCAI facility ID and integrate username and password.
- Map the claimant fields to the claimant form.
Optionally you can use the Claimant Bulk Upload feature to load a set of claimant records to HCAI.
This article assumes that you have enabled HCAI integration and added your username and password.
Configuring the Claimant Form
The Claimant form field mapping is accessed through the Application Settings tab.
1. Click the Settings tab in the Referral Management System.
The Settings page is displayed.
2. Click the HCAI Settings link.
The HCAI Settings page is displayed.
3. Scroll to the Claimant Settings section.
Two options are available: Claimant Field Mapping and Claimant Batch Processing.
4. Click the Claimant Field Mapping link.
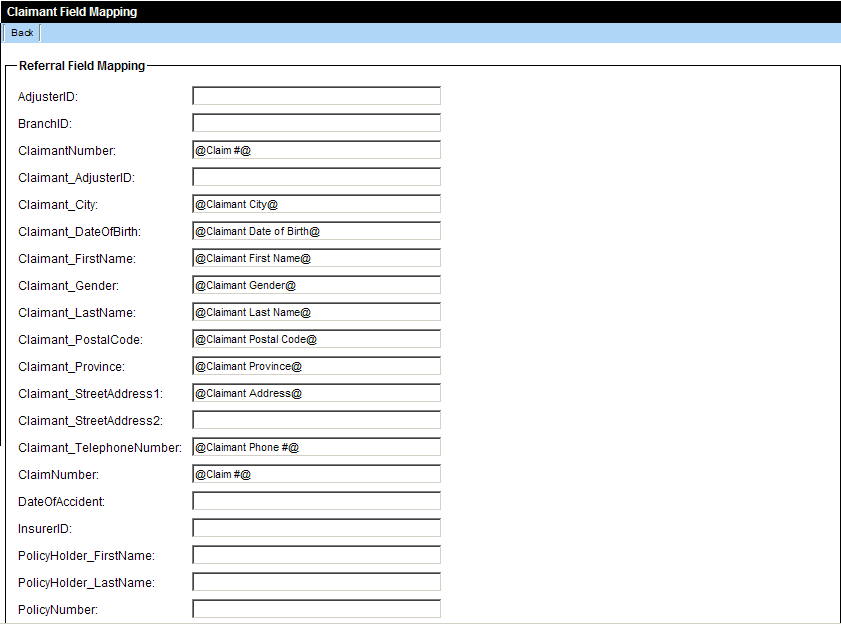
The Claimant Field Mapping page is displayed.
- The system is pre-configured to map the standard fields to the OCF-21B fields.
- SmartSimple fields are referenced in the format @field name@
- All the fields required to map the claimant information can be mapped from the Level 1/case/Referral level.
- If you wish to set a field to a constant you can just enter the constant. For example insurer ID can be set to your HCAI designated insurer ID number.
5. Review and modify the fields as required.
6. Click the Save button.
7. Click the Back button.

