People
Contents
Searching Overview
You can search for people and companies from a variety of different locations within the system.
| Menu or Application | Search For |
| Organization, Search People | People: internal and external, related companies, standard and custom fields. |
| Communications, Contacts | External people only - limited search capabilities. |
| Universal Tracking Application > Contact Tab | Same page as the Search People page. |
| Universal Tracking Application > Company Tab | Same functionality as the Search People page, but with companies. |
| Sales Tracking Application > Company Tab | Same page as the Company tab in the UTA |
| Sales Tracking Application > Contacts Tab | Same page as the Search People page |
| Sales Tracking Application > My Contacts | Limited to contacts associated with companies where the current user is the owner. |
Using the Search People Menu
The Search People page is generally the most common page used to search for people and companies.
1. Click the Organisation, Search People menu.
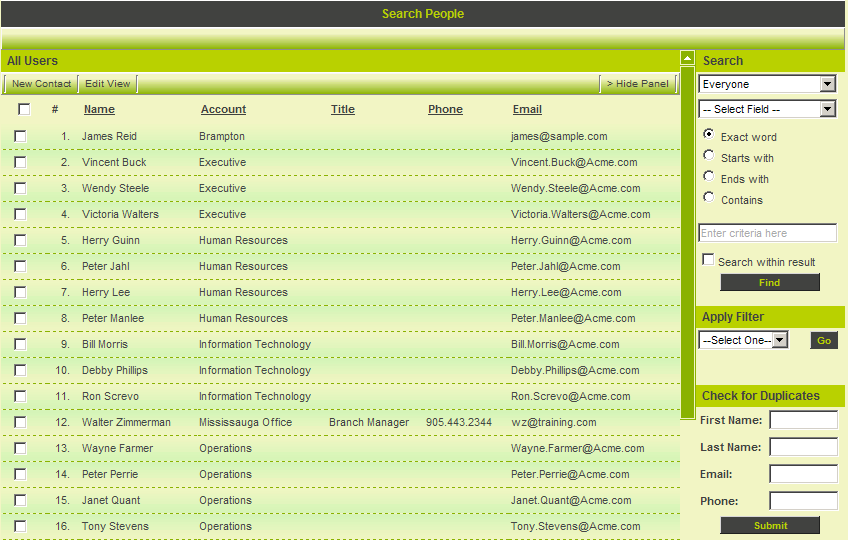
The Search People page is displayed.
All contacts are displayed. This includes internal and external people. If there are security rules in place such as manager permission – view own accounts only, then not all contacts will be displayed.
The page is divided into a number of areas:
- People List – this area will display people based on the selection criteria. Initially all contacts are displayed. The columns displayed for each person is controlled by the Edit View tab – only available to a Local User Administrator or Global User Administrator.
- If you have in excess of 50,000 contacts in the system we recommend that you suppress the All Contacts view and only show the contacts that are selected by the application of a search criteria. You disable this list by using the Global Settings, User & Contact Settings, Disable Preload People List.
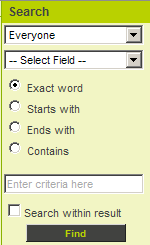
- Search Window – this area is used to set the criteria for searching.
- Apply Filter – You can save a search as a filter and apply without recreating the search.
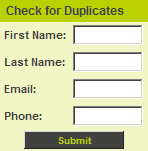
- Check for Duplicates – You can check for duplicates and create new contacts though the Check for Duplicates section of the window.
- Sorting the Contact List - You can sort the contact list by clicking on the heading above the column you wish to sort by. Initially, contacts will be displayed in the sequence defined by the Contact List View.
Searching for Contacts
When you wish to search for contacts you use the Search text box.
Contact Type Combo Box
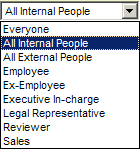
The first combo box lists the types of contacts;
- Everyone – means both internal and external contacts.
- All Internal People – restricts the searching to just internal contacts
- All External People – restricts the searching to just external contacts
- Selecting a role – restricts the search to just contacts in that role.
Contact Field Combo Box
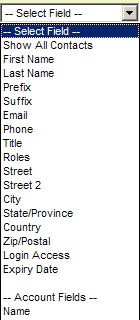
The second combo box lists the fields that you can search.
The contents of this combo box will change based on the type of contact that you select from the first combo box.
- Everyone – all standard fields for contacts and companies are selectable.
- All Internal People – all standard fields for internal contacts and companies are selectable plus any custom fields that have been added specifically to internal people.
- All External People – all standard fields for external contacts and companies are selectable plus any custom fields that have been added specifically to external people.
- Selecting a role – all standard fields for contacts and companies are selectable plus any custom fields that have been added specifically to the selected role.
Search Matching Criteria
You can set the search so only part of the criteria needs be entered.
- Exact Word – the correct value must be entered. If you were looking for people with the first name “Brendan” then the entire sting – “Brendan” must be entered.
- Starts with – the start of the criteria is entered and records are retrieved based on that criteria. Entering the string “Bren” would return the records with Brendan as the first name.
- Ends with – the end of the criteria is entered and records are retrieved based on that criteria. Entering the string “an” would return the records with Brendan as the first name.
- Contains – any part of the criteria is entered and the records are retrieved based on that criteria. Entering the string “rend” would return the records with Brendan as the first name.
Criteria Text box
The actual criteria is entered in the criteria text box.
Search within results
The search within results check box restricts additional searches to records that met the criteria of the previous search.
Contact Filter
- Filters are stored search criteria.
- Because the criteria is stored and not the results you can apply the criteria whenever you need to see the current data that matches that criteria.
- In addition, if you have access to the Email Broadcasting application you can use the filter to select the list of recipients.
- Filters are stored in the user profile and can be deleted if no longer required.
- If you are in a role with the Manager Permission, Create Public Filters and Templates, then you can permission the filter to be used by other people.
Creating a Contact Filter
In this exercise you will create a contact filter and review the filter from your user settings.
1. Reapply the criteria that displayed all contacts associated with the organisation beginning with “Human”.
All contacts where their organisation begins with the word human are displayed.
The Criteria is displayed above the contact list.
2. Click the Save Filter button.
The Save filter window is displayed.
3. Set the name to People in HR.
4. Click the Save button.
The filter is saved.
5. Click the Apply Filter combo box.
The filter is displayed.
Removing a Filter
Filters are stored in the user’s profile and accessed through the Settings menu.
1. Choose Configuration, Personal Settings menu.
All the filters that you have created are displayed.
3. Click the Filter name.
The Filter details are displayed.
4. Click the Delete button.
The filter is deleted.
