Configuring List Views
Revision as of 11:35, 12 April 2013 by Arthur Lathrop (talk | contribs)
Revision as of 11:35, 12 April 2013 by Arthur Lathrop (talk | contribs)
The List View allows you to define which Standard and Custom Fields are displayed when viewing a list of records. You can also define the sequence in which the records are displayed.
- Within the Universal Tracking Application the Settings page allows you to define the list view for Level 1, Level 2 and Level 3 as well as the Accounts and/or Contacts sections on the Level 1 records (if the Contacts/Accounts Standard Fields have been enabled).
- The List View defined for Level 2 will apply both to the list view on the Level 2 tab, and the list of associated Level 2s at the bottom of a Level 1 record, if shown. Similarly the Level 3 list view applies also to the Level 3s listed at the bottom of a Level 2 record.
- If Display as Tab has been enabled for a Level 2 Type you can customize the List View for the items listed on that tab.
- If you use the same Tab Label for more than one Level 2 Type (thus grouping multiple Types onto the same Tab) it will also use the List View configured on the Settings page, the same List View as the Other Level 2 Types tab.
- Within most other Applications you can set the List View via the Settings page.
- Some list views contain special items and cannot be configured, such as the list of Applicants on an Opportunity within Sales Tracking.
- You can also set the List View by clicking on the Edit View tab. The example below is on a Contacts list view:
- Note: changes here will affect the Contacts List View throughout SmartSimple (UTA Contacts Tab, Search People, Sales Tracking, etc.)
Contents
Defining a List View
The List view settings can be accessed by clicking on the List View hyperlink for the relevant level on the UTA Settings page, or by clicking on the Edit View button at the top of a list view.
There are two types of List Views: System Views and Personal Views.
- System Views belong to a specific role. All users in that role will have the option to select this List View. Multiple System Views can be defined for each role.
- Personal Views are only visible to the user who creates them. Multiple Personal Views can be defined for each user.
System Views
- When you click on the "New System View" button, you will be prompted to select the role to which the System View pertains. Select the appropriate role and click "OK."
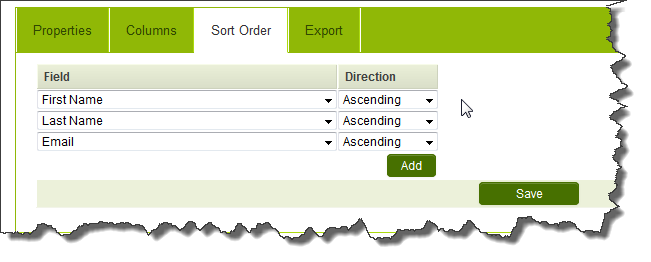
- You will now see three tabs in the right-hand frame: Properties, Columns and Export.
Properties
- By default, the "View Name" will match the role that you have selected. The name of the list view can be edited.
- Select a display order. This will define which list view will be the default for users who possess multiple roles.
- The default value for the "Open Button Label" is "Open." Changing this value will change the caption on the button used to access a specific record in the list view.
- Checking the "Open in edit mode" option will mean that when records are opened, they will default to edit mode as opposed to view mode.

