Creating an Organization Hierarchy
Contents
Creating an Organization Hierarchy
The same technique is always used when creating a new organization:
- Click the organization that you wish to be the "parent" (one level up) of the organization you want to create - Parent Organization.
- Click the New Organization tab.
- The basic details of the new company will be checked to ensure the company does not already exist. This feature is particularly useful when adding external companies.
- The New Office will be created “below” the existing organization in the organization hierarchy.
In this example, you will create an organization below the root organization.
1. Click the Root Company link.
The users are displayed at the bottom of the organization details.
2. Click the New, Company menu.
Company Duplicate Check Window
The Quick Entry for Duplication Check window is displayed.
1. Enter a new Company Name.
If the new company name matches an existing company you will be prompted to either use the existing record, create a new record, merge the records, or delete the extra records.
2. Click the Submit button.
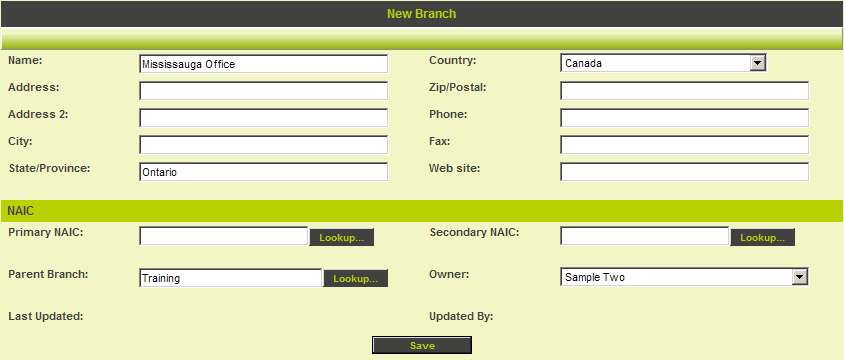
The New Company window is displayed as there is no possible duplicate record.
Standard Organization Fields
The standard fields used to describe the organization are:
- Name - Name of account.
- Address - Street address for this account.
- Address 2 - Second line of address – if required.
- City - City address.
- State/Province - State or province portion of billing address.
- Country - Country portion of address. You select the country from within the combo box. The default country will be the same as the user’s country.
- Zip/Postal Code - Zip or postal code portion of billing address.
- Phone - Account's primary phone number.
- Fax - Account's primary fax number.
- Web Site - Organization website address.
- NAIC Codes The North American Industry Classification System (NAICS). (If enabled)
- Parent Branch - If this account is in an organization hierarchy, then use the name of the higher-level account.
- Owner - Assigned owner of account.
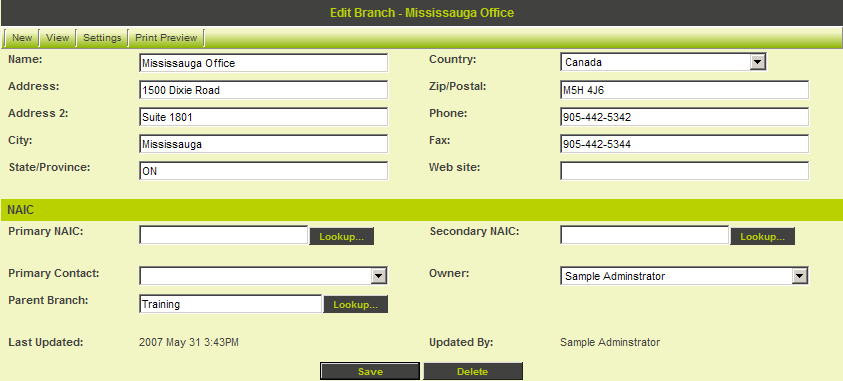
- Last Updated By - The name of the person that last updated the account information.
- Last Modified Date - The date and time the account information was last modified.
A default contact field will also be displayed once you have saved the organization details.
This field links a specific person to an organization to provide a general contact point in that organization. For the root organization, the contact is automatically set to the original Global User Administrator.
You can only set this value after you have added people to this organization.
Organization “Ownership”
If you intend to assign specific internal staff to “manage” an organization you will need to assign the appropriate “owner” to each organization.
Each sub-account (division, business unit or branch) in the same organization can have a different owner.
If you need to assign multiple internal staff to work with an organization, you can use the associations feature to associate multiple internal contacts with a single account.
1. Complete the Organization details.
2. Click the Save button.
The organization record is displayed.
Additional menu items are enabled.
| Menu | Options |
| New | User - add a new contact to this organization
Resource - add a new resource to this organization (only applicable if full project management is enabled). Branch - add a new organization as a subsidiary of the current organization. Activity - add an activity (phone call, meeting, etc.) with this organization - without reference to a specific contact. Import Organizations - launch the Import Wizard to import multiple organizations. Import Contacts - launch the Import Wizard to import multiple contacts. Import Activities - launch the Import Wizard to import activity records. |
| View | Organization - displays current organization in View rather than Edit mode.
Organization Chart - displays the reporting structure for this organization. Pin Board - displays the Pin Board for this organization. |
| Setting | Applications - enables applications for user by this organization - available only to system administrator.
User Signup - enables self-signup of contacts for this organization via the internet. Branch Signup - enables signup of branches via the internet. Categories - defines the categories of the organization. Costs and Rates - used to set costs (only applicable if full project management is enabled). |
| Print Preview | Displays a preview page of all the organization details. |
3. Select the View Company menu.
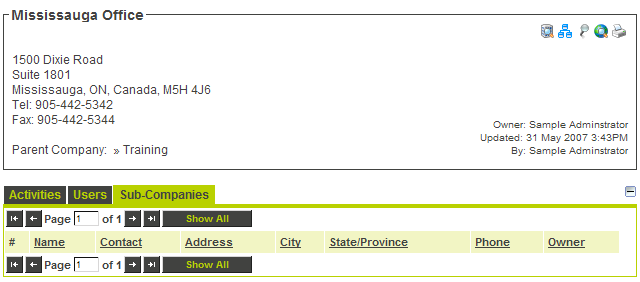
The Company View page is displayed.
The following icons are displayed.
- Notes are displayed to the right of the screen.
Company Tabs
The following tabs are displayed at the bottom of the company record.
- Activities – displays all activities for all contacts at this organization.
- Users – displays all contacts at this organization.
- Sub-Companies – displays all sub-organizations at the bottom of the page.


