Difference between revisions of "Branding & Visual Settings"
From SmartWiki
(→See Also) |
|||
| Line 12: | Line 12: | ||
==See Also== | ==See Also== | ||
| − | * [[:Category:Visual Settings| | + | * [[:Category:Visual Settings|Visual Settings]] |
| − | * [[:Category:Themes| | + | * [[:Category:Themes|Themes]] |
[[Category:Global Settings]][[Category:Visual Settings]] | [[Category:Global Settings]][[Category:Visual Settings]] | ||
Revision as of 13:40, 10 June 2014
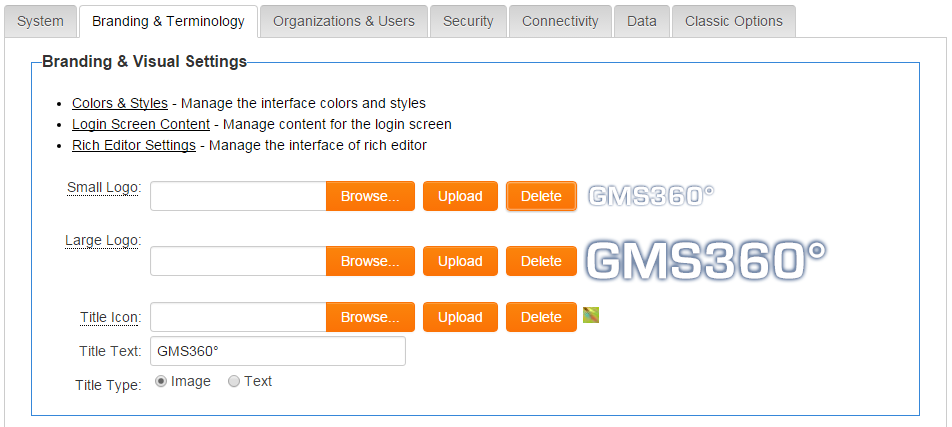
These settings, available from the Global Settings page, are used to control the overall visual and branding settings.
- Click on the Colours & Fonts link to review the visual settings.
- Click Login Screen Content to create a custom login page.
- Click Rich Editor Settings to change the options available in custom fields of the Rich Text field type.
- A "Small Logo" can be uploaded that will be used on the administration interface, the default portal, the Arcadia interface and the default login page.
- If a "Large Logo" is uploaded, it will be used in place of the Small Logo everywhere in the system except for the top left corner of the administration interface (where the Small Logo is used).
- The "Title Type" settings determine whether an image or text is shown in the top left-hand corner of your SmartSimple home page. If "Text" is selected, the text typed into the "Title Text" box will be used in place of a logo.
