Difference between revisions of "DocuSign"
Dan Eardley (talk | contribs) (→DocuSign Tags) |
Ann Vincent (talk | contribs) m |
||
| Line 126: | Line 126: | ||
|| | || | ||
|} | |} | ||
| + | |||
| + | ==Generating Fillable PDF Forms for E-Signature== | ||
| + | Web Page Views can be configured with fillable forms and exported as a system-generated PDF for e-signatures. All fields have to be created form the WPV template HTML content with the specific syntax indicated above. | ||
| + | |||
| + | Added new ability to configure Web Page View custom fields with custom content that will include fillable forms on a system-generated PDF sent through an e-signature provider | ||
==Note== | ==Note== | ||
Revision as of 16:21, 9 March 2021
Contents
Configuring Global Settings
1. Go to Global Settings - Integrations - Integration Key Management.
2. Click on New Integration Key. You will be presented with the following fields:
- Key Type: set to DocuSign
- Integrator Key**:
- Secret Key**: unique secret code for the client (see below for a description of where these are found)
3. Back in SmartSimple, Click Save once both keys have been entered.
4. On the Integrations tab, look for the Online Signature Provider section, and select DocuSign. You will then need to click the button labeled "Activate DocuSign Access", and enter your DocuSign login credentials. Once you've saved, the text next to the button should read: DocuSign Access: Enabled.
5. Configure your Web Page View field and use the tags outlined below to incorporate DocuSign functions with your SmartSimple data. Make sure these two field options are enabled:
- Online Signature: This will enable a new button in the Web Page View called "Online Signature".
- Enable Save to Server: This will allow a copy of the signed PDF document to be saved within SmartSimple.
- You can also create an Upload field, if desired, in which to store the signed PDF file. Use the Store-To Value option in the Web Page View field to point to this additional field.
6. Make sure you've created a role for your Signees, and that the intended person is added as a Contact using this role. Your Web Page View field will need to contain list syntax that specifies the roleid; this is how SmartSimple knows to whom the e-signature request should be sent.
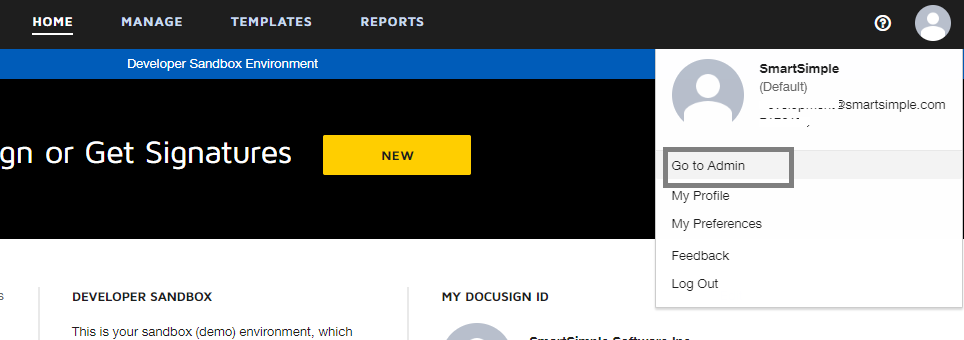
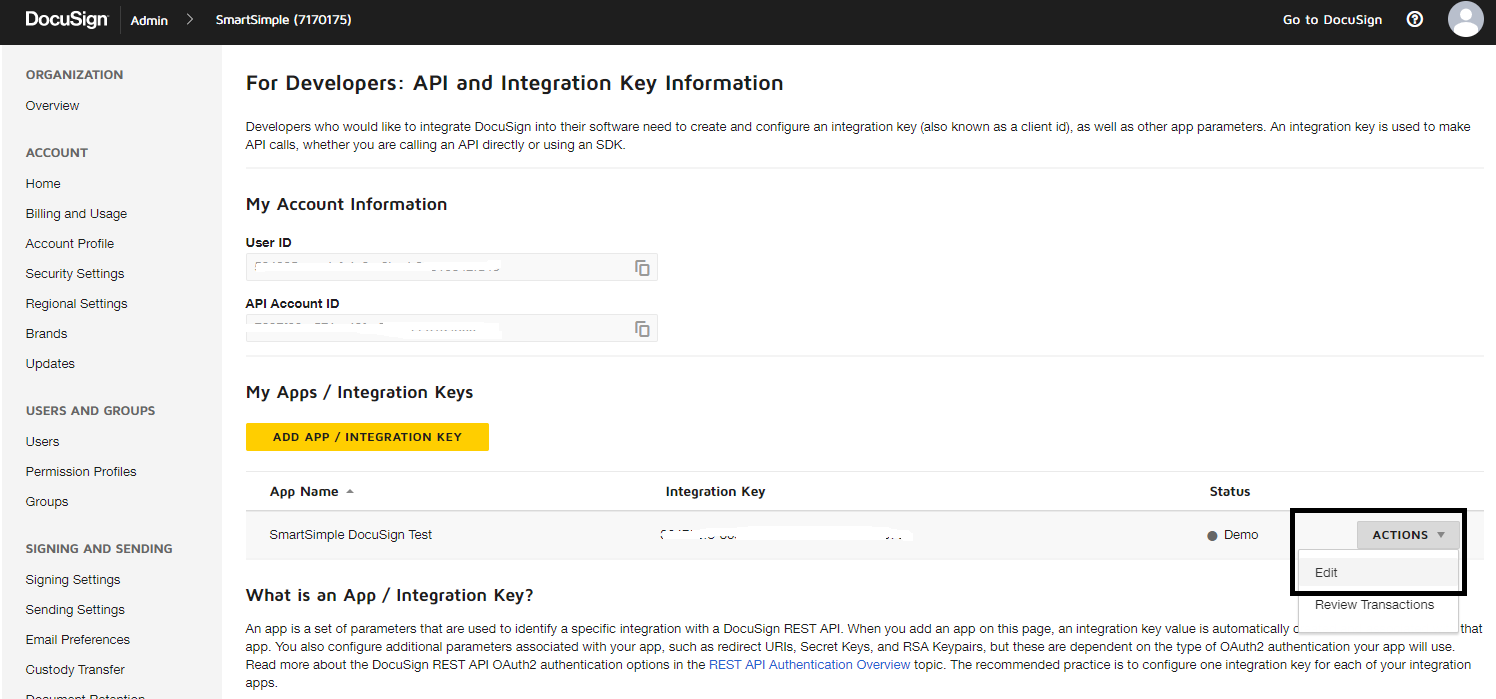
* for Integrator Key and Secret Keys, login to your DocuSign account, click on the "User" icon - go to Admin-->Integrations-->API and Keys (on left menu) - click on the Integrator Key and there you will be able to add new Secret keys.
Tip: Within the Web Page View window, you can click the Online Signature button to view the status of the current request once it's been sent.
DocuSign Account Set Up
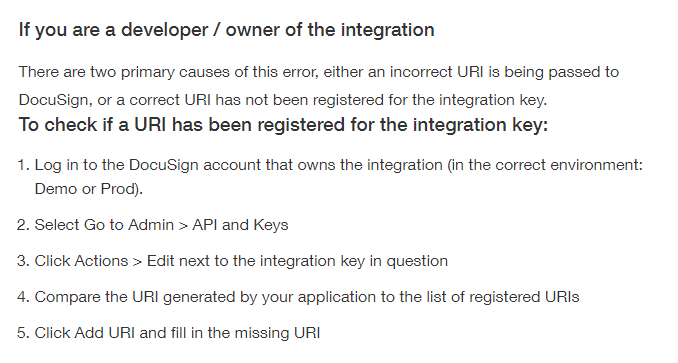
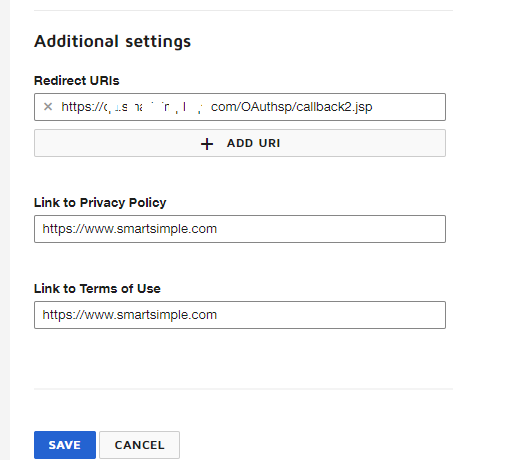
To use DocuSign as a signature provider in SmartSimple, you will need to sign up with DocuSign for an account with API capabilities. DocuSign requires users to create a sandbox account (reference: https://www.docusign.com/blog/dsdev-new-api-and-keys-page/) in order to create an integration key for their DocuSign API integration. After you obtained an integration key from your DocuSign sandbox account, to complete the set up process, you will have to provide the Redirect URIs (see screenshots for additional information on the instructions) for the DocuSign - SmartSimple integration.
For the Redirect URIs:
1. Go to Global Settings - Integrations - Integration Key Management.
2. Click on New Integration Key. You will be presented with the following fields:
- Key Type: set to DocuSign
- Key name: set to DocuSign
3. Copy the Redirect URL
4. Use this URL for the DocuSiign API account (when you are on DocuSign site to sign up for an API account)
DocuSign Tags
Use the below tags to configure the contact details and signing order for the signees.
| Function | Tag Format | Example | Notes | |
| Populate the email subject |
<!--SignatureEmailSubject Place Subject Here--> |
<!--SignatureEmailSubject @name@ Test Email Subject--> |
Include a variable here, such as the L1 name. | |
| Populate the email body |
<!--SignatureEmailBody Place body text here.--> |
<!--SignatureEmailBody This is a test.--> |
||
| Configure the DocuSign expiration date |
<!--SignatureExpiryDays Insert Numeric Value--> |
<!--SignatureExpiryDays 14--> |
After submission to Docusign, the document will expire after 14 days. Signees will not be able to access the document if it has gone unsigned at the time of expiry. | |
| Configure the CC email list |
<!--SignatureCC email;Name,email2;Name2--> |
<!--SignatureCC abc@fake.com;ABC Smith,qa1@fake.com;QA1--> |
Emails will be copied to the list of people included here. | |
| Configure the email language |
<!--SignatureLocale Language Code--> |
<!--SignatureLocale en--> |
Sets the email language, such as en, fr, etc. | |
| Configure the email flow for multiple signees |
<!--SignatureFlow Indicator--> |
<!--SignatureFlow P--> |
If you specify the signature flow as P (Parallel), emails will be sent to all signees at the same time.
If you specify the signature flow as S (Sequential), emails will be sent sequentially, for example: email will only be sent to the second signee after the first signee has completed signing the document, and so on. | |
| Set the Signature Block location |
<!--SignatureBlock Anchor String--> |
<!--SignatureBlock Anchor String--> |
If you wish to have the Signature Block appear in the document in a fixed position then you must include SignatureBlock tag with anchor string defined and then, in the document itself, have a text string that matches the anchor string.
| |
| Date Signed |
<!--DateBlock AnchorString--> |
<!--DateBlock Signed On: --> |
Here the anchor string is "Signed On: "
DocuSign will find "Signed On: " in your HTML and place the Date of the signature beside it. | |
| Set the location of the Initials Block |
<!--InitialsBlock InitialsAnchorString--> |
<!--InitialsBlock Your Initials:--> |
Here the anchor string is "Your Initials: "
DocuSign will find "Your Initials: " in your HTML and place the Initials Block below it. If the specified AnchorString is not found in the document, or if you do not include this tag in your HTML, signees will have the option to place their initials anywhere in the document. |
Generating Fillable PDF Forms for E-Signature
Web Page Views can be configured with fillable forms and exported as a system-generated PDF for e-signatures. All fields have to be created form the WPV template HTML content with the specific syntax indicated above.
Added new ability to configure Web Page View custom fields with custom content that will include fillable forms on a system-generated PDF sent through an e-signature provider
Note
For DocuSign to retrieve signee emails, names etc, you will have to embed them in your HTML. They will then be used in the email sent to signees. For example:
[#(?object=contact;criteria=roleid='12527';orderby=firstname) <!--SignatureFlow P--><!--signature ~email~;SIGNER;~firstname~;~lastname~;~Index~;~companyname~-->#]
If you have 3 signees assigned to the Level 1, the HTML in your Web Page View will be embedded with the info for all three:
<!--signature ttest@smartsimple.com;SIGNER;Tony;Test;1;SmartSimple Software -->
<!--signature fake@smartsimple.com;SIGNER;Fake;Man;2;Fake Co. -->
<!--signature fake2@smartsimple.com;SIGNER;Fake2;Mann;3;Fake2 Co. -->


