Difference between revisions of "Creating a Level One Workflow"
(→Setting the Trigger When and Termination Trigger) |
|||
| Line 21: | Line 21: | ||
The new [[Workflow|workflow]] is displayed. | The new [[Workflow|workflow]] is displayed. | ||
| − | [[Image: | + | [[Image:WorkFlowQA72.png]] |
| − | + | ||
=Using the UTA Role= | =Using the UTA Role= | ||
Revision as of 09:08, 15 June 2016
1. In the workflow list, click New Workflow.
2. Select the name of your UTA from the Workflow Type combo box. In our example the UTA name is GMS360 - Grants.
3. Enter the Name and Description of the workflow.
Setting the Trigger When and Termination Trigger
For Level One workflows the Trigger When and Termination Trigger boxes are available.
- The Trigger When determines what Level One Status triggers the workflow. The Deactivate option disables the workflow.
- The Termination Trigger allows the workflow to be cancelled before all its tasks are complete. A termination trigger is not mandatory when creating a Level One workflow.
4. Select a status for the Trigger When.
5. Click Save.
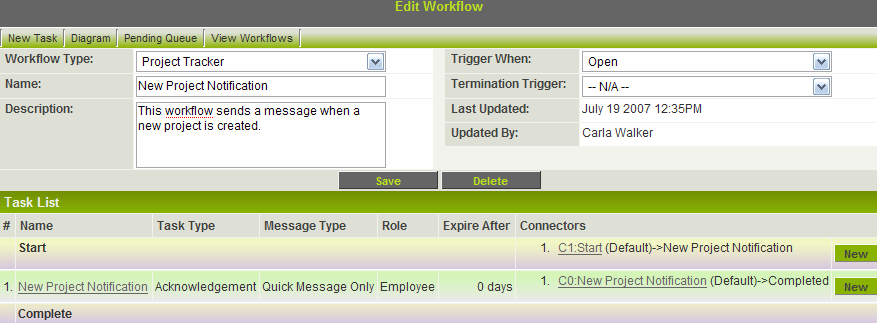
The new workflow is displayed.
Using the UTA Role
The UTA Role allows the system to send a message to all the users assigned to the Level One item with a specific role.
1. Create a New Acknowledgment task that will send a quick message.
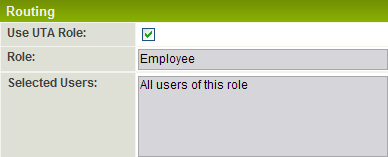
2. In the Routing section, check the Use UTA Role checkbox.
3. In the Selected User lookup, select the role of Employee, choose All Users in This Role and click OK. All Users in This Role is the only option that can be used in combination with UTA Role.
4. Click Save. Click the task name to review the routing settings.
We will not be using UTA Role in this example, so uncheck the UTA Role box.
6. Click the Selected User Lookup and select Let current user select target user from this role and click Save. Complete the workflow by creating the connectors to the Start event and the Complete event.
See Also


