Difference between revisions of "System Summary"
(→System Design Summary) |
|||
| (20 intermediate revisions by the same user not shown) | |||
| Line 1: | Line 1: | ||
=Overview= | =Overview= | ||
| + | The '''System Summary '''section is helpful for providing a number of ways of accessing information on the configuration details for an [[instance]] of [[SmartSimple]]. | ||
| − | + | =How to Access the System Summary= | |
| − | |||
| − | =How to Access the System | ||
| − | |||
'''Note: '''In order to access this part of the system, you must have [[Global User Administrator|System Administrator]] assigned as a [[User Role|role]]. | '''Note: '''In order to access this part of the system, you must have [[Global User Administrator|System Administrator]] assigned as a [[User Role|role]]. | ||
| Line 10: | Line 8: | ||
:: {{Icon-Menu}} | :: {{Icon-Menu}} | ||
| − | |||
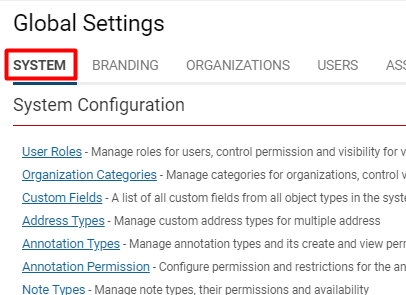
2. Under the heading '''Configuration, '''select '''Global Settings. ''' | 2. Under the heading '''Configuration, '''select '''Global Settings. ''' | ||
:: [[File:Global settings system.png|300px|border]] | :: [[File:Global settings system.png|300px|border]] | ||
| − | |||
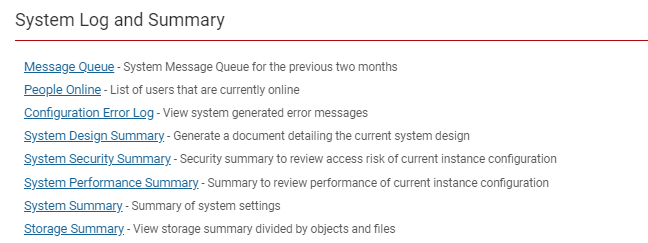
3. On the first tab (labelled '''System'''), scroll down until you see the heading '''System Log and Summary: ''' | 3. On the first tab (labelled '''System'''), scroll down until you see the heading '''System Log and Summary: ''' | ||
| − | :: [[File:System log and summary.png| | + | :: [[File:System log and summary.png|500px|border]] |
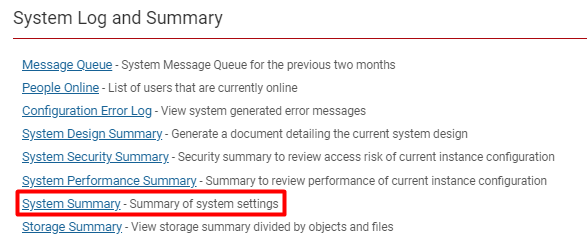
| + | 4. Click on the hyperlink labelled '''System Summary'''. | ||
| + | :: [[File:System summary.png|400px|border]] | ||
| + | =System Summary Features= | ||
| + | :: [[File:System summary tabs.png|750px|border]] | ||
| + | {| class="wikitable" | ||
| + | |- | ||
| + | ||'''[[Password Policy]]''' | ||
| + | || | ||
| + | This will display the current password policies within the instance. It will include the following details: | ||
| + | * '''Password Settings: '''Length and Complexity | ||
| + | * '''Intruder Lockout Settings: '''Number of Attempts and Lockout Duration | ||
| + | * '''Intruder Email Alert: '''Email From, Subject, and Body content | ||
| − | + | |- | |
| − | + | ||'''System Security''' | |
| + | || | ||
| + | This will display all [[Manager Permissions]] and Restrictions in the first column, and its correspondence to each [[User Role]] as an additional column. The value '''Yes '''will be displayed in the intersection of what part of the system it is giving permission for, and which role has that permission. | ||
| − | + | :: [[File:System security settings.png|thumb|left|600px|border]] | |
| + | |- | ||
| + | ||'''Role Fields''' | ||
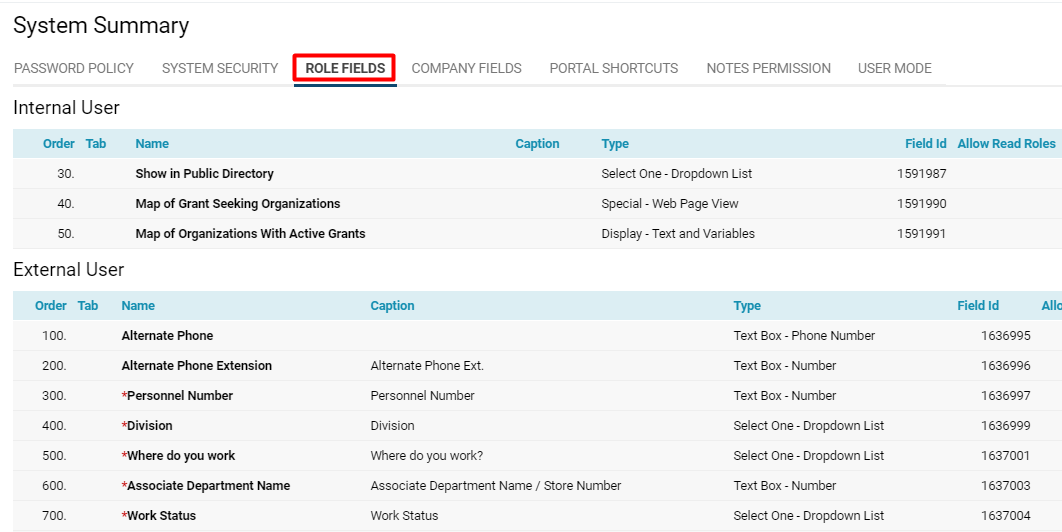
| + | ||This will display all the [[Custom Fields – General Information|Custom Fields]] that are associated with each user role (split into [[Internal]] vs [[External]]), and the details of each field such as its Type, Name, Field ID, etc. | ||
| + | :: [[File:Role fields.png|thumb|left|600px|border]] | ||
| + | |- | ||
| + | ||'''Company Fields''' | ||
| + | || | ||
| + | This will display all the [[Custom Fields – General Information|Custom Fields]] associated with each organization category (and split into [[Internal]] vs [[External]]) and the details of each field. | ||
| − | + | :: [[File:System summary company fields.png|thumb|left|600px|border]] | |
| + | |- | ||
| + | ||'''Portal Shortcuts''' | ||
| + | || | ||
| + | This will display all the [[Portals#Shortcuts|portal shortcuts]] used in each [[User Role|role]]-based [[Portals|portal]], including the '''icon '''used. | ||
| − | + | :: [[File:Portal shortcuts.png|thumb|left|600px|border]] | |
| + | |- | ||
| + | ||'''Notes Permission''' | ||
| + | ||This will display all the [[Notes Permissions]] in the first column and each [[User Role|role]] as an additional column. The value '''Yes '''will be displayed at the intersection of the '''Note '''type, and the [[User Role|role]] indicates that a [[User|user]] in that role will have permission to use that [[Notes Overview#Creating a New Note Type|note type]]. | ||
| + | |- | ||
| + | ||'''User Mode''' | ||
| + | || | ||
| + | This will display the User Mode options and allows for the feature to be switched off and on for the current user. | ||
| − | + | [[File:User mode.png|thumb|left|500px|border]] | |
| + | The options include the following: | ||
| − | + | * '''Translation Audit Mode: '''When enabled, this will highlight any areas of the system that are not going through SmartSimple's [[:Category:Translation|language translator]] tool. | |
| + | * '''Developer Mode: '''When enabled, any system changes made by a particular user are logged and can be ported to the production server. | ||
| − | |||
| − | |||
| − | |||
| − | |||
| − | |||
| − | |||
| − | |||
| − | |||
| − | |||
| − | + | |} | |
| − | + | =System Design Summary= | |
| + | You can also generate a word document that provides a summary of the system settings through the '''System Design Summary '''feature. | ||
| − | + | 1. Click on the 9-square menu icon on the top right of your page. | |
| − | + | :: {{Icon-Menu}} | |
| + | 2. Under the heading '''Configuration, '''select '''Global Settings.''' | ||
| − | + | 3. Scrolling down to the section titled '''System Log and Summary, '''click on the hyperlink '''System Design Summary. ''' | |
| − | + | :: [[File:System design summary.png|550px|border]] | |
| + | 4. Clicking this will enable a modal window to open. The window will contain different headings, each corresponding to a {{UTA}} within the system or the '''General ''''''System, '''and each with available [[Custom Fields]] or settings that can be enabled as part of the documented summary. | ||
| − | + | :: [[File:Sys design summary.png|700px|border]] | |
| + | {| class="wikitable" | ||
| + | |- | ||
| + | ||'''[[Global Settings]]''' | ||
| + | ||Provides a summary of Global Settings including Data Policies and Security Matrices. | ||
| + | |- | ||
| + | ||'''[[Workflows Overview|Workflows]]''' | ||
| + | ||Provides a summary of the settings that have been enabled onto each individual workflow. | ||
| + | |- | ||
| + | ||'''[[Portals]]''' | ||
| + | ||Provides a summary of each of the portals and portal details that have been configured against [[User Role|user roles]]. | ||
| + | |- | ||
| + | ||'''{{UTA}}s''' | ||
| + | ||Provides a summary of the settings for each individual [[UTA]], including a toggle option to indicate whether the summary should include [[Custom Fields]]. | ||
| + | |} | ||
| + | 5. Once the modules are selected appropriately within each section, click the '''Generate '''button. A design summary document will automatically begin to be downloaded onto your local computer. | ||
| − | * | + | * If there were any settings that you did not toggle on, you may always re-generate''' System Design Summary''' documents by toggling on the new options and clicking the '''Generate '''button again. |
| − | |||
| − | |||
| − | |||
| − | |||
==See Also== | ==See Also== | ||
| − | + | * [[Manager Permissions]] | |
[[Category:Global Settings]][[Category:System Management]][[Category:System Auditing]] | [[Category:Global Settings]][[Category:System Management]][[Category:System Auditing]] | ||
Latest revision as of 10:14, 28 June 2019
Contents
Overview
The System Summary section is helpful for providing a number of ways of accessing information on the configuration details for an instance of SmartSimple.
How to Access the System Summary
Note: In order to access this part of the system, you must have System Administrator assigned as a role.
1. Click the 9-square menu icon on the top right of your page.
2. Under the heading Configuration, select Global Settings.
3. On the first tab (labelled System), scroll down until you see the heading System Log and Summary:
4. Click on the hyperlink labelled System Summary.
System Summary Features
| Password Policy |
This will display the current password policies within the instance. It will include the following details:
|
| System Security |
This will display all Manager Permissions and Restrictions in the first column, and its correspondence to each User Role as an additional column. The value Yes will be displayed in the intersection of what part of the system it is giving permission for, and which role has that permission. |
| Role Fields | This will display all the Custom Fields that are associated with each user role (split into Internal vs External), and the details of each field such as its Type, Name, Field ID, etc.
|
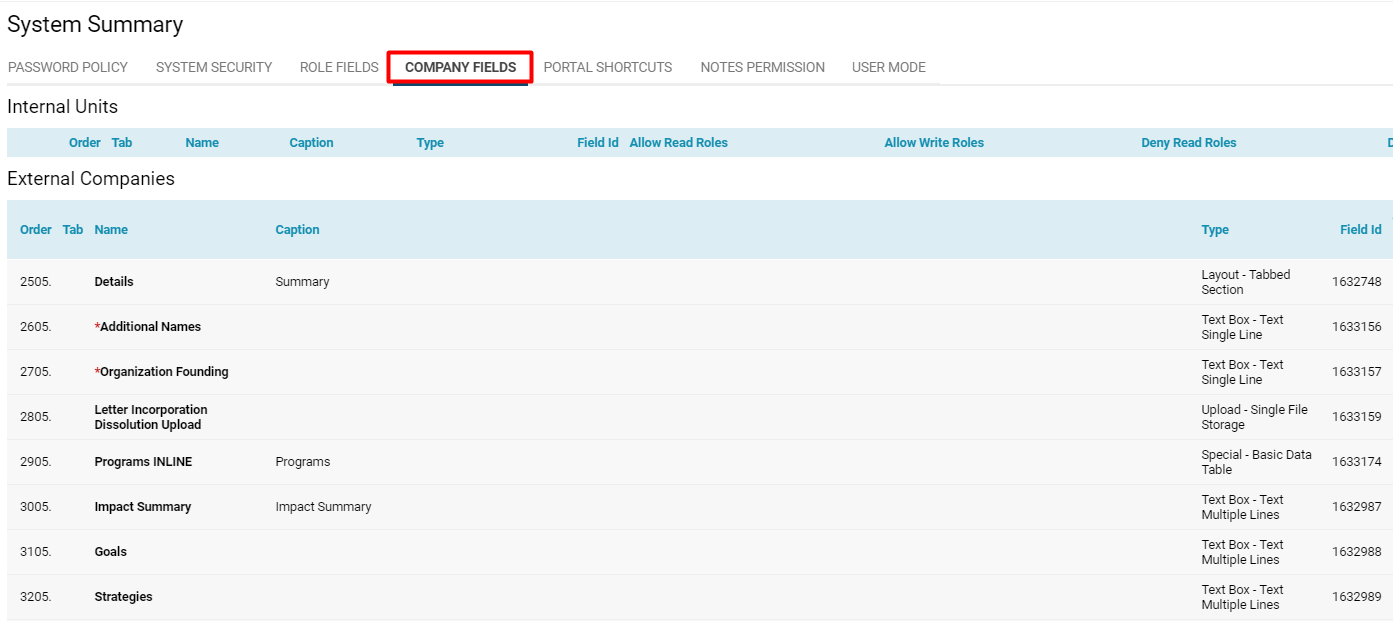
| Company Fields |
This will display all the Custom Fields associated with each organization category (and split into Internal vs External) and the details of each field. |
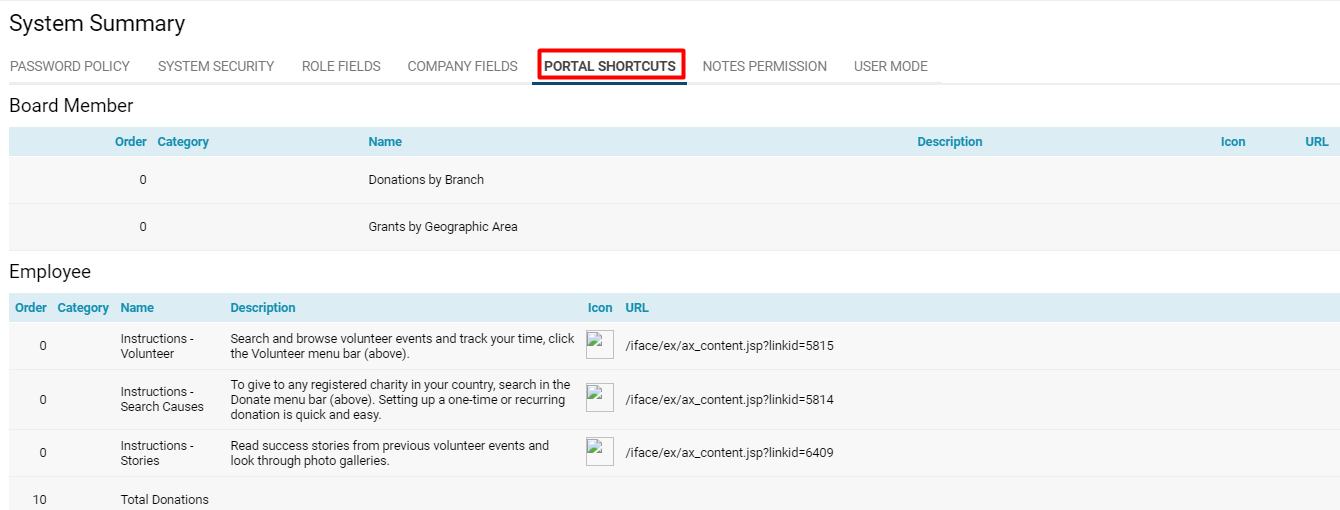
| Portal Shortcuts |
This will display all the portal shortcuts used in each role-based portal, including the icon used. |
| Notes Permission | This will display all the Notes Permissions in the first column and each role as an additional column. The value Yes will be displayed at the intersection of the Note type, and the role indicates that a user in that role will have permission to use that note type. |
| User Mode |
This will display the User Mode options and allows for the feature to be switched off and on for the current user. The options include the following:
|
System Design Summary
You can also generate a word document that provides a summary of the system settings through the System Design Summary feature.
1. Click on the 9-square menu icon on the top right of your page.
2. Under the heading Configuration, select Global Settings.
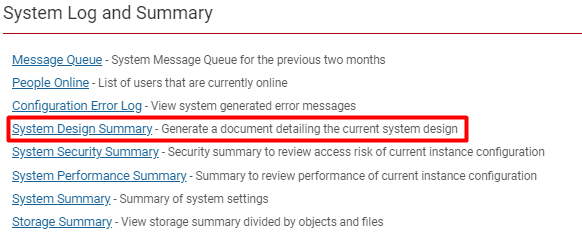
3. Scrolling down to the section titled System Log and Summary, click on the hyperlink System Design Summary.
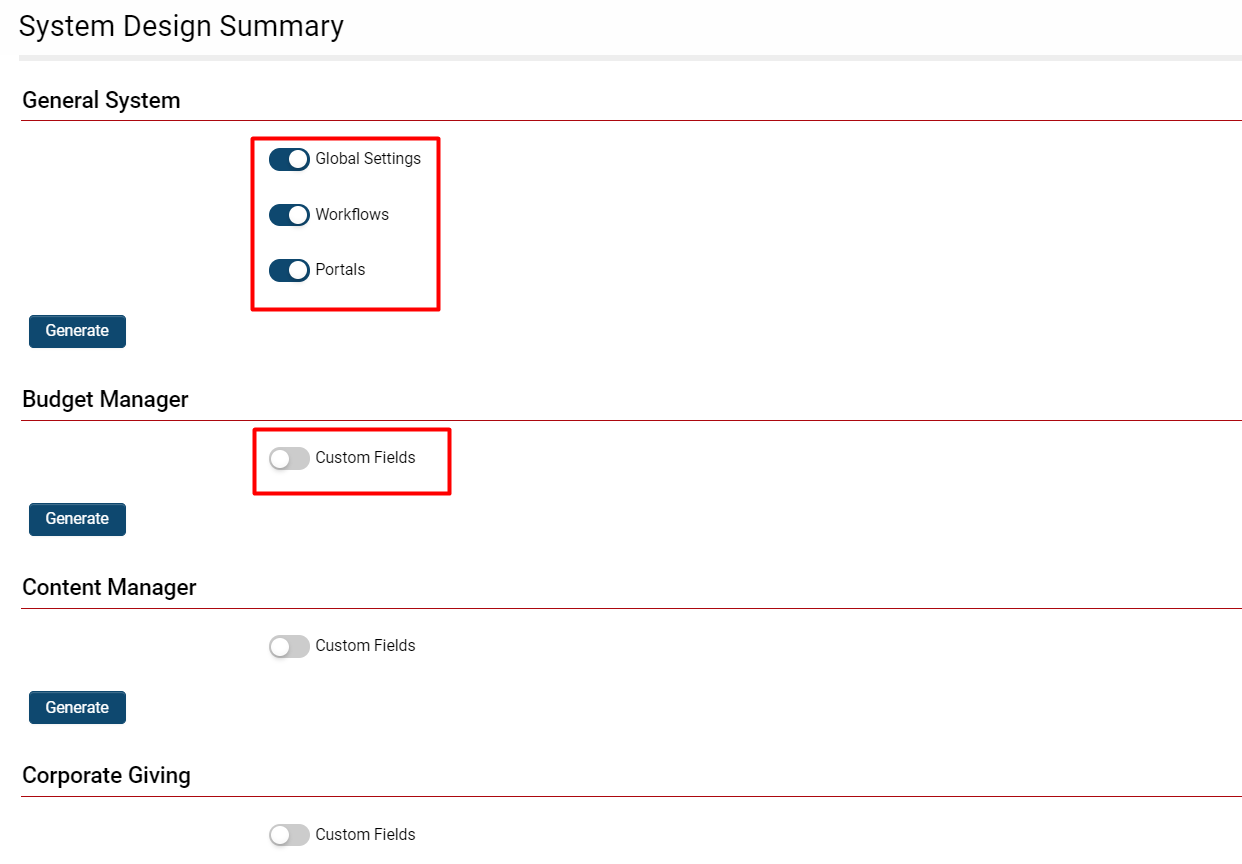
4. Clicking this will enable a modal window to open. The window will contain different headings, each corresponding to a within the system or the 'General 'System, and each with available Custom Fields or settings that can be enabled as part of the documented summary.
| Global Settings | Provides a summary of Global Settings including Data Policies and Security Matrices. |
| Workflows | Provides a summary of the settings that have been enabled onto each individual workflow. |
| Portals | Provides a summary of each of the portals and portal details that have been configured against user roles. |
| s | Provides a summary of the settings for each individual UTA, including a toggle option to indicate whether the summary should include Custom Fields. |
5. Once the modules are selected appropriately within each section, click the Generate button. A design summary document will automatically begin to be downloaded onto your local computer.
- If there were any settings that you did not toggle on, you may always re-generate System Design Summary documents by toggling on the new options and clicking the Generate button again.
