Difference between revisions of "Login Page"
| Line 130: | Line 130: | ||
{| class="wikitable" | {| class="wikitable" | ||
|- | |- | ||
| − | || | + | ||'''Button Label''' |
| − | || | + | ||The label that will appear on the button on the login page that, when clicked, will direct the user to this Routing Page. |
| − | |||
| − | |||
| − | |||
|- | |- | ||
| − | || | + | ||'''Header Title''' |
| − | || | + | ||The header that will appear on the Routing Page. |
|- | |- | ||
| − | || | + | ||'''Introduction Text''' |
| − | || | + | ||The introduction text that will appear on the Routing Page. |
|- | |- | ||
| − | || | + | ||'''Trailing Text''' |
| − | || | + | ||The text that will appear at the bottom of the Routing Page. |
|- | |- | ||
| + | ||'''Routing Links''' | ||
|| | || | ||
| − | + | This is a dynamic section that allows for the creation of multiple links on a Routing Page. In order to add a new link, simply click the '''+ '''button. | |
| + | |||
| + | * '''Title: '''The title that will appear for the configured link. | ||
| + | * '''Description: '''The description that appears against the configured link. | ||
| + | * '''URL: '''The URL that the user will be taken to upon clicking on the link. | ||
| + | |||
|} | |} | ||
| + | The routing page configuration section is intended for those [[instance]]s that have the following: | ||
| + | |||
| + | * Multiple signup pages to register different kinds of organizations and users | ||
| + | * Multiple signup pages for different languages | ||
| + | * Multiple eligibility questionnaires for different locations | ||
| + | |||
| + | A routing page will allow for simplified creation and access to multiple pages, guiding the end-user to the correct page from a single login page. A successful routing page might look like the following: | ||
| + | |||
| + | :: [[File:Routing page.png|700px|border]] | ||
===Template=== | ===Template=== | ||
Revision as of 11:18, 25 June 2019
Contents
[hide]Overview
After a User has been added to the system or they have signed up, they will then be able to login to the system through a customizable login page. It is essential to know how to set up and modify a login page as this is the first thing that users will see before gaining access into your instance.
- Generally, the username and password are embedded in the website.
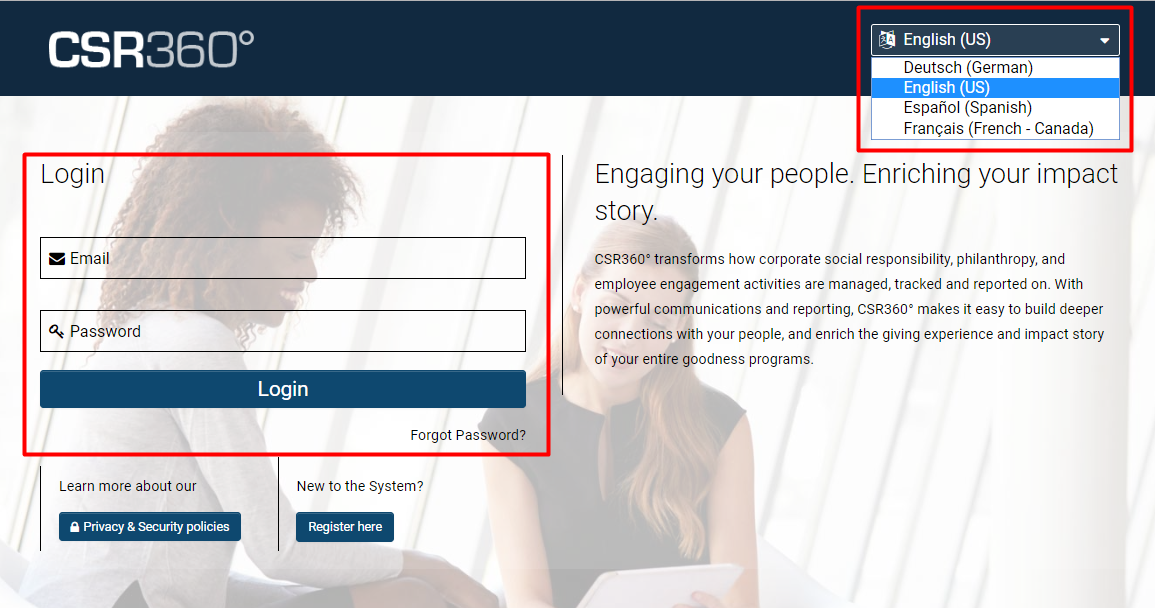
- Note: Language-specific login pages can be created and can be accessed using a drop-down when a person tries to login.
In this above example, the login page consists of numerous components: an actual login section for username and password, a registration button, a privacy and security policies hyperlink, language options, and Branding that customizes the background, logo, and description.
Configuration - Essentials
Creating a New Login Page
1. Click on the 9-square menu icon on the top right of your page.
2. Under the heading Configuration, select Global Settings.
3. Click on the second tab - it will be labelled Branding.
4. Click on the hyperlink for Login Pages.
5. The list of login pages available in your system will be displayed; if there are none, this page will be displayed as blank.
You will be presented with two tabs:
- Primary: A list of all configured login pages, including the language name.
- Alternate: A list of all configured content management login pages, including the alias and ID for that login page.
6. Staying on the Primary tab, click the + icon on the top in order to make a new Login Page.
Login Screen Content - General
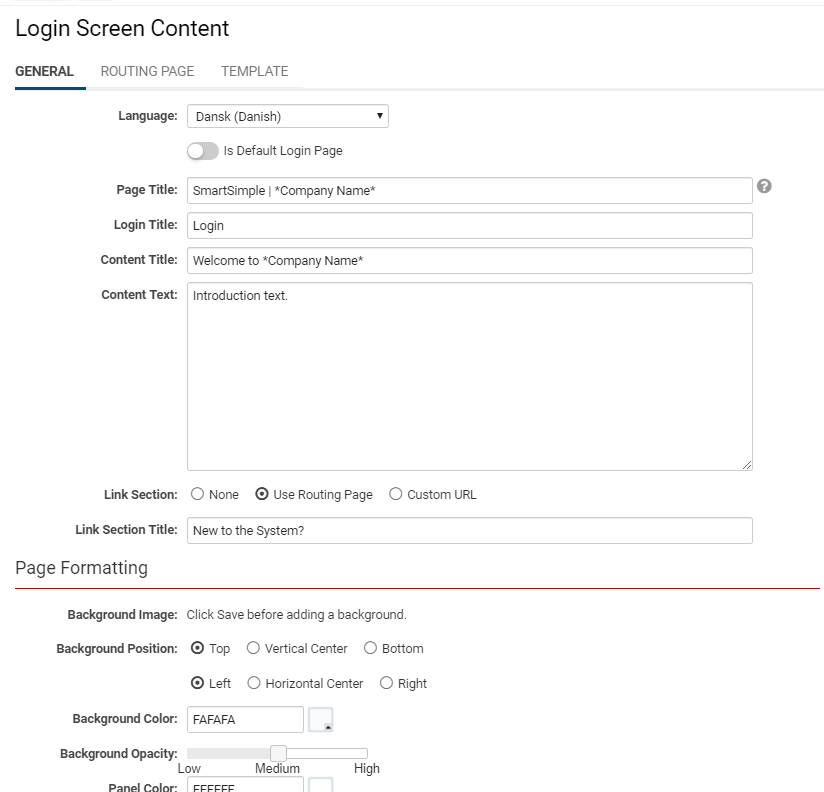
Once you click the + icon to make a New Login Page, you will be redirected to the Login Screen Content to modify and format your new login page.
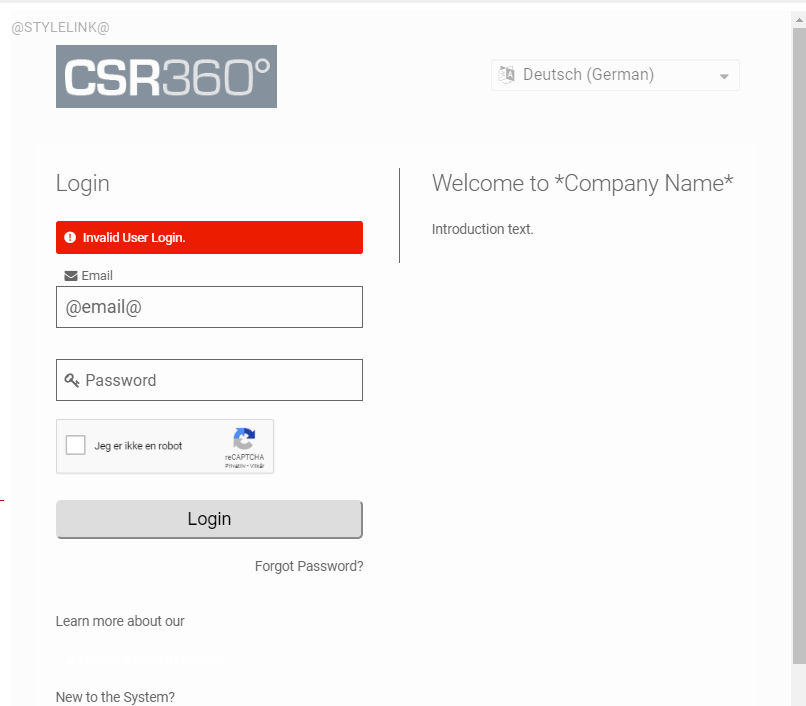
It will open on the first General tab, where settings and formatting can be modified on the right side of the screen, while the left side displays a preview with placeholder variables:
The following settings are available on the General page:
| Language |
Select from a drop-down list of languages available that you can change your login page to:
|
| Page Title | This is the text that appears in the title bar at the top of your browser. By default, this will appear as the alias name of your instance. You can change the text here. To modify other details as well, such as the logo that will appear as a heading for the login page, please see the Branding page. |
| Content Title | A generic content title might be "Welcome to *Company Name*" - this is the text that will appear on the main body of the login page next to the actual login username and password fields. |
| Content Text | This is the text that will appear below the content title. Best practice is to provide a summary of the company or an introduction towards what the user should expect from this site. |
| Link Section |
None - You do not want to display any links on the login page. Use Routing Page - A routing page created in our system will direct new users to the appropriate signup page. Custom URL - Insert an external URL for this link section. |
| Link Section Title | Add a title that will go above the link from the Link Section. For example, if you used a signup routing page, which is a page that directs new users to the appropriate Signup Page, your title for that link section could be, "New to the System?" |
Page Formatting
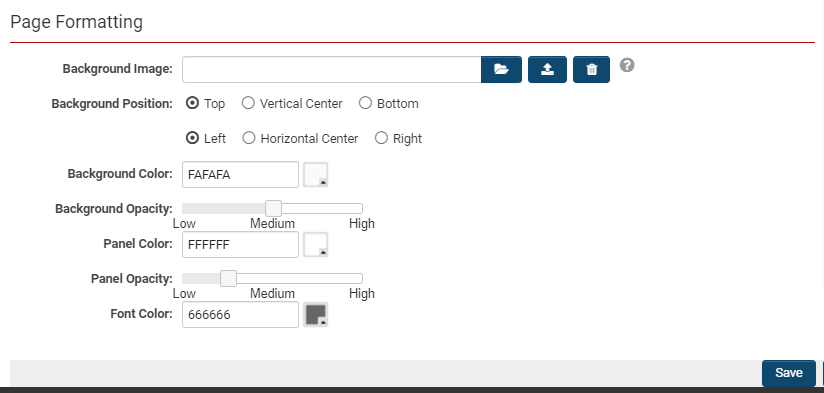
Scrolling down on the General Page will then bring you to Page Formatting options:
| Background Image |
Upload a background image of your choice to appear as the background of your login page. You may select a file from your computer with the folder icon and upload it with the upwards arrow icon. You can delete any uploaded file with the trashcan icon.
|
| Background Position | Select the position that you want your background image to appear in: Top, Vertical Center, Bottom, Left, Horizontal Center, Right. |
| Background Color | Select the color you would like your background to have. |
| Background Opacity | Select the level of opacity you want your background to have, with high opacity being a completely solid image or colour background and low being nearly transparent. |
| Panel Colour | Select the color you would like to have surrounding the text area of your login page. This colour will be contrasted against the background colour if you choose one depending on the opacity. |
| Panel Opacity | Select the level of opacity you want your panel colour to have. |
| Font Colour | Select the color of the font that will be included in the login page. This will effect all fonts on the page, including the Content Title, Content Text, Link Section Title, and so on. |
Routing Page
You can also learn about the Routing Page here.
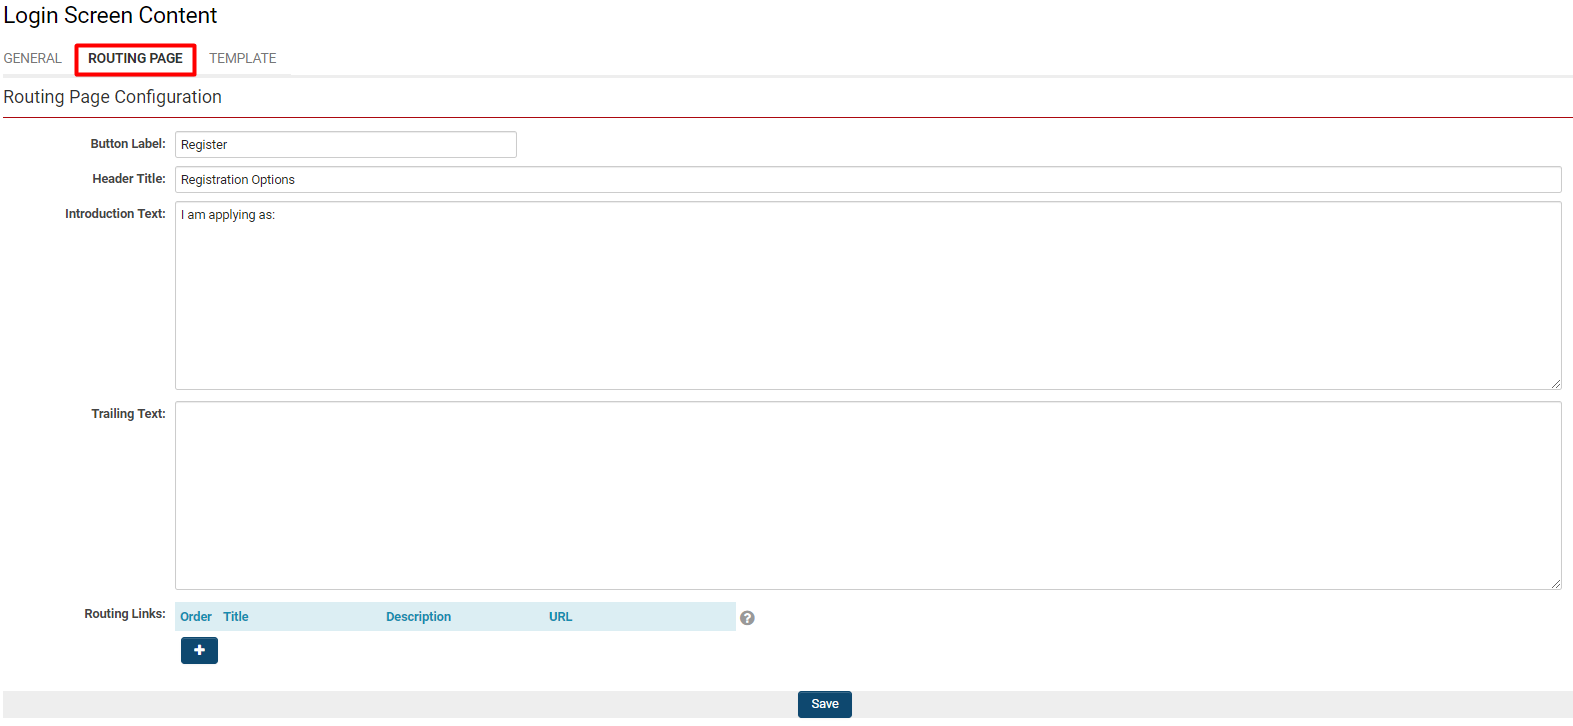
The configuration options for your routing page include the following:
| Button Label | The label that will appear on the button on the login page that, when clicked, will direct the user to this Routing Page. |
| Header Title | The header that will appear on the Routing Page. |
| Introduction Text | The introduction text that will appear on the Routing Page. |
| Trailing Text | The text that will appear at the bottom of the Routing Page. |
| Routing Links |
This is a dynamic section that allows for the creation of multiple links on a Routing Page. In order to add a new link, simply click the + button.
|
The routing page configuration section is intended for those instances that have the following:
- Multiple signup pages to register different kinds of organizations and users
- Multiple signup pages for different languages
- Multiple eligibility questionnaires for different locations
A routing page will allow for simplified creation and access to multiple pages, guiding the end-user to the correct page from a single login page. A successful routing page might look like the following:
Template
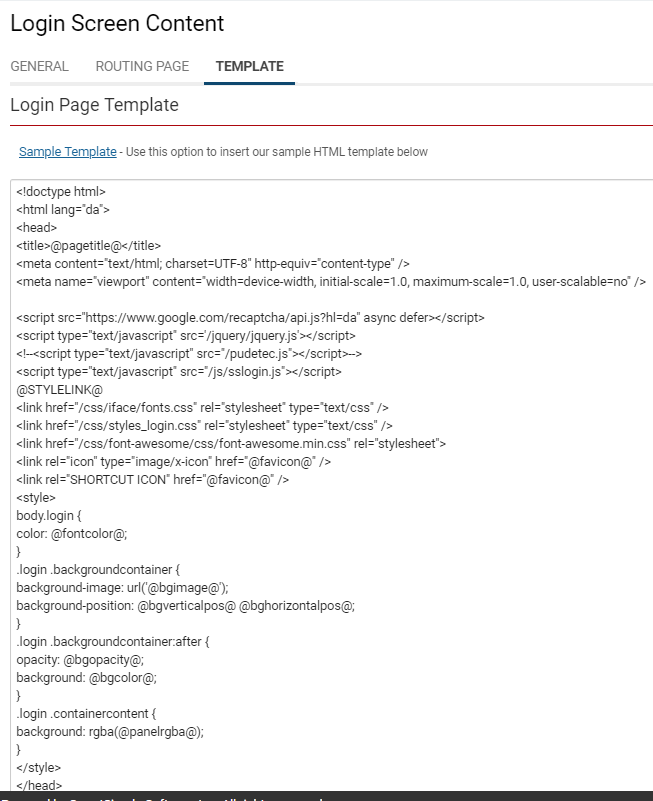
The third tab from the Login Screen Content is the Template page. Here, you can use the Sample Template button to populate the content of the Rich Editor field, and then modify as necessary.
For improved security, CAPTCHA validation can be added to your login page. All that's required in order to configure this is to place the @captcha@ variable within your login screen template where you wish it to appear. After two failed login attempts, users will be presented with a CAPTCHA they must complete before they are able to attempt a third login.
- Note: CAPTCHA validation can also be made language-specific if it is included in the template for a specific language login page.
