Difference between revisions of "Notes Overview"
| Line 58: | Line 58: | ||
:: {{Icon-Menu}} | :: {{Icon-Menu}} | ||
| − | |||
2. Under the heading '''Configuration, '''select '''Global Settings.''' | 2. Under the heading '''Configuration, '''select '''Global Settings.''' | ||
3. On the first tab, under the subheading '''System Configuration, '''click on '''Note Types.''' | 3. On the first tab, under the subheading '''System Configuration, '''click on '''Note Types.''' | ||
| + | |||
| + | :: [[File:Note types.png|500px|border]] | ||
| + | |||
| + | The Notes list view is displayed. | ||
| + | |||
| + | 4. Click the '''+ '''icon on the top left to create a new Note Type. | ||
| + | |||
| + | 5. The New Note Type details will be displayed. | ||
| + | |||
| + | :: [[File:New notes type form.png|600px|border]] | ||
| + | |||
| + | |||
| + | |||
Revision as of 15:29, 17 June 2019
Overview
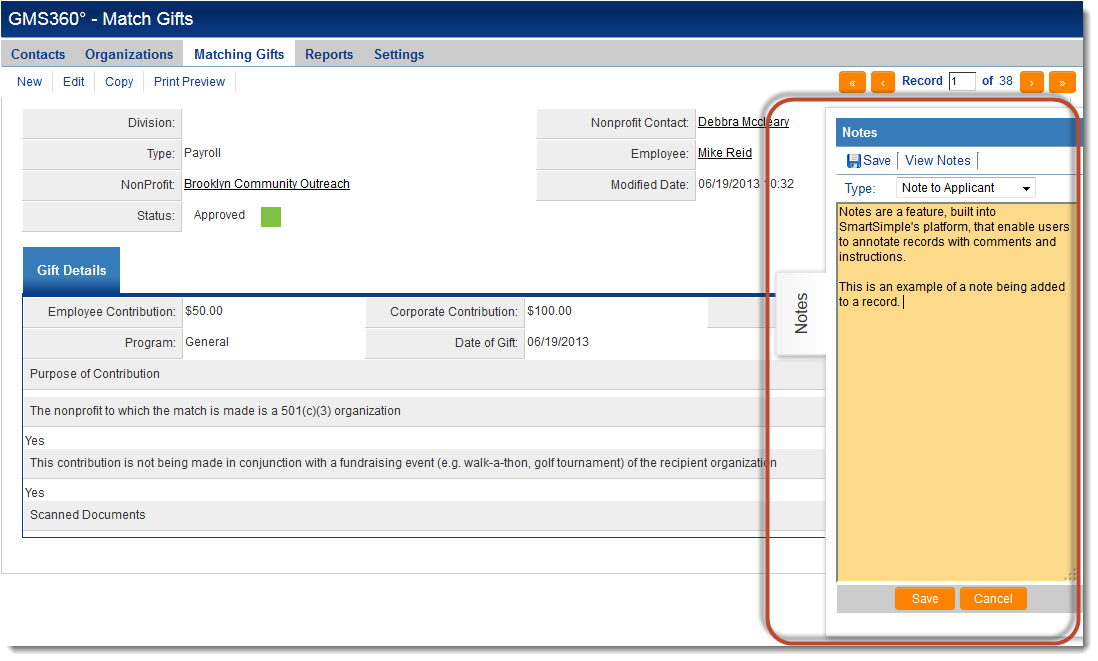
Notes are a built-in feature into SmartSimple's platform, available in every instance, that enables users to annotate records with comments and instructions.
Notes will give you, your internal team, your external applicants, claimants, reviewers, and board members an increased level of communication right in your system without needing an outside email program or extra custom fields. Not only can an infinite number of notes be created, but you can also configure notes to have differing levels of visibility for roles, pre-created text options, and even triggers for Workflows. The benefits of Notes will go as far as you want to utilize and configure them.
Features of Notes:
- They can be added to the following: UTA records, Contact and company profiles, calendar events, SmartFolders, Invoices, Transactions and more.
- System Administrators can even add notes to individual Custom Fields, templates, and statuses in order to document processes and maintain a change log.
- System Administrators can create different types of Notes and set role-based permissions for editing and viewing each specific Note type.
- See Notes Permissions for additional information.
- Note types can be created that have sets of pre-populated text for selection by the end user.
- See Notes Options for additional information.
- Workflows can be configured that notify users by email that a new note has been created. These workflow-generated emails can contain variables, including the text in the body of the note.
- See Pulling Variables in Notes Workflow for more information.
Configuration - Essentials
Using Notes
Notes are available to records in both View Mode and Edit Mode. The View Mode will allow read-only access to Notes (therefore without modification ability), while the Edit Mode allows users to make changes or delete the note.
When Notes are visible on a record, the panel can be efficiently expanded or hidden by clicking on the vertical Notes tab.
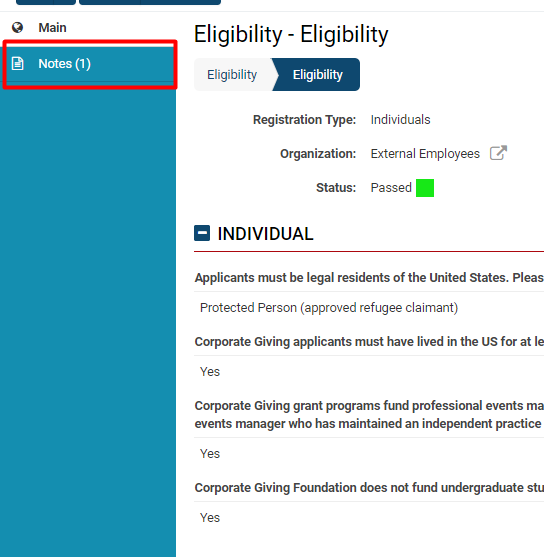
When you click into any record, the Notes tab on the left side menu will appear with a number of the notes available.
Clicking on the Notes tab from the left side menu will open a list of available notes on that record.
On this Notes page, many options are available:
- Pressing the + icon on the top right will allow you to create a New Note
- Pressing the printer icon next to it will allow you to generate a print preview of all Notes on that page
- Underneath those two icons, you will see the available Search Options, which can be filtered by either or both Note Type and From/To Dates
Contents of Notes
Each note will appear in its own box, with the following details:
- Date and time stamps
- Username of user who created the note
- The type of Note
- The content of the note
- A count of this note among the list of available notes (changing in real time as notes are added and deleted)
- An Edit Notes icon on the left (
 )
)
For security purposes, no user can edit another user's Notes.
Role-Based Permissions for Notes
General access to the Notes feature is controlled through role-based permissions. You will need to set these permissions before a user is able to access notes on any record.
Notes can then further be made available against the individual entities (e.g. UTAs, organizations, users, calendars etc) in the system using Advanced Logic.
1. Click the 9-square menu icon on the top right of your page.
2. Under the heading Configuration, select Global Settings.
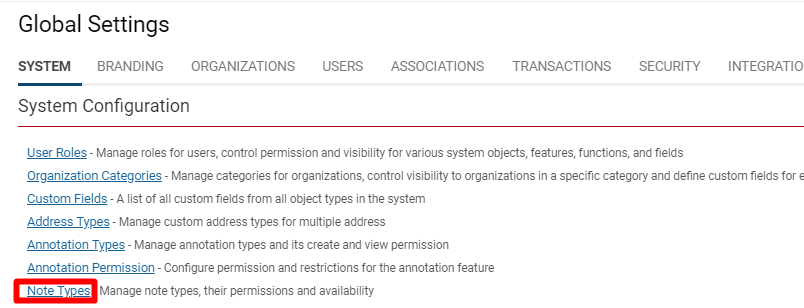
3. On the first tab, under the subheading System Configuration, click on Note Types.
The Notes list view is displayed.
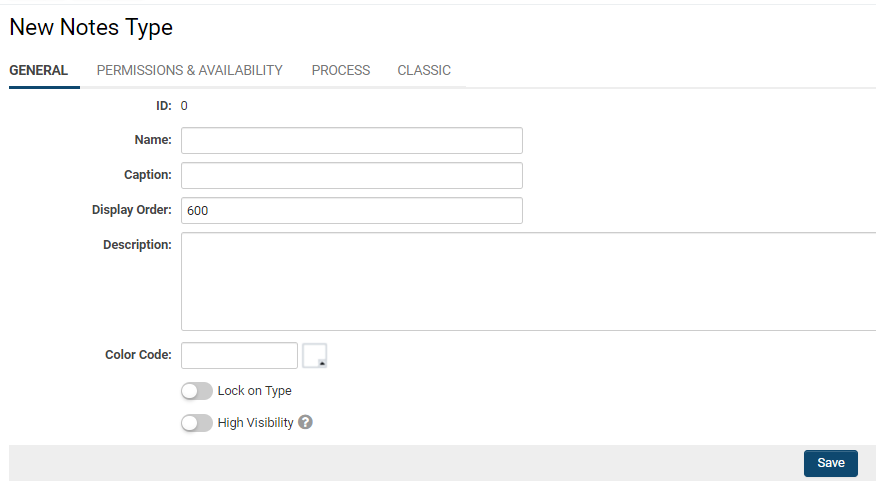
4. Click the + icon on the top left to create a new Note Type.
5. The New Note Type details will be displayed.
Configuration - Advanced
Pre-created Notes Options
When you create a note, you can choose to configure pre-created Notes Options. The impact is that the user who sees this note can select initial content for the note instead of manually and personally typing in the content. After the content is selected from the options, it can then be edited. The options are displayed only when a note is first created; after saving, they are no longer available.
The pre-created Options are a good method of enforcing a standardized Templates for your Notes feature.


