Difference between revisions of "Contact List View"
From SmartWiki
(→Contact List Views on UTA Records) |
|||
| Line 18: | Line 18: | ||
:[[Image:UTAContactListView.png|link=|500px]] | :[[Image:UTAContactListView.png|link=|500px]] | ||
| − | Note: If the Contact List View | + | Note: If the ''Contact List View'' hyperlink is not visible in the {{l2}} settings section: |
# Go to the [[UTA_Settings_-_Entity|Entity Tab]] of the settings page. | # Go to the [[UTA_Settings_-_Entity|Entity Tab]] of the settings page. | ||
# In the [[UTA_Settings_-_Entity#Level_2_Settings|Level Two settings section]], select "Use multiple Contact list for level 2." | # In the [[UTA_Settings_-_Entity#Level_2_Settings|Level Two settings section]], select "Use multiple Contact list for level 2." | ||
Latest revision as of 14:04, 20 December 2013
Definition
Contact List Views determine the fields that are shown in the columns of an ordered list of contact records.
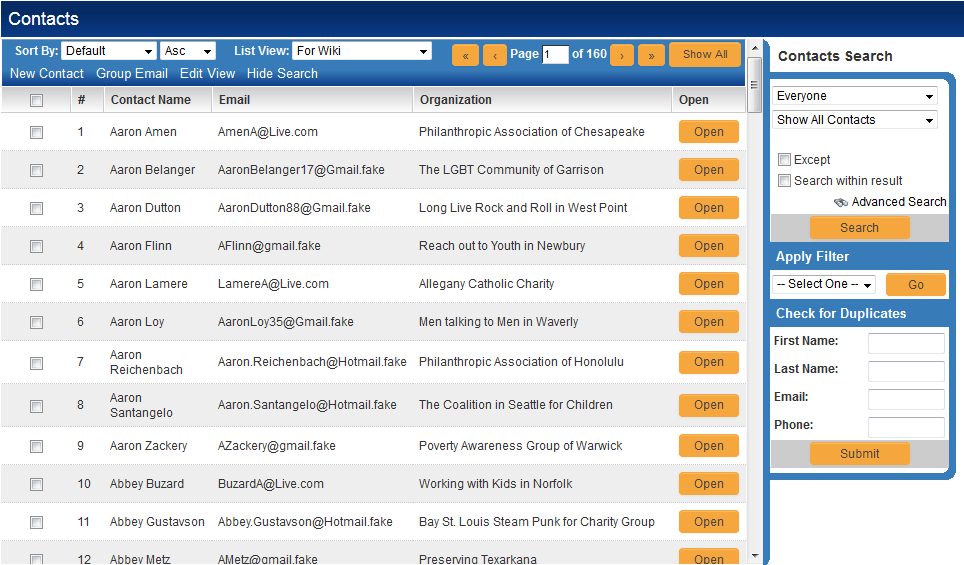
- In the above example, the following fields have been selected for display: the index (#), Contact Name, Email Address and Company Name. The last column is an "Open" button which accesses the specific contact record.
- Multiple Contact List Views can be defined, with visibility limited to different roles. See Configuring List Views for detailed instructions.
Contact List Views on UTA Records
With a , the lists of contacts visible on a records can also be configured:
- Go to the Settings tab within the .
- Click on the hyperlink for Contact List View
- Configure the list view per the instructions at Configuring List Views
The selected fields will then be visible on the contacts assigned to your records for that UTA:
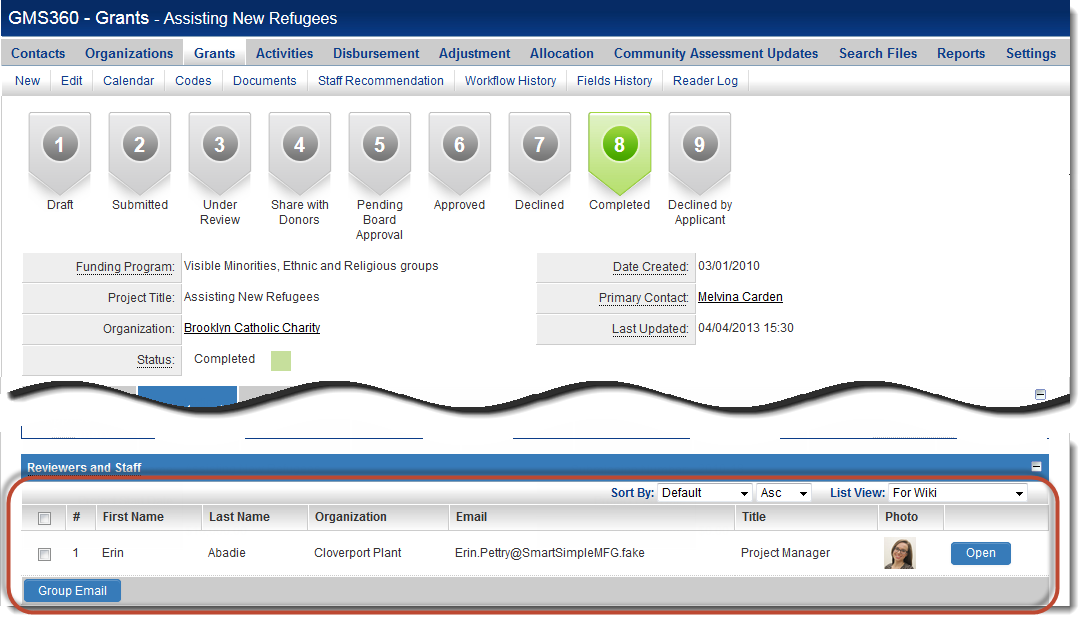
Note: If the Contact List View hyperlink is not visible in the Level 2 settings section:
- Go to the Entity Tab of the settings page.
- In the Level Two settings section, select "Use multiple Contact list for level 2."
- This will enable you to assign multiple contacts to a Level 2 record.