Difference between revisions of "Auto Loader"
(→Defining the Upload Type) |
(→Defining the Column Mapping) |
||
| Line 146: | Line 146: | ||
::* '''User ID''' (Contact Auto Loader) | ::* '''User ID''' (Contact Auto Loader) | ||
::* '''Resource ID''' (Resource Auto Loader) | ::* '''Resource ID''' (Resource Auto Loader) | ||
| − | ::* '''Tracking ID''' ( | + | ::* '''Tracking ID''' ({{l2}} / {{l3}} Auto Loader) |
* When using the fields above the IDs being Auto Loaded must match IDs of records present within the system. | * When using the fields above the IDs being Auto Loaded must match IDs of records present within the system. | ||
Revision as of 14:10, 14 June 2013
A SmartSimple feature used to automatically upload files of data related to companies, contacts and Universal Tracking Applications.
Contents
Overview
The Autoloader feature provides you with the ability to automatically update SmartSimple information with information from external text files. This feature is vital if you need to keep SmartSimple customer or project data in sync with an existing ERP or other legacy system.
An Autoloader can be triggered whenever a file is added to a designated SmartFolder. These files can be added manually or uploaded automatically using the file synchronization plug-in – SmartSync.
- Once a file is added to the SmartFolder, the autoloader process will recognize that a file has been added and start the upload process.
- Once the file has been processed, it will not be processed a second time unless a new file of the same name is added to the folder.
- Each record from the upload file will update the associated record in the database.
- A log file created indicates the success or failure of each record update and an email can be sent to a designated user indicating the success of the upload.
- If a new version of the file is added to the folder, then this flag is reset and new file will be processed.
- You can create any number of Autoloaders within the system to provide for different upload processes.
- An Autoloader can upload company, contacts or Universal Tracking Application Level 1 or Level 2 data.
Before you can deploy this feature it is necessary to:
- Define the SmartFolder, where the upload file will be stored.
- Define the format and layout of the data file – the number of columns in the upload file, the delimiter between each field and the field order.
- Specify a field in the upload file that the system will use to match an upload record to an existing customer record.
- Determine if you wish to use an automated process for files by using the SmartSync utility or manually add the files to the folder.
Each record in the upload file is used to update one set of fields in the entity to be updated. The existing value in the SmartSimple field will be replaced by the value on the field in the upload file.
Creating a SmartFolder
- Any SmartFolder can be used as the source for an Autoloader.
- The folder must be used exclusively for the Autoloader, since every file uploaded will be processed.
- Incorrect files or incorrectly formatted files will be processed so could lead to data loss and/or creation of invalid data.
IMPORTANT Because any file uploaded to a SmartFolder that is attached to an autoloader will be processed it is extremely important that the SmartFolder is permissioned and labelled appropriately.
- SmartFolders for autoloaders should be permissioned such that only contacts that need to be able to upload files for autoloading are permitted to do so.
- It is best practice to put all Autoloader enabled SmartFolders into a parent folder named Autoloader (with role-restricted access) to help ensure no inappropriate files are uploaded to the folder.
Preparing the Upload File
- You must be able to specify a unique field that will be used to link each record in the upload file to each record in the customer record. You cannot use a standard field such as customer name or phone number.
- This common field needs to be present in each record on the upload file and in each customer record. For instance, a unique account number field that you add to the customer table can be linked to the same account number field in the upload data.
- The file to be uploaded must be in ASCII format. There is no specific file naming convention.
- Each record in the file must be separated by a CR/LF (ASCII 13,10 /D,A) character combination.
- Each field must be delimited by one of the following characters:
Comma – “,” (ASCII 44/2C)
Tab – (ASCII 9/9)
Pipe – “|” (ASCII 179/B3)
Semi colon – “;” (ASCII 59/3B)
Colon – “:” (ASCII 58/3A)
- This can be accomplished either using Notepad to create and edit the data for import which can be saved with txt as the file extension.
- Alternately you can use the Save As feature within Microsoft Excel and save the document as a csv file.
Notes:
- If any of the data to be imported contains commas and you are creating a csv file from Excel you should export the data using pipes (|) as the separators rather than commas. To do this you need to change the settings on your PC prior to creating the csv file. The method of doing this depends on your PCs Operating System, but is roughly outlined below:
Start -> Settings -> Control Panel -> Regional Settings.
Click the "Number" tab and in the "List Separator" field,
Replace the current default separator with the one you want to use (such as the pipe symbol | ).
- If you use Microsoft Excel to create a csv file it is recommended that you open the document with Notepad to review the contents prior to Autoloading. If any of the data within the Excel document had line breaks within cells it will create a line break in the csv document. Each new line in the csv document will start a new record, thus you must ensure all inner-cell line breaks are removed from either Excel or the txt document.
- Alternately when performing a CSV import, any columns that have line breaks or delimiters within the content can be contained within double quotes. NOTE: Any double quotes within that content MUST be escaped with a backslash \ in front of the double quote so they aren't treated as the closing quote of the column. Example of a 4-column CSV:
1st Record|Draft|"This content"|555-1212
2nd Record|Submitted|"That content"|123-4567
3rd Record|Draft|"Broken
Content"|444-5555
4th Record|Draft|"Normal Content Test"|321-9876
5th Record|Submitted|"Backslash Escaped \" quote content
Also with
multiple line breaks"|777-8888
6th Record|Submitted|"Normal Content again"|111-2233
Autoloader Constraints
- You must be a Global Administrator in your instance of SmartSimple to access the Autoloader feature and set up an upload process.
- The user uploading the file must have write permissions to the folder where the file is to be stored.
- You must not use the upload folder for any purpose other than uploading files, as the autoloader will attempt to process any file added to the folder.
Instructions
This section describes the detailed steps required to use the Autoloader. Carefully examine, using a file editor, the file that will be uploaded.
Ensure that the file meets the file layout criteria outlined in the previous section:
- Choose the Configuration, Global Settings menu.
- Scroll to the end of the page.
- Click the Autoloader link.
- Click the New Autoloader tab.
Setting the Autoloader Name
As you can define any number of autoloaders each autoloader process must be uniquely named.
- Set the name for this autoloader process.
Setting the SmartFolder
- Click the Folder Lookup button to display the SmartFolder, list.
- Select the folder where you plan to add the file.
The folder name will be added to the Folder box.
Defining the Upload Type
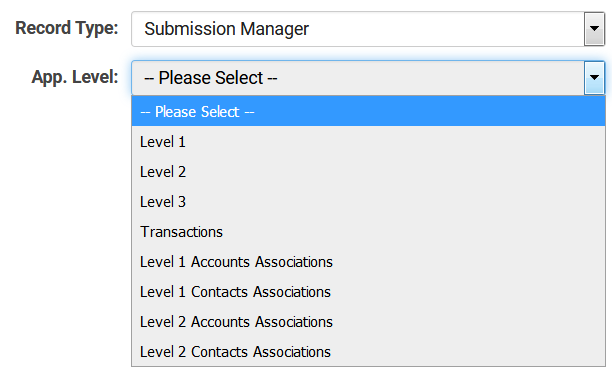
The Upload type can be company, contact, or a Universal Tracking Application Level 1 or Level 2 data.
Additional Settings
You must set the following additional settings:
- Run Daily – the Autoloader will run daily at the same time.
- Delete First – all existing data will be deleted from the UTA level selected (This setting only applies to UTA data).
- IMPORTANT: Delete First is only used to delete UTA data where the data will be completely replaced with uploaded data. Use with caution
- Activate – enables the Autoloader. Until this check box is enabled the Autoloader will not execute.
- Email Log To – sets the email address of the person that you wish to receive a message every time the autoloader executes with a report of the upload process. This report is also stored in the same folder as the uploaded file.
- Launch Time – sets the time on a daily basis that the autoloader will execute.
New Record
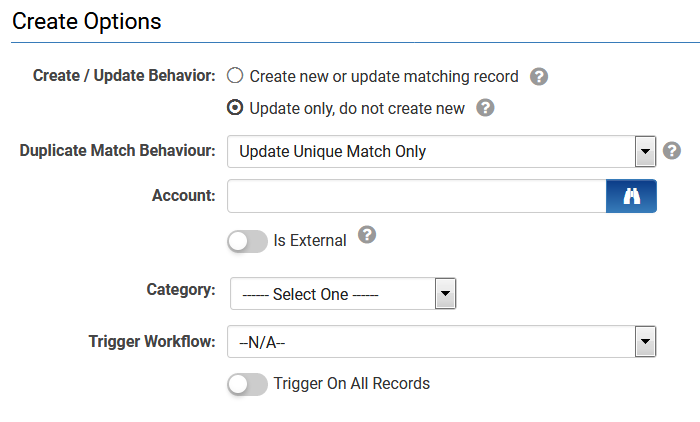
The New Record section of the Autoloader is used to determine how new records in the upload file should be handled.
- Create - If you wish to create new record, then enable the Create check box. If you do not enable this check box and new records are located in the upload file they will be rejected.
- Account – determines where in the organisational hierarchy new records should be added.
- Category – determines the organisational category that you wish to be associated with the new records.
- If you are uploading contact records the category field is replaced by a role field so you can determine the role of new contacts.
File Layout - Defining the number of columns
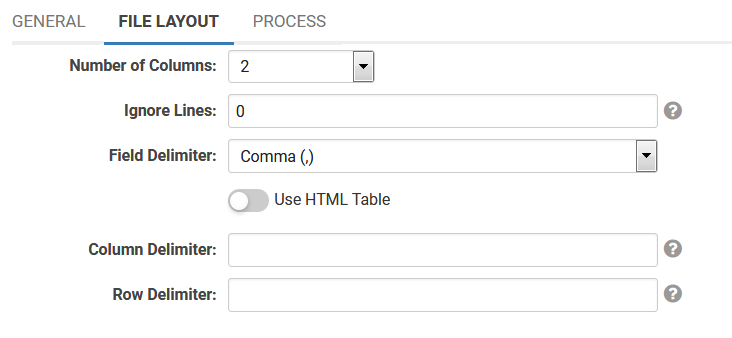
The File Layout section is used to determine the number of columns in the file, the delimiter between the columns and the use of a HTML table to display the data.
- The number of columns you select is used to define the number of columns in the upload file, and the number of fields that can be updated in the database.
- The maximum number of fields that can be updated is 50 fields in a single file.
- If more than 50 fields are required, then you will need to create two upload files.
Defining the Column Mapping
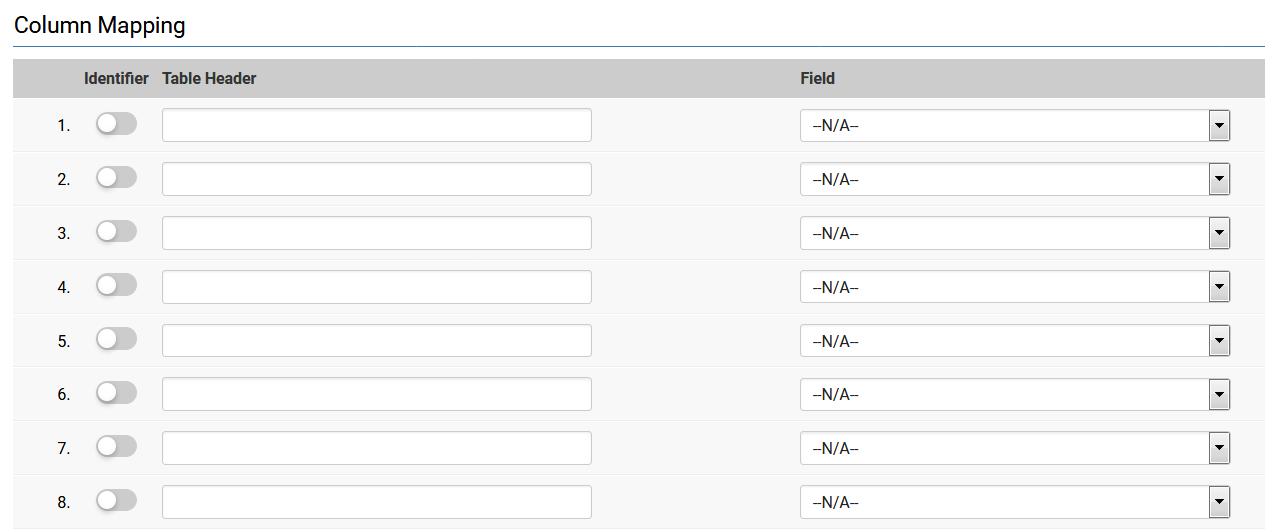
Once you have defined the number of fields, you define the field order to match the column order in the upload file.
- The number of columns you select determines the number of fields you can map.
- The field name is selected from the Field combo box.
- In order for the update to succeed, a single field is required to match an upload record to an existing database record this is indicated as the Identifier field. Customer data will generally be an account number type field.
- The Table header field is only required if you are using the HTML Table feature.
IMPORTANT:
The following fields must only be included in the Autoloader field mappings if you are updating existing records. These fields must not be used when using the Auto Loader to create new records.
- When using the fields above the IDs being Auto Loaded must match IDs of records present within the system.
- If used the fields should be marked as the Identifier.
- These fields would normally be used if you have extracted data from SmartSimple including those ID fields, updated the data outside of SmartSimple and wish to import the updated information.
Activating the Autoloader
The final step of the configuration process is activation of the Autoloader.
- Click the Activate check box.
Using an HTML Table
An HTML table is very useful where imported data contains multiple records and a single record set of fields exists within SmartSimple.
- For example, if you wished to import multiple lines of sales information into a single text box field you would enable the HTML table feature and then map all the fields into a single field indicating the column and row delimiters.
Updating Account Owners
When you are updating company type information you can automatically associate an account field to a user field in order to establish “account ownership”. This section is only displayed at the bottom of the Autoloader page if you have set the Type to Company.


