Difference between revisions of "Adding the SmartSimple Login to your Website"
(→Returning to the Custom Login Page when Logging Out) |
|||
| Line 65: | Line 65: | ||
8. Go to '''Branding & Visual Settings''' section. | 8. Go to '''Branding & Visual Settings''' section. | ||
| − | 9. | + | 9. Click the "Source" button, select and delete all the content in the '''Login screen content''' text box. |
| − | 10. Add the following | + | 10. Add the following variable. |
| − | + | @redirect='''http://www.yourdomain.com/yourloginpage.html'''@ | |
| − | 11. Replace the hyperlink reference with a reference to your '''custom login page'''. | + | 11. Replace the hyperlink reference (http://www.yourdomain.com/yourloginpage.html) with a reference to your '''custom login page'''. |
12. Click the '''Save''' button. | 12. Click the '''Save''' button. | ||
| Line 78: | Line 78: | ||
Note: you can redirect users to any page that you wish, not just the custom login page. | Note: you can redirect users to any page that you wish, not just the custom login page. | ||
| + | |||
== Returning invalid login error message== | == Returning invalid login error message== | ||
If you wish to return an invalid username or password error message to your login page you can place the | If you wish to return an invalid username or password error message to your login page you can place the | ||
Revision as of 11:39, 21 February 2012
Contents
Overview
These instructions explain how to embed the SmartSimple login process within your website.
- Connecting the SmartSimple login to your website makes it easier for people to remember where to go. It also increases the exposure of the company's website to people using SmartSimple.
- Every organization using SmartSimple can log into the system using the standard login (http://alias.smartsimple.com) entry point.
- Alias is the short form reference that you create in the company settings page.
These instructions assume that you are familiar with HTML and have access
read/write to the web page on which you wish to enable this feature.
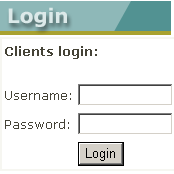
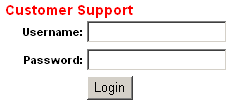
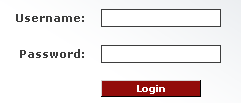
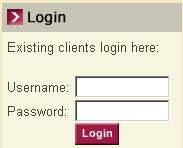
The following examples show how these login pages can look:
Step by Step Instructions
1. Use your Web Page Editor to open the website page to which you wish to add the SmartSimple login.
2. Paste or type the following code into the required location on the page.
<form name="login" action="http://xxxx.smartsimple.com/exlogin.jsp" method="post">
      <input type="hidden" name="alias" value="xxxx">
      <table width="100%" border="0" cellspacing="0" cellpadding="0">
         <tr>
           <td>Username:</td>
           <td>
             <input type="text" name="user" size="10"
           </td>
         </tr>
         <tr>
           <td>Password:</td>
           <td>
              <input type="text" name="password" size="10"
           </td>
         </tr>
         <tr>
           <td> </td>
           <td>
             <input type="submit" name="Submit" value="Login">
           </td>
         </tr>
      </table>
</form>
3. Replace xxxx with the company Alias
4. If you wish to use SSL replace http://alias.smartsimple.xxx with https://alias.smartsimple.xxx
5. Save the page.
6. Add any additional formatting as required.
7. Test the page to ensure you can login successfully.
Returning to the Custom Login Page when Logging Out
When a user logs out of SmartSimple they are returned to the generic "Alias" login page – not a login page that you have established using the technique shown in this document.
Use the following technique to take a user back to your web site login page when they log out.
You should not make this change until you are sure your login page is functioning correctly, otherwise you will not be able to log into SmartSimple. If this happens please contact the help desk.
7. Click the Configuration, Global Settings link.
8. Go to Branding & Visual Settings section.
9. Click the "Source" button, select and delete all the content in the Login screen content text box.
10. Add the following variable.
@redirect=http://www.yourdomain.com/yourloginpage.html@
11. Replace the hyperlink reference (http://www.yourdomain.com/yourloginpage.html) with a reference to your custom login page.
12. Click the Save button.
Users now logging out from SmartSimple will be redirected to this page.
Note: you can redirect users to any page that you wish, not just the custom login page.
Returning invalid login error message
If you wish to return an invalid username or password error message to your login page you can place the following script in the head portion of your login page.
You can change the “Invalid Username or Password.” message located in the showmsg function to whatever message you wish to display.
<script language=javascript>
function _getrequestvar(name)
{ var url= location.href;
var hasQueryString = url.indexOf('?');
if (hasQueryString != -1)
return url.substring(hasQueryString+2+name.length ).replace(/%20/g,'
').replace(/\+/g,' ');
else
return "";
}
function showmsg()
{
if( _getrequestvar('errmsg').length>0)
return "Invalid Username or Password.";
else
return "";
}
</script>
Additionally you will need to place this second script within the area you wish the error message to be printed.
<script language="javascript">
document.write(showmsg());
</script>
Alternatively, if you are using a server page as your login page you can choose to use the parameter “errmsg=Invalid+User+Login.” which is passed back to your page in order to display the error message.


