Creating a Single Step Workflow in Time Tracking
Contents
Overview
This artcile provides an overview to creating a straight through approval workflow.
- In this example there are no workflow tasks. The Start event of the workflow is directly connected to the finish event.
1. Click the Global Settings, Workflow link.
The list of workflows is displayed – currently empty. This list will display the name, narrative description, and is modified by date and name.
2. Click the New Workflow link.
The New Workflow window is displayed.
Setting the Object Type
SmartSimple provides the ability to attach a workflow to many different objects. If you do not select the correct object type, the workflow name will not be listed when you attempt to connect the workflow to the object.
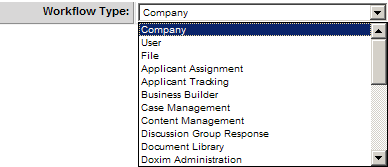
1. Click the Workflow Type combo box.
The complete workflow types are listed.
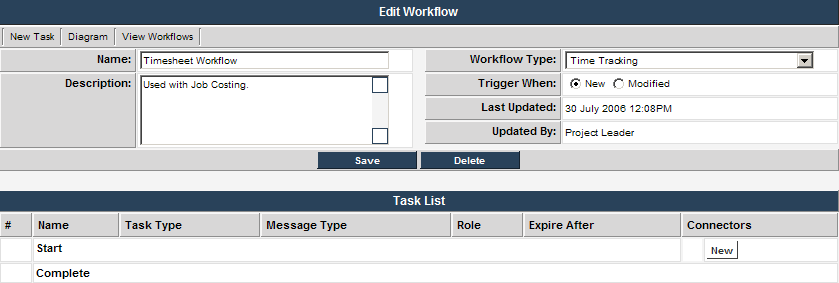
This workflow will be attached to Time Tracking, and will be triggered when a new timesheet is submitted.
2. Set the Workflow Type to Time Tracking.
3. Set the Name to Timesheet Workflow.
4. Set the Description to Use with Job Costing.
Setting the Trigger Type
The workflow trigger determines when a new instance of the workflow should be started.
- The New Object option will only trigger when a new object is created. In this example, when a new file is added to the folder.
- The Change Object option will trigger the workflow when an existing object is changed.
The default for the new object option is correct. It is necessary to save to the workflow details before you can add any workflow steps.
1. Click the Save button.
The workflow is saved.
Adding a Workflow Connector
Next you will connect the built-in Start and Complete tasks.
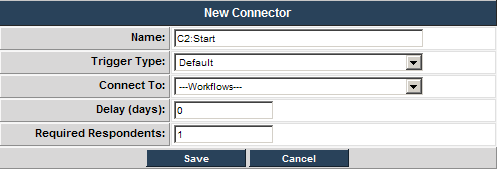
1. Click the New Connector button.
The New Connector window is displayed.
2. Set the Connect To: to the Start task.
3. Click the Save button.
The start task is connected to the complete task.
Viewing a Workflow Diagram
You can now view the workflow diagram.
1. Click the Diagram button.
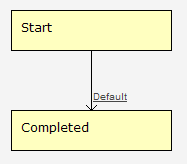
The workflow diagram is displayed.
The start event is linked to the complete event. There is no branching logic in this workflow.


