Enabling ORCID Within Your System
Overview
ORCID (Open Researcher and Contributor ID) is an independent non-profit organization that provides a persistent identifier – an ORCID iD – that distinguishes individual researchers and a mechanism for linking research outputs and activities to the user’s specific ORCID iD. ORCID is integrated into many systems used by publishers, funders, institutions, and other research-related services. Learn more at ORCID.org
SmartSimple Cloud supports functionality that can authenticate ORCID iDs and update ORCID records using the ORCID API. SmartSimple Cloud is using the 3.0 version of the API for the ORCID integration. By collecting a user’s authenticated ORCID iD, this allows import of a user’s ORCID record to their profile. The ORCID integration can also be configured to add and update funding records on the user's ORCID record. This functionality will be of particular interest and advantage to researchers and research-based foundations using SmartSimple Cloud.
ORCID offers a Public API that allows organizations to connect their systems to the ORCID registry. The Public API can be used to collect authenticated ORCID iDs. ORCID Membership allows access to the Member API, which facilitates registration, and information exchange with ORCID records. ORCID membership is open to any organization interested in integrating ORCID identifiers. The Member API allows your systems and applications to connect to the ORCID registry, including reading from and writing to individual ORCID records with the user’s permission. Learn more at ORCID Membership.
This article will show you how to setup importing a user’s ORCID record as well as add and update Funding records using the ORCID API. You will need Global Administrator access to setup the ORCID integration in SmartSimple Cloud.
Use cases
- Once logged into SmartSimple Cloud, users can access their ORCID accounts using their registered email address and password or create a new account. They then authorize SmartSimple Cloud to obtain their ORCID iD. Storing authenticated ORCID iDs in your system ensures accuracy and reflects the user's research activities.
- Upon receiving user permission, information visible to trusted parties, in addition to publicly available data, is imported into their profile. The display of ORCID records on the user's profile is permissioned by role, providing staff or reviewers with an overview of the user's research activities.
- The process is streamlined by retrieving data from ORCID records to populate application or progress report forms. In SmartSimple Cloud, data from ORCID is stored in JSON format, enabling specific formatting and versatile data usage within the system.
- Enabling staff to add and update data in ORCID funding records simplifies the user experience by connecting validated information to their ORCID records. This action is triggered by a workflow, configurable for specific roles and statuses. Data field mapping sent to ORCID is managed by your system administrator. (Article: Updating Funding Data in ORCID)
- The display of ORCID data on the user’s profile complements any existing configurations showing researcher profile data and outputs. In SmartSimple Cloud, ORCID data is stored in JSON format, allowing system administrators to create tailored views of information from various sources for your team or organization-specific processes.
Configuration
Obtain Keys to Use the ORCID API
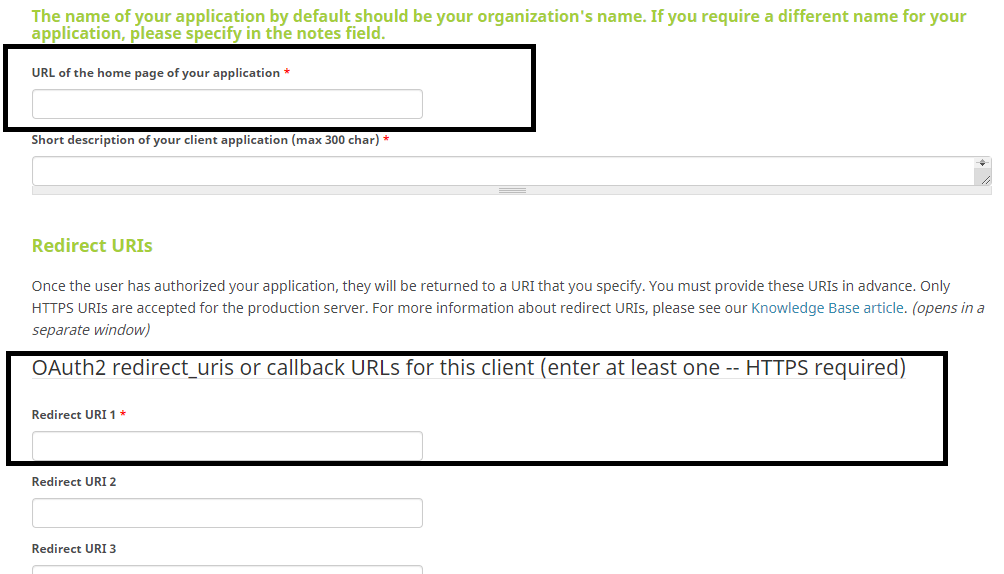
To use the ORCID Integration, a ORCID Member API (Production Member API) is required. Each instance URL will need its own API. During signup, you will need to provide the Homepage URL and also a Redirect URL . Please refer to the ORCID API application for more information.
Below is a screenshot of the ORCID Member API application on ORCID:
ORCID URL Configuration
Example of "URL of the home page of your application"
https://alias.smartsimple.com
This is the URL you use to access your instance of SmartSimple Cloud.
Example of "Redirect URI"
https://alias.smartsimple.com/links/orcid/callback.jsp
This is a link to the callback server page for your instance of SmartSimple. Note that the URL will be different as it must match that used to access your own copy of SmartSimple Cloud.
Integration Key Management
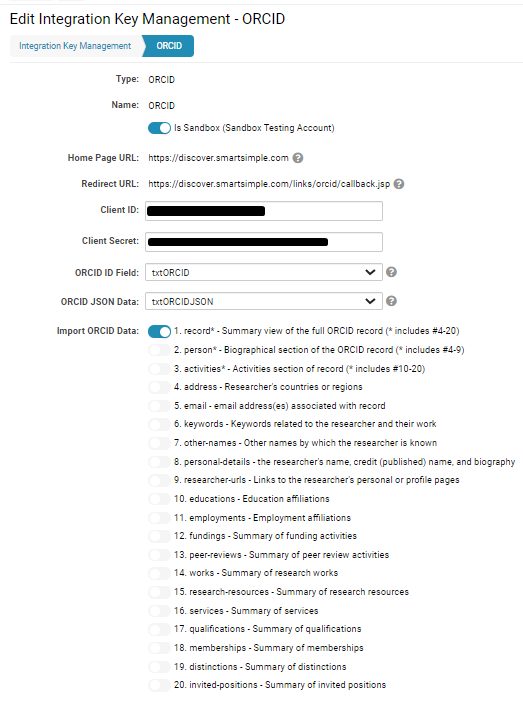
After a successful ORCID Member API application, set up your Client ID and Client Secret in your system in Integration Key Management.
- Go to Global Settings > Integrations > Integration Key Management.
- Click on New Integration Key (+ button).
- Key Type: set to ORCID.
- Copy the Home Page URL and Redirect URL for ORCID Member API application.
- Fill in Client ID and Client Secret from your ORCID API application.
- Choose user custom fields to store the ORCID iD and JSON data.
- Select one or more Import ORCID Data record types. These determine the set of information that will be pulled from ORCID.
Note: ORCID offers a sandbox testing server to try the ORCID API. You can create user accounts and test out API calls on the sandbox without needing to worry about affecting production data or accidentally spamming researchers.
Enable ORCID Tab on User Profile
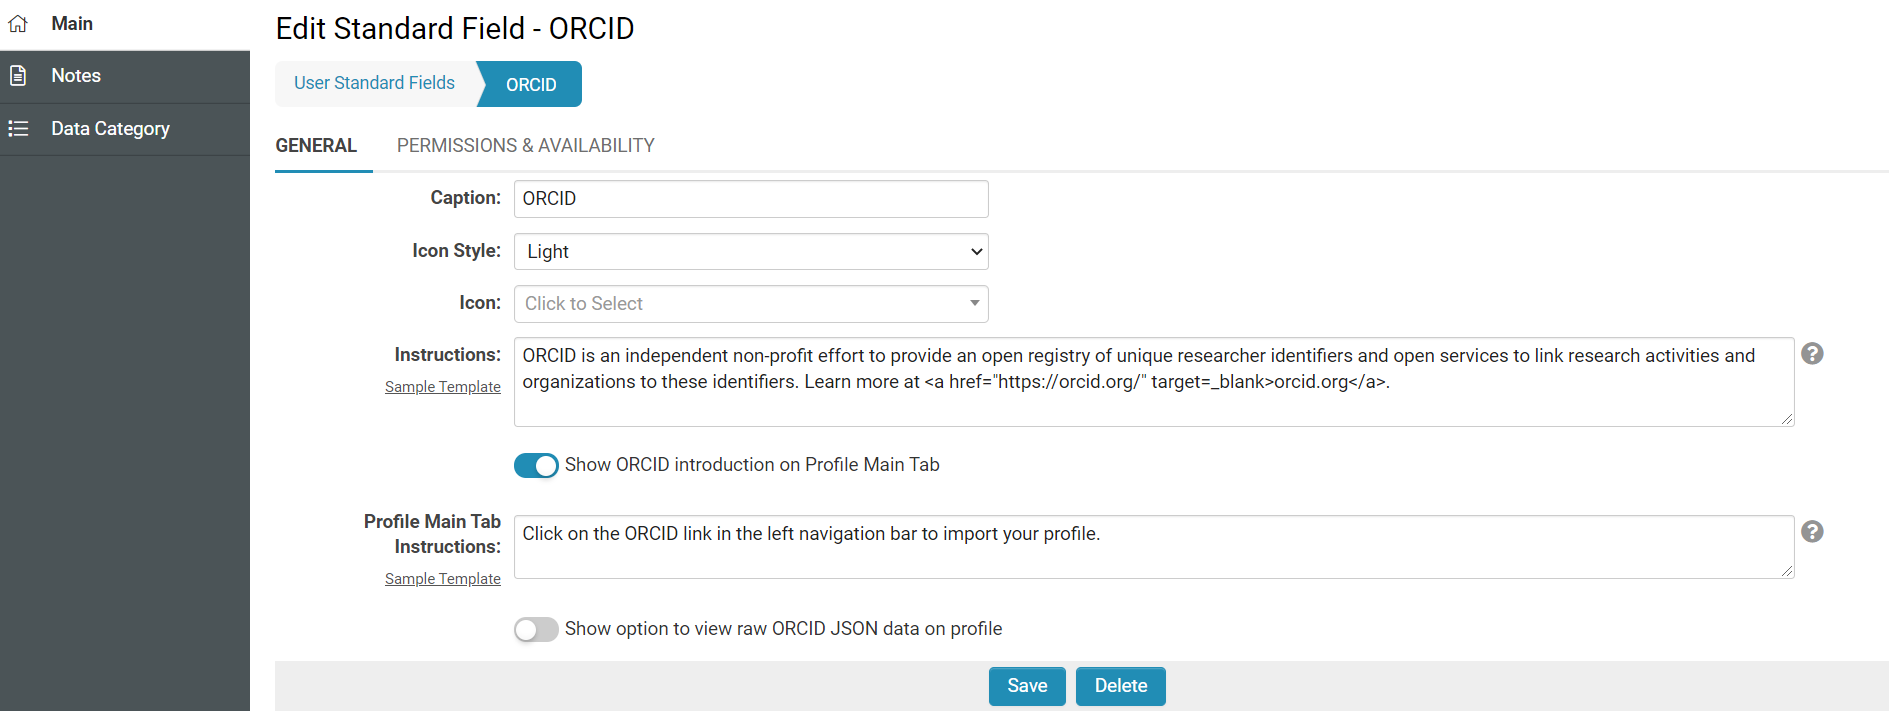
SmartSimple Cloud supports importing a user’s ORCID records to their profile. The ORCID iD is stored to a user profile field and the data imported from ORCID is stored in JSON format.
Under Global Settings > Users > Standard Fields > ORCID, update the configuration to permission specific roles and statuses. It is advisable to include instructions and messaging on the Profile Main tab. Sample templates for messaging within these sections are available.
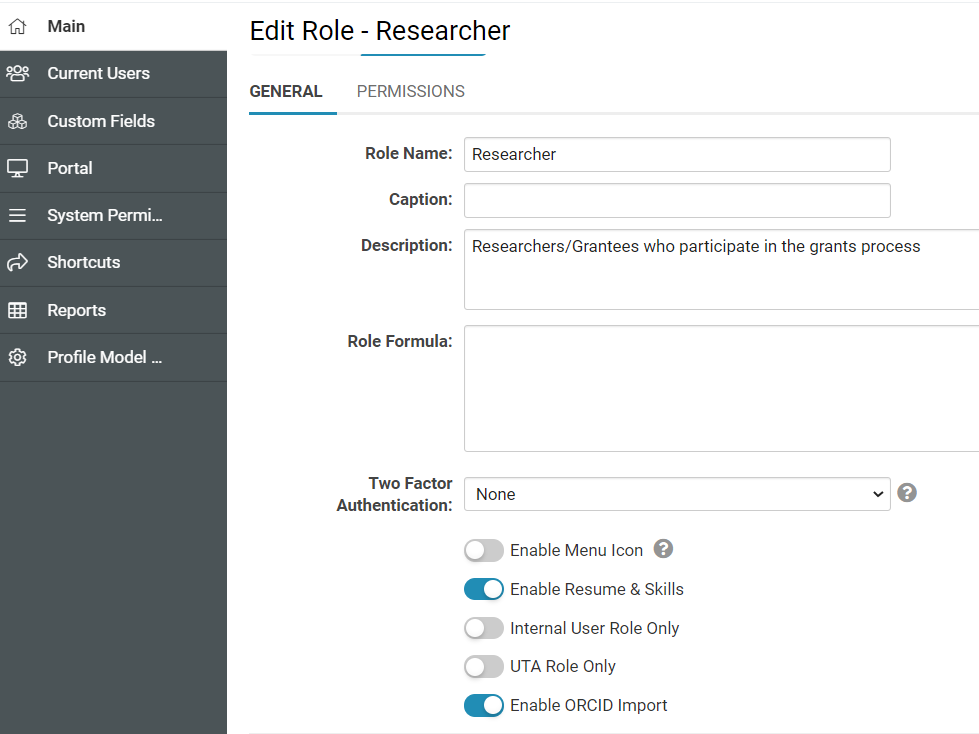
Configure Roles Using ORCID
Under Global Setting > Users > Roles, select a role and toggle on the option Enable ORCID Import. Users with the selected role will have the option for ORCID import in their profile.
Using the ORCID Integration
Import ORCID record to User Profile
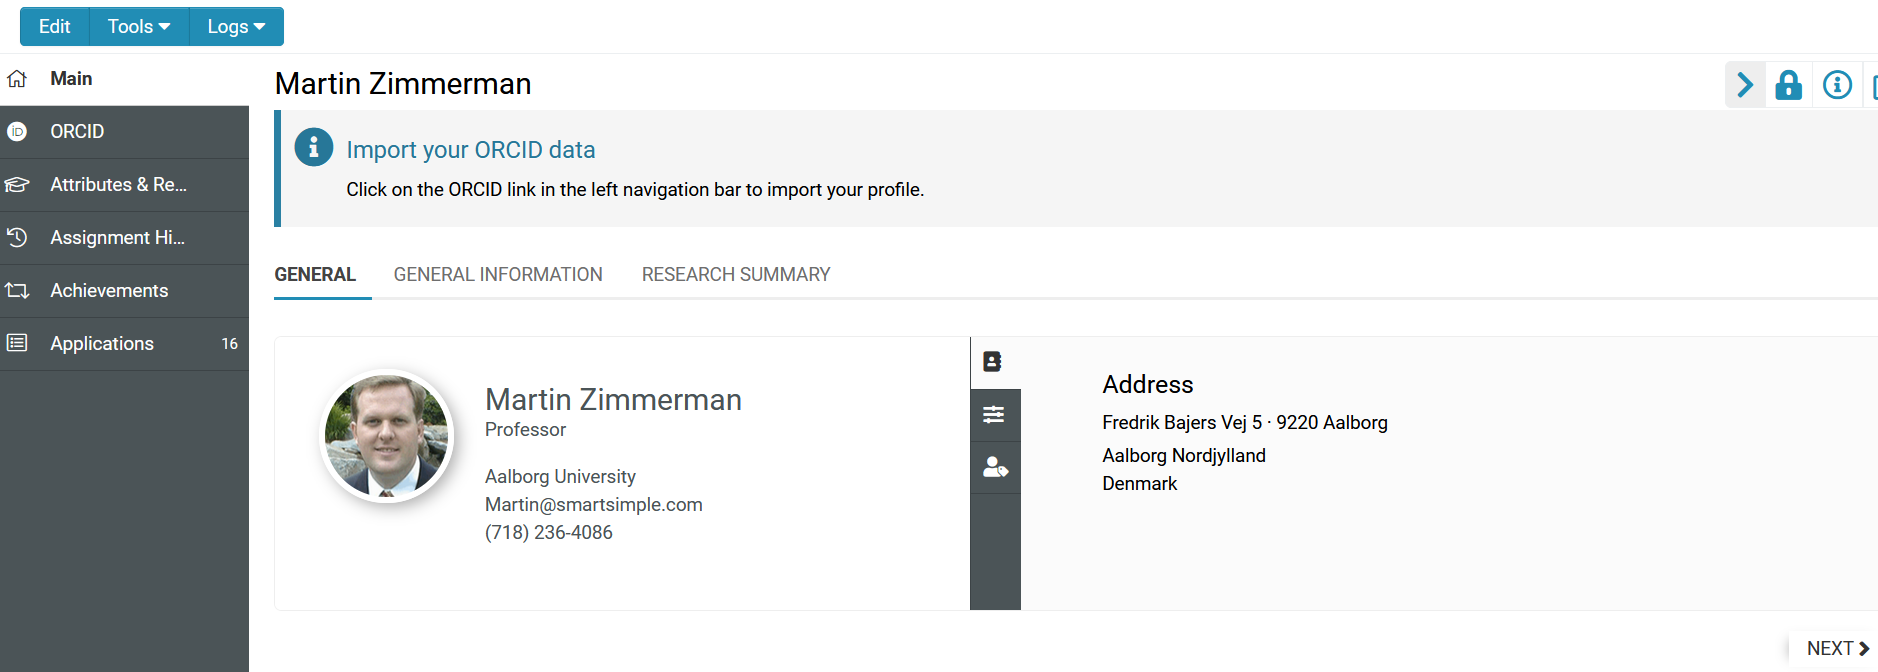
1. When the user logs into their portal, if they have not previously imported their ORCID record, a message appears instructing them to navigate to the correct section.
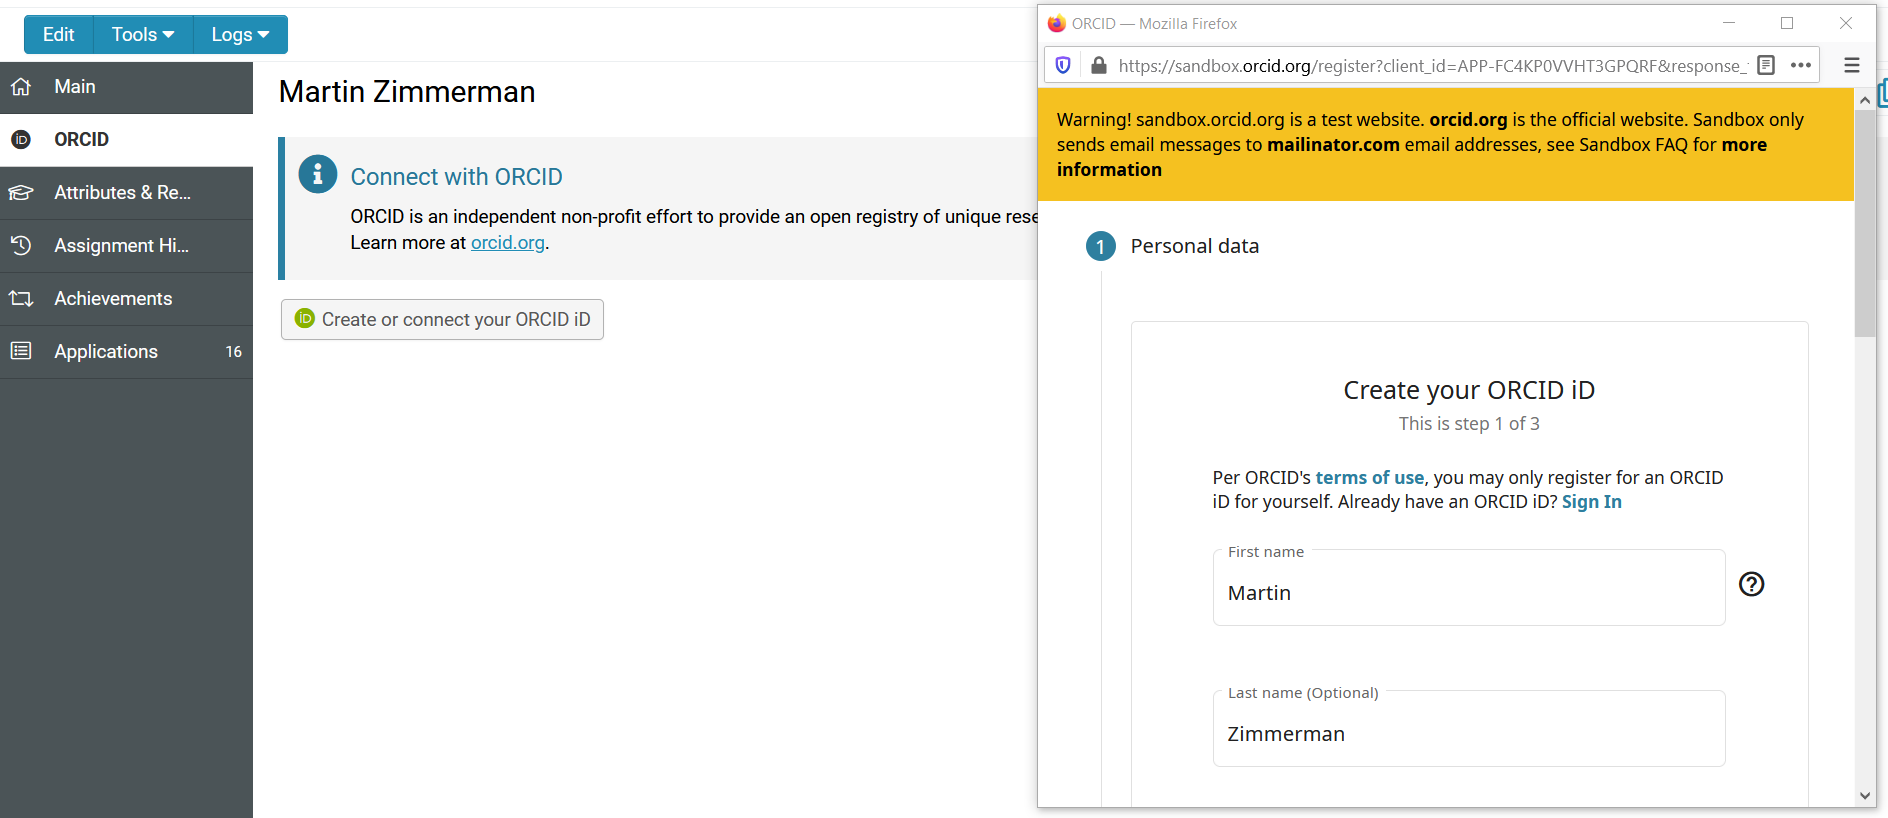
2. When the user navigates to the ORCID tab on their profile, they have the option to connect their ORCID iD. Instructions appear to the user in this tab. These instructions should introduce users to ORCID, why you are requesting access to their ORCID record, and what you will do with their data.
3. When the user clicks on the Create or connect your ORCID iD button, a new window appears for the user to create or login to ORCID. This process uses OAuth to authenticate ORCID iDs.
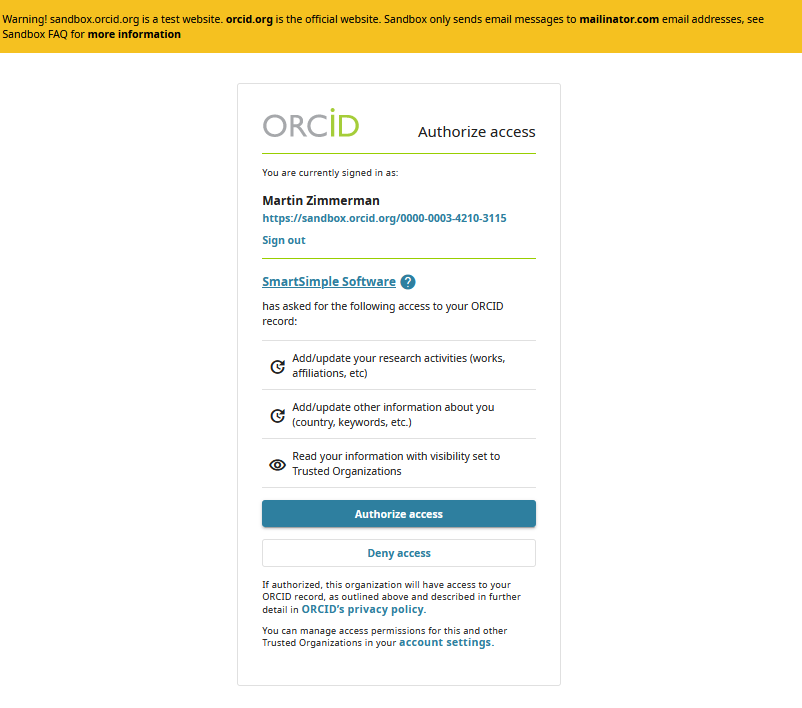
4. Once the user's credentials are entered, the user is prompted to Authorize access for the system. Note that the organization name will be the one used to apply for the ORCID API and not SmartSimple Cloud.
5. Once the Authorize access is clicked, the ORCID iD is authorized and the user is prompted with a button to Continue to import your ORCID data. The ORCID iD is stored in the field designated in the configuration settings. Note the ORCID iD, access tokens and refresh tokens are all stored into the same record for the user in the system database. If Deny access is clicked, the process ends.
6. When the user clicks Continue to import your ORCID data, the data is automatically refreshed on their profile and a thank you message appears. The user can close the separate window at their leisure. The user’s data is stored in JSON format in the field designated in the settings.
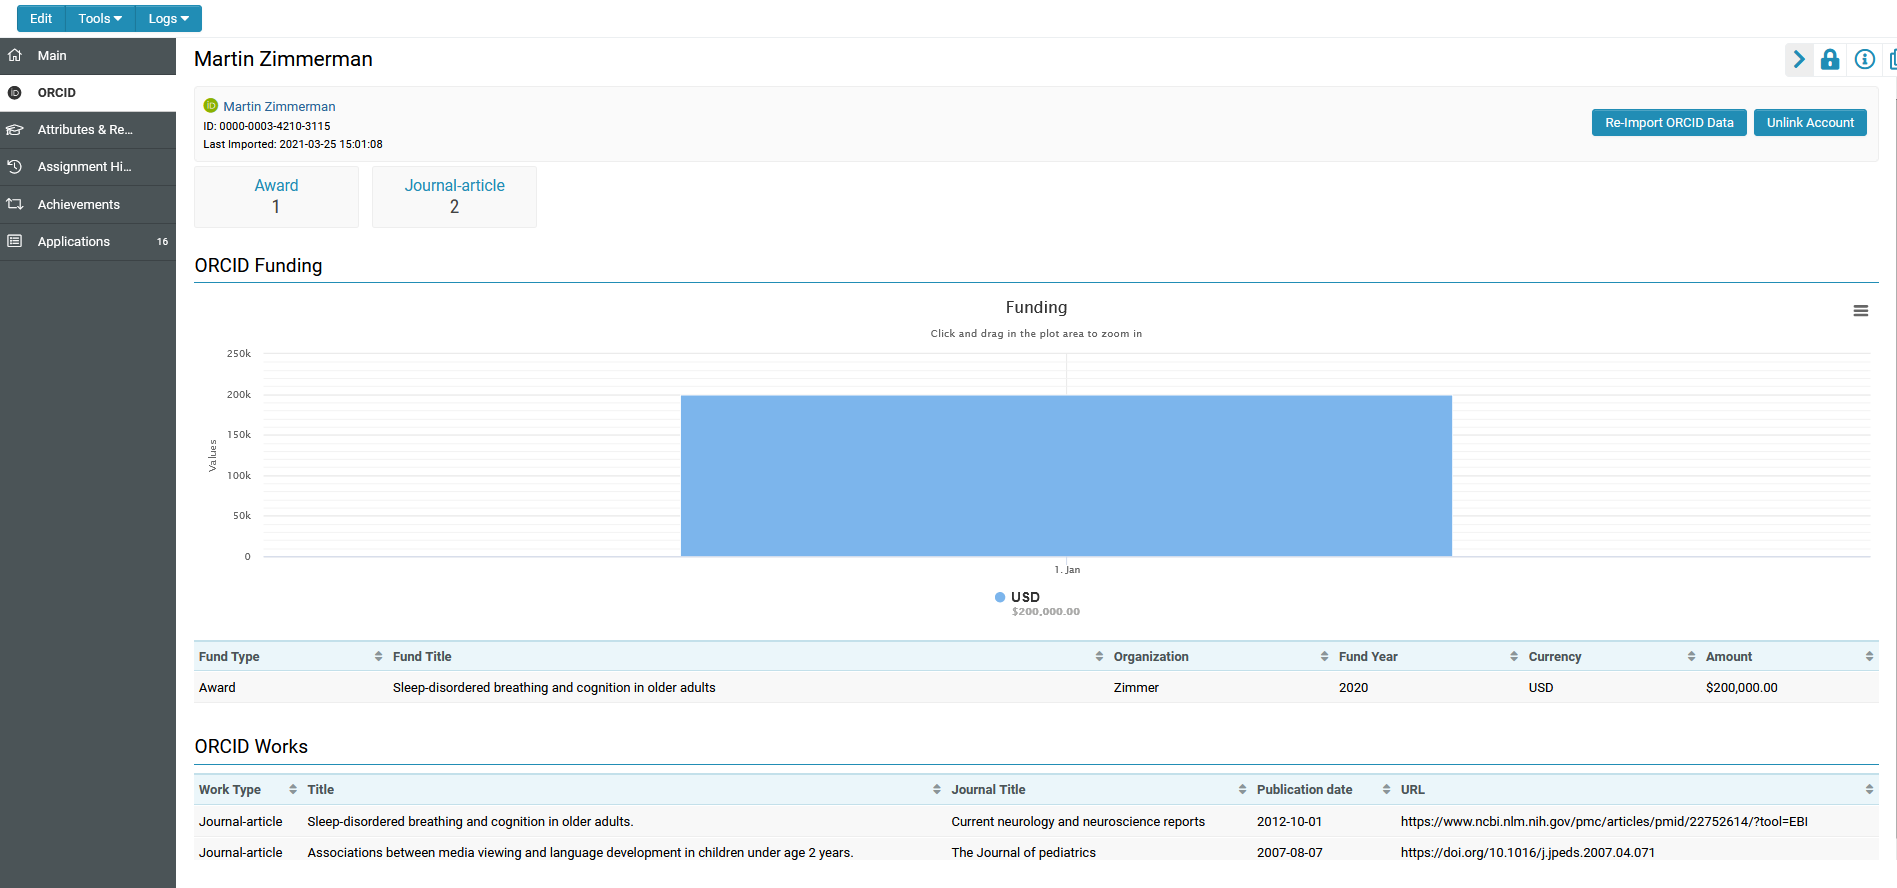
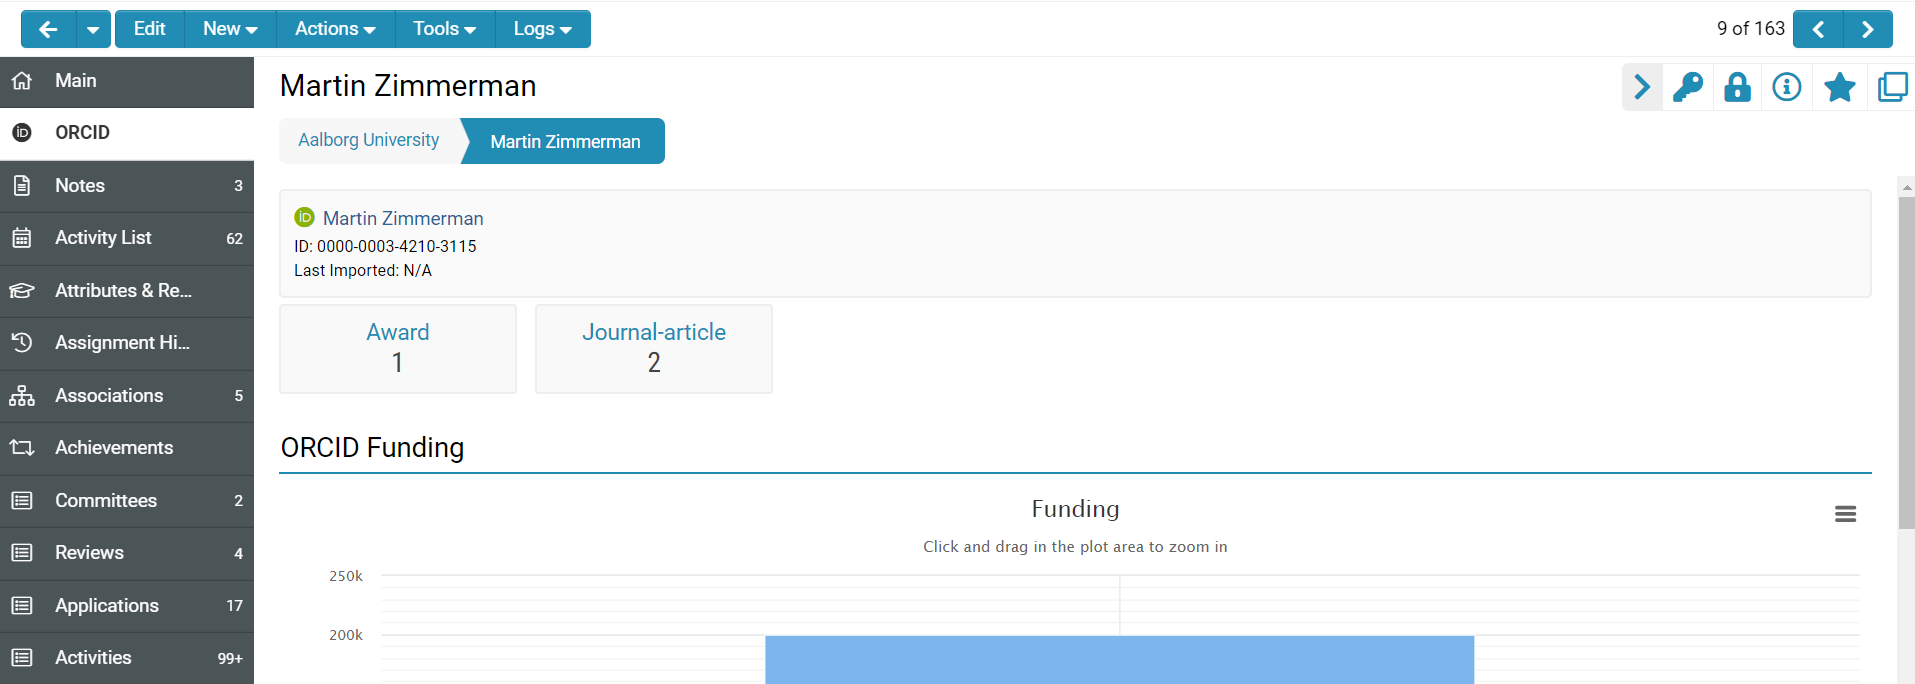
7. The user profile displays an overview of their ORCID record. A count of different Funding Types and Works is provided at the top of the page. Details of the Funding and Works are listed.
8. If specific Funding records do not contain a year or amount, they are excluded from the chart and a message to the user is displayed.
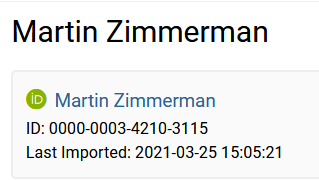
9. An ORCID iD icon is displayed to the top of the page next to the profile name on the ORCID tab of the profile. This has a hyperlink to the public ORCID record of the user’s account. The user’s iD and last imported date is displayed.
10. A button captioned Re-Import ORCID Data is available for the user to trigger a re-Import of their ORCID record. Any data that has been updated or added to ORCID will be imported and the profile page automatically refreshed. The Last Imported date will be updated. 11. A button captioned Unlink Account is available for the user to unlink their account. A message appears for the user to confirm. When confirmed, the ORCID record information is immediately removed from the ORCID tab of their profile.
Viewing Other Users’ ORCID records
1. For roles able to view the user’s profile, such as internal staff, if the user has not previously imported their ORCID record, a message appears indicating that they have not connected to ORCID. Note that the user themselves has to login to the system in order to authenticate their iD to import their profile.
2. For roles able to view the user’s profile, such as internal staff, once the user has connected to ORCID and imported their profile, the ORCID record can be viewed.
