Difference between revisions of "Wiki Editing CheatSheet"
Mark Bridger (talk | contribs) (→Preformatted text) |
Mark Bridger (talk | contribs) (→Configuration – Essentials) |
||
| Line 14: | Line 14: | ||
===Configuration – Essentials=== | ===Configuration – Essentials=== | ||
| − | Break out all the tasks the majority of users will do and explain how to do them in the minimal steps possible. Use a numbered list for the tasks and keep them below 15 steps. If it is more than 15 steps to do something break the task into multiple headers. | + | Break out all the tasks the majority of users will do and explain how to do them in the minimal steps possible. Use a numbered list for the tasks and keep them below 15 steps. If it is more than 15 steps to do something, break the task into multiple headers. |
===Configuration - Advanced=== | ===Configuration - Advanced=== | ||
Revision as of 11:37, 20 September 2019
Contents
Overview
SmartSimple’s Wiki is a repository of knowledge used to make learning and configuring SmartSimple easy to do. This page will provide guidance for anyone who is contributing to the wiki. By establishing standards to follow that will improve the user experience of this Wiki.
Wiki article structure
All wiki articles need to follow this format:
Overview
Answer the following questions
- What is this article about? Example: The Login page allows a user to gain access to your SmartSimple System. The user will authenticate on this page, typically by entering a username and password.
- Why is this important? Example: The login page is used to: Authenticate the user, Switch languages, Direct people to a signup page, Ask the user to accept the use of cookies, enforce agreement of your systems privacy and security policies, and Reset your password.
- What will the reader learn from this article? Example: This article will show you how to setup and modify login pages within your system.
- Is there anything odd or important that should be noted? Example: Note: You will need global administrator access to setup or edit login pages. You will also need to create a separate login page for each language you want to support.
Configuration – Essentials
Break out all the tasks the majority of users will do and explain how to do them in the minimal steps possible. Use a numbered list for the tasks and keep them below 15 steps. If it is more than 15 steps to do something, break the task into multiple headers.
Configuration - Advanced
Break out all other tasks not listed in the essentials section. This section is meant for task that are particularly difficult, not commonly used or tricky/cumbersome.
Settings Explained
List all the settings used by this page/feature, what the setting does and if not self evident why you would use it. This should be presented in a table format. Example: Setting: Is Default Login Page, Description: By default, when a user goes to your system's URL, example https://smart.smartsimple.com they will be directed to the English US language login page. If you want users to go to a different language login page by default, toggle this setting on for the login page with your desired language. Note: only one login page can be set as the default.
See Also
This section is optional. If there are other related articles you think a user should be made aware or that you have mentioned in this article you may wish to add links to these articles in here. Be mindful that any static links you add here will need to be maintained. If a page name changes someone will need to go back and fix every link added to every page in a See Also.
Category
Make sure every article has a category that way by default it is easy to find all related pages so we should not need to heavily rely on the “See Also” sections as categories list all related articles and the links are dynamic so there is no maintenance liability and they are accessible from every related page.
Other considerations
- Add hyperlinks to other pages where SmartSimple's terminology is used.
- Use US English for spelling.
- Use Microsoft conventions for writing instructions (When you refer to a button, check box, or other option, use bold formatting for the name)
| Correct | Select Save |
| Incorrect Select | "save" |
Note more help about the mediawiki can be found mediawiki.org
Text Formatting
Bullets
Create bullets like an unordered-list
- Bullet 1
- Bullet 2
* Bullet 1
* Bullet 2
Bold Text
Bold Text
'''Bold Text'''
Italicized Text
Italicized Text
''Italicized Text''
AddingSuperscript
textsuperscript
Text<sup>superscript</sup>
AddingSubscript
Textsubscript
Text<sub>subscript</sub>
#Numbered...
- Item
- Item
- Item
- Item
# Item
# Item
# Item
# Item
Preformatted text
You can have HTML or WIKI syntax appear the way you typed it by wrapping the code with an opening < and pre and > then a closing < / pre and > tag. This is used for code examples of what to type into the wiki. The pre stands for preformatted text. This will preserve the formatting of the text you entered (example tab, double spaces, new lines). Currently you cannot add code that has a closing tag < / > inside a pre as the slash will close the pre. We have tried other syntax such as nowiki and code but they all seem to exhibit the same issues after you save, edit then save again. The pre tag is not to be used for emphasis or notes.
your code goes here
double space  double space
tab 	tab	tab
Heading Levels
Level 1 is for page name.
==level 2==
===Level 3===
====Level 4====
=====Level 5=====
======Level 6======
Tables of Contents
MediaWiki adds a table of contents at the top of the page when you have four or more headers.
To change this behavior, at the top of the page, add:
__NOTOC__ 	Hides the table of contents (TOC).
__FORCETOC__    Forces the table of contents to appear at its normal position (before the first header).
__TOC__ 	Places a table of contents at the word's current position (overriding __NOTOC__).
Hyperlinks
Links to Internal Pages
Link to internal page
[[Branding]]
Link to internal page with different text
[[Branding|Different text]]
Links to External Pages
Add a link to an external webpage
[https://www.smartsimple.com smartsimple.com]
Note:
- You must specify text for the link or it will show up as a number.
- All external links open in a new window.
Image Files
- Under the Global Actions, press Upload file.
- Press the Choose File button to select an image and press Open.
- Press the Upload File button
Note: When adding screenshots, they should be 800 pixels wide. When naming images, it is suggested to use the ticket number dash year dash number. That way it is easy to identify the related enhancement ticket and to see if the screenshot is out of date.
To display an image

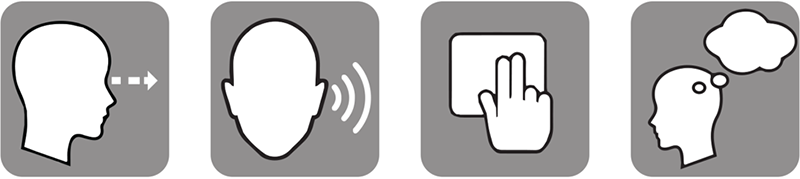
[[File:a11y-disability.png|thumb|none|500px|The four disability classifications]]
Images are uploaded at a resolution of 800 pixels but displayed at 500px. Make sure you add a caption.
Image with internal link
[[File:a11y-disability.png|thumb|none|500px|The four disability classifications|link=Accessibility]]
Image with external link
[[File:a11y-disability.png|thumb|none|500px|The four disability classifications|link=https://www.smartsimple.com/agreements.html]]
You can upload a new version of any file by typing File: then your desired file name into the search.
Tables
Syntax
| Syntax | Description |
|---|---|
{|
|
table start |
|+ |
table caption, optional; only between table start and first table row |
|- |
table row, |
!| |
table header |
|| |
table data each cell |
|} |
table end |
Example
| Sample Header | Sample Header |
|---|---|
| Sample Text | Sample Text |
| Sample Text | Sample Text |
{| class="wikitable"
|-
!|Sample Header
!|Sample Header
|-
||Sample Text
||Sample Text
|-
||Sample Text
||Sample Text
|-
|}
Categories
You can categorize pages and files by adding one or more Category tags to the content text. These tags create links at the bottom of the page that take you to the list of all pages in that category, which makes it easy to browse related articles.
[[Category:Interface]]
Adding a Link to a Category Page
[[:Category:Interface|Interface]]
Templates
Anytime you repeat the same information across multiple pages use a template. For example when a page is deprecated, we display the same message across the top on each page by adding that template. This is also done for commonly used terms.
{{ DeprecatedPage }}
To find or edit a templates type template: then your desired template name into the search.
Renaming a Wiki Article
Follow these steps in order to rename an article on the Wiki without losing your original content or hyperlinks from other pages:
1. Click on the More option on the top left of the Wiki page you wish to rename.
2. Select Move.
3. Write your new article name in the left text box.
4. Ensure that the Leave a redirect behind option is selected so that you will not lose continuity between hyperlinks.
5. Click Move Page.
Moving a Wiki Article to a New Category
You can also move Wiki articles to new categories (such as making them into a Category or Template page) by using the Move function.
1. Click on the More option on the top left of the Wiki page you wish to rename.
2. Select Move.
3. Select the page's new category from the right drop-down field box.
4. Ensure that the Leave a redirect behind option is selected so that you will not lose continuity between hyperlinks.
5. Click Move Page.
How to Add a User to the Wiki:
- On left panel, click on User Manager.
- Click the green Add button.
- Add smartstaff group.
- Click OK.