Transaction Custom and Standard Field Types
From SmartWiki
Revision as of 15:55, 15 November 2007 by Julia Decker (talk | contribs)
There are two types of custom fields that you can create using the transaction feature – global fields that are used for ALL transaction types, and custom fields that are a specific transaction type.
- To create global transaction custom fields, click the Custom Fields tab at the top of the transaction list.
- To create transaction specific custom fields, click the Fields button next to the transaction type name.
Transaction Standard Fields
Each transaction consists of the following fields:
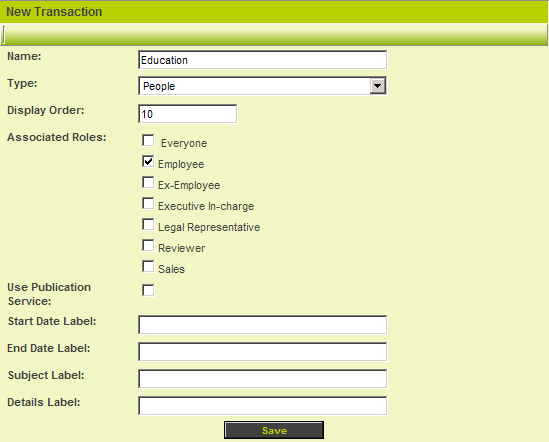
- Name - The Name of the transaction type. This name will be displayed on the tab.
- Type - Transactions can be associated with contacts or companies. Note: only contact transactions are currently supported.
- Display Order - Defines the tab order for the transaction types.
- Associated Roles - The roles to which the transaction type is associated.
- Use Publication Service - Used to link transaction type to an external web service. This is used specifically for accessing external services that can provide contact level transaction information.
- Start Date Label - Standard field representing the start date of the transaction. If this field is not required leave the level as blank.
- End Date Label - Standard field representing the end date of the transaction. If this field is not required leave the level as blank.
- Subject Label - Standard field representing the subject of the transaction. If this field is not required leave the level as blank. You can set a new label if you wish to use this field for a different purpose.
- Description Label - Standard field representing the description of the transaction. If this field is not required leave the level as blank.
1. Set the following values.
In this example the associated role is set to employee and all the standard fields are set to blank.
2. Click the Save button.
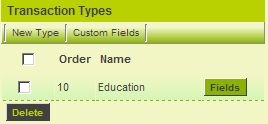
The Transaction type is displayed in the left panel.
Next you will add the custom fields to complete the transaction type.
3. Click the Fields button.
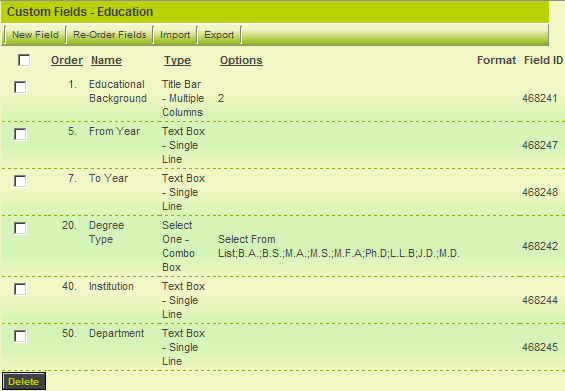
The Right panel now displays the custom field list.
4. Add the following custom fields:
The completed field list will look as follows:


