Template:April2016Upgrade
Contents
- 1 Global System Upgrades
- 1.1 New Currencies Now Supported in the System 911
- 1.2 New Dynamic List View Filtering
- 1.3 New Annotate Specific Application and Form Fields with Comments 911
- 1.4 New Privacy and Confidentiality Hyperlink Added to Login Pages by Default 911
- 1.5 Enhanced Record Lock Feature Added when Modifying Contacts and Companies
- 1.6 Enhanced Search Functionality Added to Reports Page
- 1.7 Enhanced Custom Field List Views Now Display Last Modified Date
- 1.8 New Assign Many Objects to Many Objects With the Assignment List View - Phase 1 911
- 1.9 Enhanced Revamp Dynamic Control fields
- 1.10 New Level 2 Fields Now Visible in Level 3 List Views
- 1.11 Enhanced Password Policy Options
- 1.12 Provider / Consumer List View Filter
- 1.13 New Advanced Search Extended to Orgs, Branches, and External Persons Connected to the L1
- 1.14 New User Accounts Can Become Disabled After Inactive Period
- 1.15 New Font Weight and Color Settings to List View Columns
- 1.16 Updated Style of Arcadia Tabs
- 1.17 New Control Page Breaks and Page Orientation With SmartField PDF Options
- 2 On-Demand System Upgrades
Global System Upgrades
The new features listed below are enhancements to the SmartSimple system and will be immediately available to SmartSimple users upon the application of the upgrade to their server:
New Currencies Now Supported in the System 911
40 new currencies have been added to the list of standard system currencies.
New Dynamic List View Filtering
77277
This enhancement adds the ability to filter a list view based on UTA roles and the ability to filter list views based on system variables such as @userid@ and @companyid@
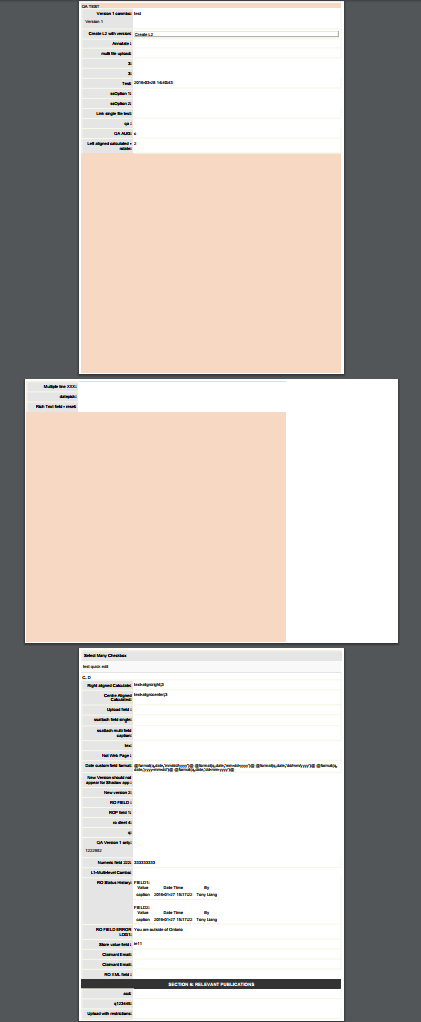
New Annotate Specific Application and Form Fields with Comments 911
This new features enables organizations who receive applications and forms to add field-level comments for applicants to review and revise. This feature allows organizations to better communicate feedback with applicants by enabling them to add comments to specific fields on submitted applications and forms. This process allows the annotated fields to be editable only.

![]()

New Privacy and Confidentiality Hyperlink Added to Login Pages by Default 911
Privacy is a shared responsibility. This enhancement places a visible privacy and confidentiality hyperlink on the top right corner of all login pages. This makes it easier for organizations to communicate their unique privacy and confidentiality responsibilities to their users in a consistent manner. Privacy IS a shared responsibility. This enhancement makes it easier for organizations to communicate their privacy and security policies with their user community. A new Privacy and Security tab within the Global Settings page is the centralized place where all privacy, security, and confidentiality policies can be documented. The contents of the Privacy and Security tab will be displayed in a new hyperlink located on all login pages.
Configuring the Privacy and Security Settings
- Choose the Configuration, Global Settings menu.
- Click on the Privacy and Security tab
- Complete the privacy settings options
- Click Save to save the policy
Additional Settings
You must set the following settings:
Policies (Configurable for individual countries)
- Country -
- Language -
Country - Language (Settings)
- Link Name -
- Introduction -
- Privacy Policy -
- Communications Policy -
- Data Access -
- Accountability -
- Data Confidentiality -
- Performance Integrity -
- International Data Privacy -
Notes
- Each field includes a last modified by and modified date stamp
- Policy formats include rich text format and URL to webpage containing the policy
- Additional policies can be added by clicking the + (plus icon) at the bottom of the Country - Language settings
See Also


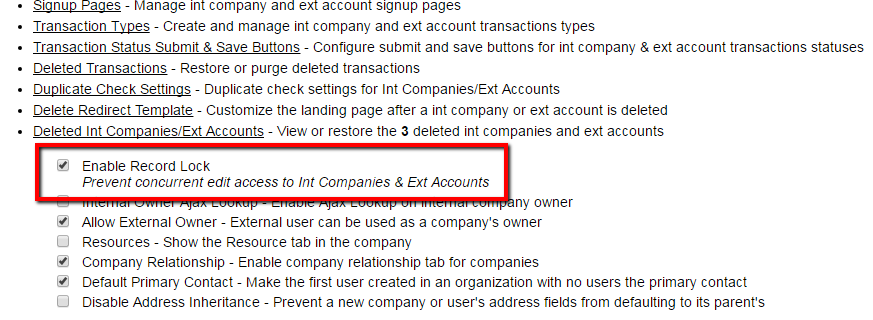
Enhanced Record Lock Feature Added when Modifying Contacts and Companies
This optional feature locks a contact and company record when in edit mode. This eliminates any possibility of two users from modifying the same record at the same time. It is possible that two people could attempt to edit the same record at the same time. This scenario is not ideal as it could lead to data loss. This enhancement extends the existing record lock feature to include contacts and company records eliminating the possibility of two people editing the same record record simultaneously. This feature is optional and can be turned on and off from within Global Settings -> Organizations & Users -> Enable Record Lock (found under their corresponding section for companies/users)
Configuring the Contact and Companies Record Lock
- Click on the Configuration menu, then select the Global Settings option.
- Navigate to the Organizations & Users tab.
- Under the Int Company & Ext Account Settings and Int User & Ext Contact Settings sections, locate the Enable Record Lock option.
- Add a check mark to enable the record lock.
Notes
- This feature can be configured separately for both companies and users
Also See
- Record Lock
Enhanced Search Functionality Added to Reports Page
This enhancement adds the search feature to reports page. For organizations with many reports, or organizations who expect to generate many reports over time, this is a welcomed enhancement. The reports page now has search functionality giving you the ability to quickly filter reports by column name, role, status, and type.

Enhanced Custom Field List Views Now Display Last Modified Date
This enhancement adds the last modified date field to Custom Field list views. This data is useful when tracking changes made to these list views.

New Assign Many Objects to Many Objects With the Assignment List View - Phase 1 911
77277 This feature adds the ability to assign many objects to many objects through the new Assignment List View feature. This feature will allow you to easily attach a group of reviewers to a Level One, assign many users to one or many organizations, even attach a Level 1 to one or more Level Ones. Once fully implemented, this enhancement adds the ability to assign many objects (like users, organizations, Level 1, Level 2, Level 3s), to many objects. Phase one of this enhancement (April 2016 Upgrade) will add the ability to attach one or many contacts to Level 1s.
Configuring the Assignment List View
Add an Assignment Type
To begin a assigning users and to UTA objects, an assignment type must first be added.
- Choose the desired UTA, click on the Settings icon.
- Navigate to the Level One.
- In the Level One Provider settings, click on the Assignment List View Settings hyperlink.
- The Assignment Types page is displayed.
- Click on the + New Assignment Type icon.
- Complete the New Assignment Type page.
- Click Save.
- New Assignment Type options include:
- Display Order -
- Assignment Name -
- Description -
- View Roles -
- Assign -
- Assign As -
- Trigger Workflow -
- Run Template Formula -
Assigning the Users to UTA Level 1's
- Navigate to the UTA where you've added the New Assignment Type. If this step has not been completed please see the section Add an Assignment Type.
- From the navigation bar click on the Assignment List View icon.
- The Assignment List View page is displayed. This page is comprised of two list views arranged side to side. The list view on the left displays users. The list view on the right displays level 1's. The assignment type(s) that where configured in the previous section will appear in the Assignments drop down box. The Assigned Role drop down box allows the selection of specific roles.
- Assign Users and Level One's by dragging and dropping each user and Level One to the sections titled Drag Users Here and Drag Level One Here.
- Click on the Continue button
- The Confirm Assignment lightbox is displayed. This page summarizes that assignments were requested.
- Click on the Assign button to complete the assignment.
Additional Settings
You must set the following settings:
Notes
![]()


Enhanced Revamp Dynamic Control fields
77277 This enhancement changes the way Dynamic Control fields are rendered, however it retains the same functionality.
New Level 2 Fields Now Visible in Level 3 List Views
This feature allows level 2 fields to be referenced from within a level 3 list views in Arcadia X portals. Level 2 fields will also appear in Level 3 advanced searches.
Selecting Level 2 Fields from Level 3 Objects
- Navigate to the required UTA.
- Click on the Level 3 tab.
- Click on the Edit View icon.
- Under the Columns tab, click in any cell to view both the Level 3 fields and associated Level 2.
Also See
Enhanced Password Policy Options
77277 This feature adds an additional option to the password policy ensuring a user’s ID (in its entirety) cannot be or part of the user's password, or the whole password.
Provider / Consumer List View Filter
77277 This feature enhances standard list views with the ability to view a subset of consumers from a provider.
New Advanced Search Extended to Orgs, Branches, and External Persons Connected to the L1
This feature is an enhancement on the List View Parent and Child feature introduced in the January 2016 upgrade. With this enhancement Advanced Search functionality has been added to the following:
a) the organization connected to the L1
b) the branch connected to the L1
c) the external person connected to the L1
d) the internal person connected to the L1
New User Accounts Can Become Disabled After Inactive Period
After a period of inactivity users accounts will now become deactivated. Based on defined privacy policy settings, an account can become fully disabled or require a password reset to regain access. These policies can be configured from within the company security settings and allows for different actions based on internal and external users.
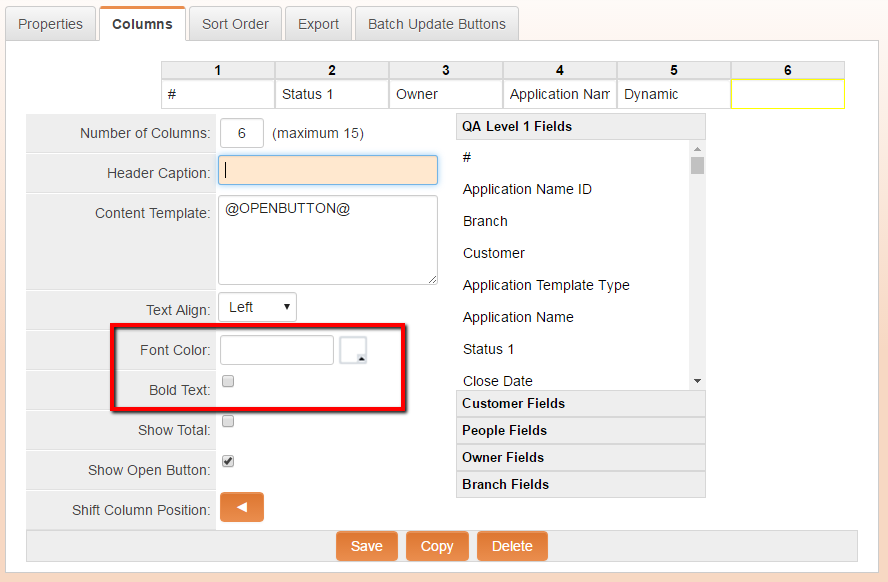
New Font Weight and Color Settings to List View Columns
This enhancement adds the ability to easily select a column font color and specify whether the column text is boldface.
Updated Style of Arcadia Tabs
The look of Arcadia Tabs have been updated to include an accent color styling.
![]()
- The Arcadia tab with updated styling (above)
![]()
- The Arcadia tab look prior to new styling (above)
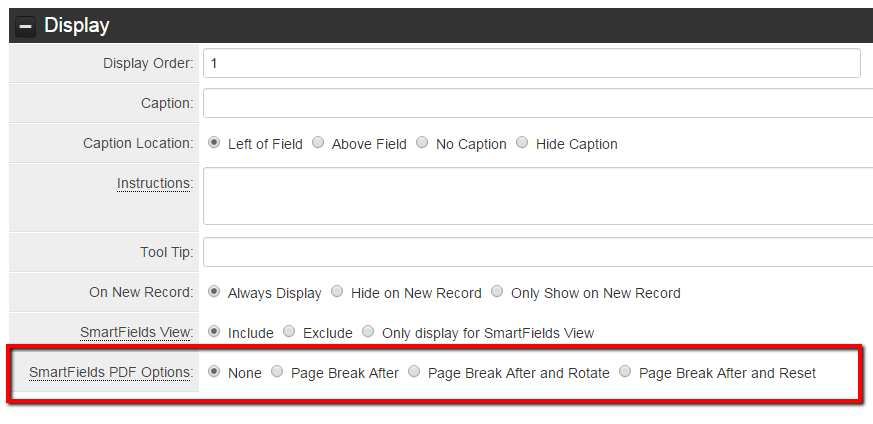
New Control Page Breaks and Page Orientation With SmartField PDF Options
This enhancement enables greater control of PDF documents generated from SmartField Views by one-click control of page breaks and page orientation.
On-Demand System Upgrades
The following features are also available immediately with the application of the upgrade, but must first be enabled or configured by a System Administrator:
Enhanced Stripe e-Payment Integration 911
77277 This enhancement furthers the integration with contemporary payments service, Stripe, and builds on the initial beta release in November. The system can now generate a payment form from a Level2 invoice and collect a credit card payment using the Stripe integration.

New Create Arcadia X Layouts Using Pre-Made Templates With the Layout Picker 911
The Arcadia X layout picker enables the point-and-click configuration of portal sections using pre-made templates and the choice of Arcadia X themes and backgrounds. All Arcadia X sections built using the layout picker will be formatted for optimal viewing on a wide rage of devices. For novice users and those not familiar with html, the Arcadia X layout picker provides pre-made templates with various layouts eliminating the need for technical know-how. Arcadia X layouts built using the layout picker are responsive by default, making them accessible on devices with different screen sizes and resolutions.
New Role Permissions for Submit buttons
Submit buttons can now be configured so that they are presented to users based on role and UTA role permissions reducing the need for visibility conditions. If a Submit button is associated with both a role and UTA role, the UTA role permission will take precedence. Prior to this enhancement, Submit buttons could be associated with one or more Level One templates and visibility conditions controlled when the button was visible. This enhancement adds role and UTA role permissions to Submit buttons giving admins more flexibility when configuring them.
Data Packaging and Data Exchange Enhancements 911
This enhancement is the first in a multi-year platform enhancement aimed at creating a data exchange structure that can be used to package Instance configurations, UTA configurations, and other data. For the April 2016 upgrade, UTA packaging and unpackaging is available. This meta data exchange enhancement allows UTA data to be extracted from an instance, packaged, and then loaded / installed into another instance with minimal effort. The benefits of this feature is wide ranging including, quick and easy storage and archiving, the ability to easily restore UTA's data, sharing of configured UTA's between similar organizations, and much more.
Batch create Level one from Provider
77277 This feature adds the ability to create level 1s based on based on a list of organizations attached to a level one or level two provider