Search Panel Options
Search Panel Options
The Search panel on the right of the screen is used to locate existing contracts.
- The Standard tab displays the standard fields in the combo box that you have associated with the Level 1 Entity.
- The Custom tab displays the custom fields in the combo box that you have created.
- Search options to control the way the data will be searched.
- The Status check boxes are used to determine which Level 1 items you wish to see by status.
- The Stored Filters combo is used to apply search criteria that you have previously saved.
1. Click the New Contract tab.
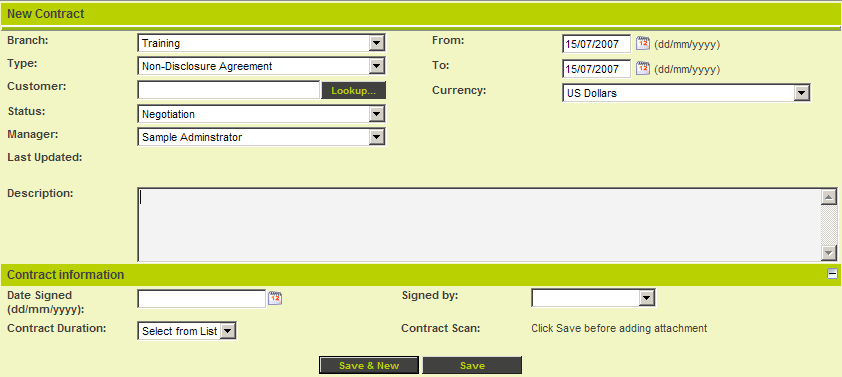
The New Contract window is displayed.
The standard fields that you selected for the Level 1 Entity are displayed at the top of the page.
- The Branch field (internal organisation entity) will default to the location of the current user.
- The templates that you created are displayed in the Type combo box.
- The statuses that you created are displayed in the Status combo box.
- The Manager Field (owner) will default to the current user.
The custom fields that you created for the Level 1 Entity are displayed below the standard fields.
Two save buttons are displayed.
- The Save & New button will save the current Level 1 item and display the New Contract window again so an additional contract can be created.
- The Save button will save the current Level 1 item.
Template Choice Restricts Statuses
You configured the current template – Non-Disclosure Agreement to only be associated with two statuses.
1. Click in the Status combo box.
Only Negotiation and Active are displayed.
2. Select a different type of Contract from the Type combo box.
3. Review the contents of the Status combo box.
The status list now includes all statuses selected for this template.
Creating a Contract
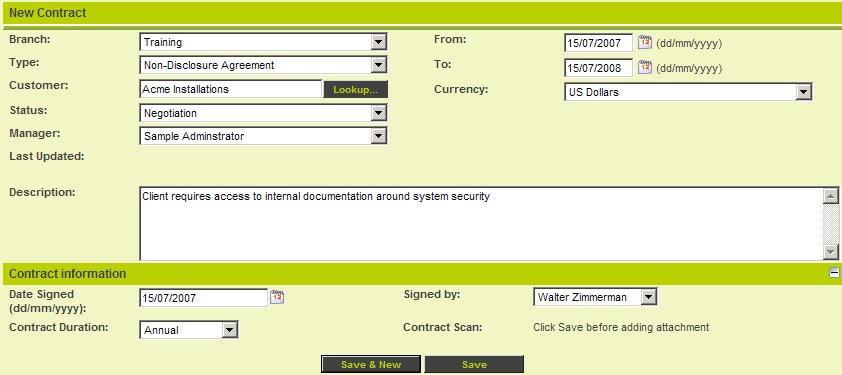
1. Create the following contract:
2. Click the Save & New button.
A new, blank contract window is displayed.
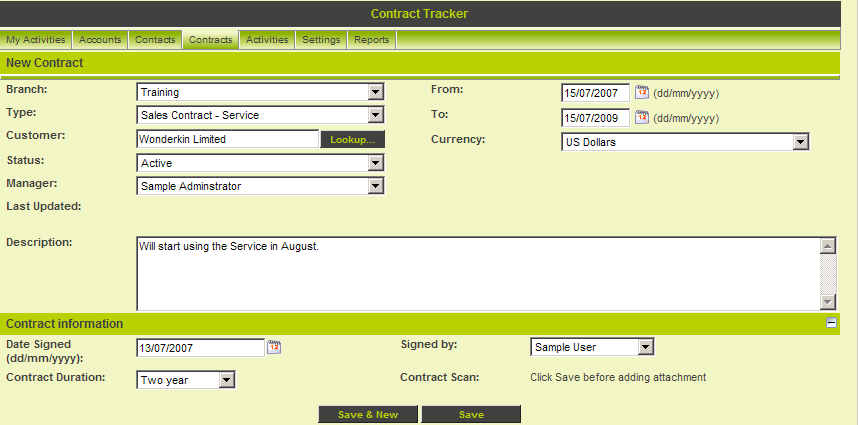
3. Create the following additional contract:
4. Click the Save button.
The contract is saved and remains on the screen.


