Multi-Factor Authentication
Contents
Overview
Multi-Factor Authentication is a method of authentication in which a user is granted access to your SmartSimple Cloud system only after successfully presenting two or more pieces of evidence to an authentication mechanism.
The security impact of Multi-Factor Authentication (MFA) is that while a user may lose an access card or get tricked into sharing a password, the odds of both happening to a single user are dramatically reduced. Using MFA therefore enhances an organization's ability to ensure that no one is using illegitimate means to gain access.
SmartSimple Cloud supports two different approaches to Multi-Factor Authentication:
- Time-based One-Time Password (TOTP) via an authenticator app.
- IMPORTANT: YOU MUST setup your authenticator app and link to your user account BEFORE enabling this type of MFA if you are an existing user. Additional steps are required. Please see below for details.
- Single Use Verification Code sent by either Email or SMS.
- No additional configuration steps required for this type of MFA.
Configuration - Essentials
All settings related to multi-factor authentication are in a single location
- Navigate to Global Settings > Security > Password and Activation Policies
- Scroll to Authentication Options and toggle on Enable Multi-Factor Authentication
- Specify the roles that require authentication via TOTP and/or Verification Code
NOTE: If new roles are added to the system, the MFA configuration must also be updated

Setting up Verification Codes for Email
The easiest way to set up MFA is through the email that was used for user registration and login. Be sure to follow the instructions carefully to avoid accidentally locking yourself or others out of their accounts.
- Go to Menu Icon > Global Settings > Security tab > Password and Activation Policies and then scroll down to the section marked Authentication Options.
- Toggle on Enable Multi-Factor Authentication. You will see additional settings displayed for different authentication methods.
- Under the Roles with Verification Code via SMS or Email setting, you will need to decide which roles need to be authenticated via a verification code sent through the email address used for login. Ensure that users assigned to this role have not opted out of receiving system emails. Click the Save button at the bottom of the page to activate changes.

Logging in with a Verification Code from Email
When a user has been assigned a role that requires a verification code, they can login using the following steps:
- When the user logs in using their email and password, they will be prompted to enter a verification code that was sent to their email.
- The user can check their email to copy the verification number.
- Enter the verification code into the field and then click Submit to finish authenticated login.


Setting up Verification Codes for SMS
In order for users to receive SMS messages, a SmartSimple administrator must first enable SMS services by going to Menu Icon > Global Settings > Communications tab > Toggle on Enable SMS Notification. Ensure that the target users have an active mobile number filled into this standard field. If the phone number field is empty, users will not be able to receive any SMS messages for login and may be locked out of their accounts once activated.

Logging in with a Verification Codes for SMS
- When the user logs in, they will be presented with the option to receive a verification code via email (if available) or through SMS. The user can click Send Code by Text Message.
- The user can check their mobile messages, enter the code into the field, and then click Submit to finish authenticated login.


Configuration - Advanced
Enforce TOTP Multi-Factor Authentication for Particular Roles
NOTE: Before enabling MFA for use with TOTP, all existing users with roles intended for TOTP must first scan their TOTP Secret Key or TOTP QR Code into an authenticator app.
- In your SmartSimple instance (logged in as Global Admin) in the Configuration Menu (9-Square Grid Icon), select Global Settings.
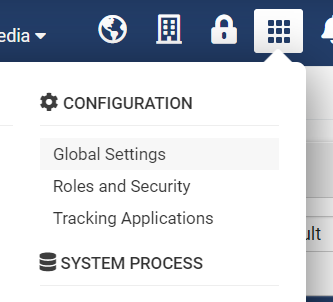
- Select the Security Tab from the Global Settings.
- Click Password and Activation Policies.
- Under “Authentication Options”, toggle on Enable Multi-Factor Authentication (MFA).
- In the setting Roles with Time-Based One-Time Password (TOTP) include the roles that you will be adding 2-Factor Authentication for. Note that the existing users in these roles must first scan the QR Code on their mobile device before this setting should be toggled on.
- Toggle on Enable Trusted Device if you would like users to be able to bypass entering a code for a time period after the code has been successfully entered. If enabled, also enter the time period that the 2-Factor Authentication will be bypassed for trusted users.
- Scroll to the bottom of the page and click Save.
- To test your MFA, log out of your account, and then log back in. You should now see a page following login called “Set Up Multi-Factor Authentication.” Follow the instructions in the following section to set up TOTP Multi-Factor Authentication.
- In your SmartSimple instance (logged in as Global Admin) in the Configuration Menu (9-Square Grid Icon), select Global Settings.


Logging in the First Time with TOTP
In order to use TOTP effectively, users must first download an authenticator application onto their mobile devices. Popular authentication apps include Google Authenticator, Microsoft Authenticator, or 2FAS. When logging into the system for the first time after TOTP has been activated on the user's role, the user must first follow these steps:
- For existing users: from the login page, enter your email and password as usual to log in. For new users: use the Activation Link to set a password, and submit.
- You will then be presented with the following screen:
- Follow the instructions listed on the screen, starting by installing an authenticator app on your mobile device.
- On your mobile device, open the authenticator app and select “Add new device” or similar. Then select “Scan QR Code” or similar.
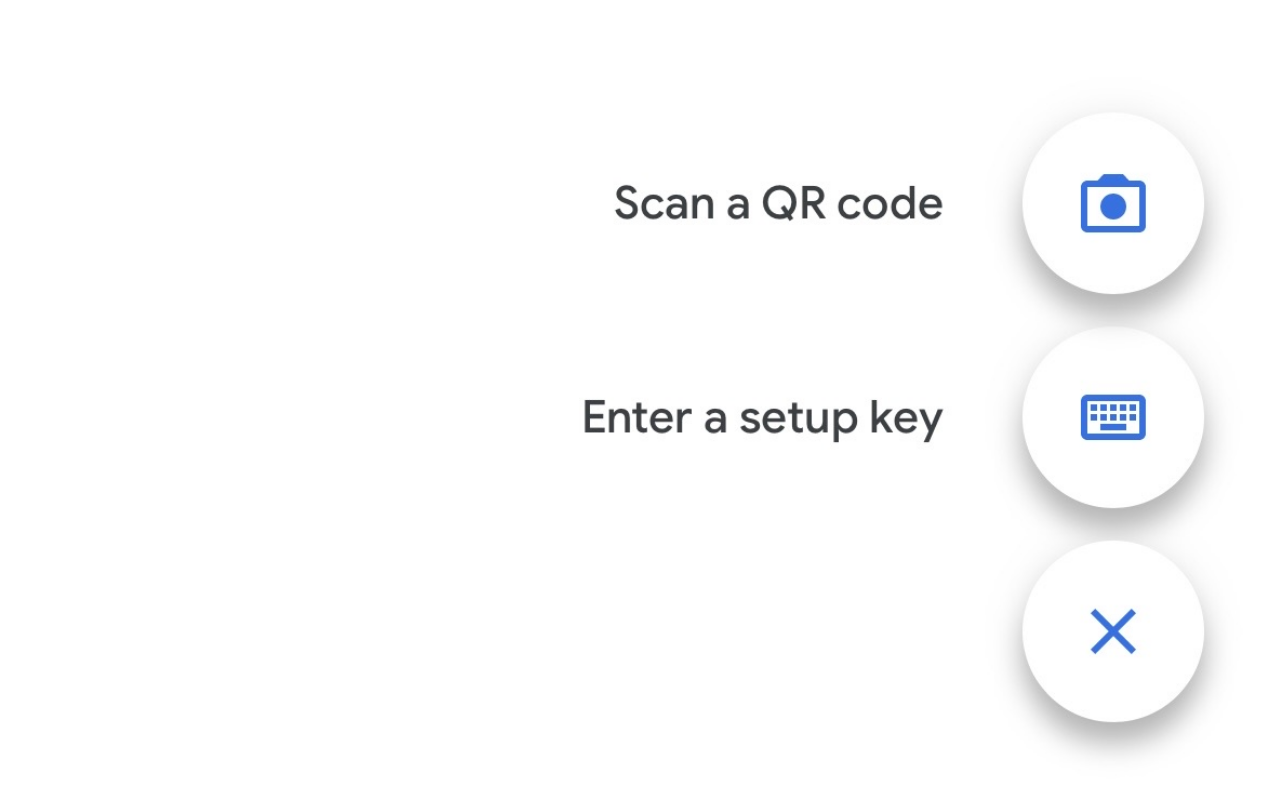
- Clicking the button "Show TOTP Key and QR Code" reveals the QR and secret code used with an authentication app.
- After scanning the QR Code or entering the TOTP Secret Key in your Authenticator app, a new device should be added to your list. Alternatively, you could also use the TOTP Secret Key as opposed to the TOTP QR Code.
- Next, enter the TOTP Verification Code in the modal window.
- Press Submit when done.


If the Mobile device Associated with TOTP is Misplaced
NOTE: If a mobile device associated with TOTP is misplaced, TOTP must be reset by a Global Admin, or a user in a role with Role can reset TOTP for permissions in the role's setting page (More information detailed in the following section).
In the case of a user's device being misplaced, the following steps will allow an internal user in the roles listed above to reset a user's TOTP:
- First, navigate to the user's profile who wishes to have TOTP credentials reset.
- Next, from the Actions dropdown, select Edit Roles and Access.
- In the following modal window, select the button labeled Reset TOTP. Note that the button will disappear after the reset has been initiated.
- The user may now login as normal, following the prompts on the subsequent Set Up Multi-Factor Authentication screen.
Determining which roles can reset TOTP
- In your SmartSimple instance (logged in as Global Admin) in the Configuration Menu (9-Square Grid Icon), select Global Settings.
- Select the Users Tab from the Global Settings.
- Click Roles.
- Select Edit beside the role that you would like to grant permission to reset TOTP on behalf of other users. For security best practices, this role should be an internal role only.
- Select the Permissions tab.
- In the field Roles this role can reset TOTP for, select the roles that this role can reset TOTP on behalf of.
500px - Click Save when complete.
- In your SmartSimple instance (logged in as Global Admin) in the Configuration Menu (9-Square Grid Icon), select Global Settings.
Settings Explained
|
Setting |
Description |
|
Enable Multi-Factor Authentication |
Enables MFA for the entire instance but does not have any impact unless user roles are specified. |
|
Roles with Time-based One-time Password (TOTP) |
Associates one or more roles with authentication proven through an authenticator app such as Google or Microsoft Authenticator. |
|
Roles with Verification Code via SMS or Email |
Associates one or more roles with authentication proved through either email or an SMS message. The user can choose at the point of verification to receive an email containing the one-time-code or an SMS message containing the one-time code. SMS must be enabled by SmartSimple and will incur an additional cost. Please speak to your account manager for more information. |
|
Enable Trusted Device |
This option is used to enable the trusted device feature. If this option is selected then every user (via their role) associated with MFA will not be prompted every time they attempt to log into the system. |
|
Trusted Device Expiry |
Sets the frequency of the MFA prompt, based on the number of days specified. If the number is set to one, the user will be prompted every day for an MFA verification code, if set to five then the user will be prompted every five days. |